Pneumatic nailers and staplers, powered by pressure from a compressor, will kick your productivity up in the shop or at the job site. Fire a fastener in the blink of an eye, with minimal workpiece damage, while enjoying great control over placement and depth.
Best Pneumatic Tool for You?
Your project will determine the best type of pneumatic fastening tool. Are you nailing 2x4s together? Adding trim pieces to a cabinet? Just as you wouldn’t use a sledgehammer to drive a finishing nail, you must match the tool to the job.
There are six major types of pneumatic fastening tools: framing nailers, roofing nailers and staplers, finish nailers, brad nailers, pin nailers, and various staplers. Here’s a close look at how each can best fit your needs.
Framing nailers
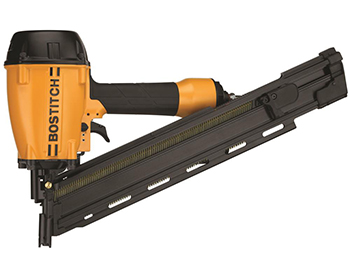
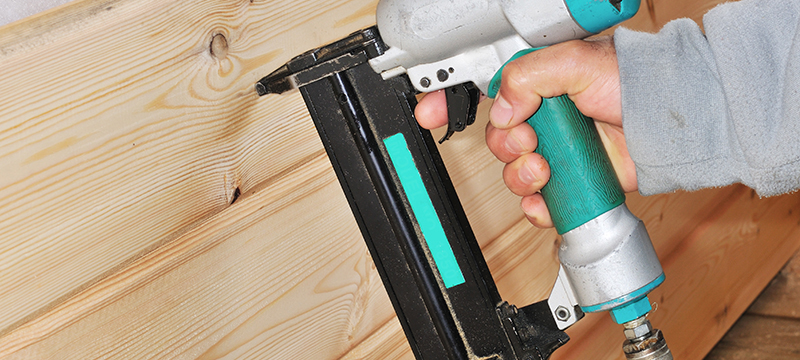
These powerful tools drive nails for all types of frame construction. Looking to build a home, garage, shed, or fence? Here’s your tool. Some framing nailers hold up to 100 nails in stick sets. Other framing nailers, like the one shown above, have a magazine that holds a coil of several hundred nails for less refilling time.
Pro Tip: Some framing nailers fire nails that don’t have fully-rounded heads, allowing more nails to be placed in a stick. Some building codes prohibit the use of these “clipped-head nails.”
Roofing nailers and staplers
Putting down shingles is hard, monotonous work. A roofing nailer or stapler takes a lot of time and effort out of the process. You’ll find contractors who argue in favor of using either a nailer or stapler, but both nails and staples hold shingles with tenacity if placed correctly and set so the fastener does not go through the shingle or weaken the shingle material around it.
Finish nailers
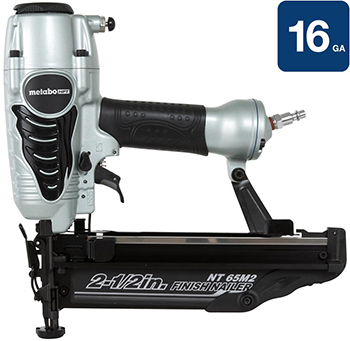
Finish-carpentry tasks—such as nailing in place moldings, trim boards, or door and window casings—require a finish nailer. These tools leave a small nail hole you can quickly and effectively mask with filler. Finish nailers have straight nail magazines (like the one above left) and angled magazines (above right) that allow you to get into tighter spaces.
Pro Tip: Test the nail depth adjustment in wood matching your project stock—the thickness and hardness of the wood will affect how far the tool drives the fastener. (It’s best to have a tool that offers a depth-of-drive feature so you don’t have to keep running to the compressor to adjust air pressure.)
Pro Tip: Before nailing trim in place, many professionals pre-finish it with stain and varnish. Doing that makes applying the filler easy and wiping off excess without sanding.
Brad nailers
These “baby” finish nailers use smaller-gauge nails perfect for attaching short or thin moldings and other small stock. The fastener’s slimmer profile and the decreased “punch” delivered by a brad nailer significantly help avoid splits in small project pieces. Brad nailers are much smaller and lighter than finish, making them nimble in your hand with less user fatigue.
Pin nailers
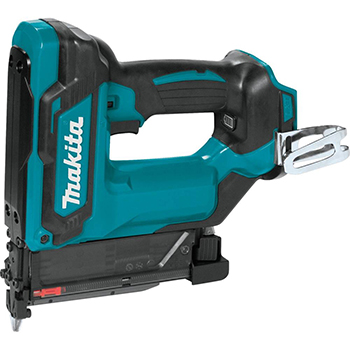
In recent years, fine woodworkers have increasingly used pin nailers instead of clamps to hold their pieces together during glue-up. This speeds up the process and makes it possible to glue two parts that are hard to clamp. Because a pin nail has no head, it leaves a small hole that doesn’t need filling. But being headless also gives a pin nail little holding power, so always use glue in conjunction with pin nails.
Pro Tip: Despite their thin profile, don’t be lulled into thinking that splitting cannot happen with pins. Always place the pin at least 1” from the end of the workpiece (2” if possible) to avoid splitting.
Pneumatic staplers
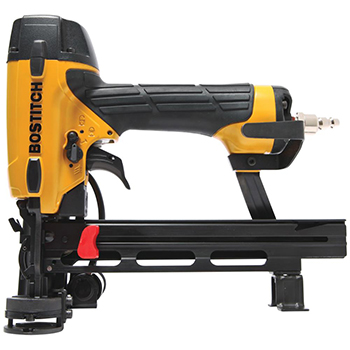
Staples provides a lot of holding power to thin materials that might rip through a small nail head: carpet padding, house wrap, roofing felt, flooring underlayment, and insulation, to name a few.
You can choose between ones using staples with narrow and wide crowns—your choice depends on how much holding power is necessary and how much staple crown you want to show. Construction-type staplers can even apply more giant staples for attaching such things as sheathing, fence boards, and strip flooring.
Buying an Air Compressor
Before buying an air compressor, weigh these factors:
- Tool usage. If you’re using an air-hungry framing nailer or more than one nailer/stapler at a time, select a compressor with more capacity than a tiny hotdog or pancake type.
- Location. Will you be working in your shop, or do you need the portability to take the compressor to a job site? You’ll need a gas-powered compressor if you won’t be around electricity.
Pneumatic Tool Safety
When using pneumatic nailers and staplers, you must protect yourself with approved safety glasses and ear protection. Take a few minutes to read the tool’s manual before you begin working. These tools are safe when used correctly. But remember: these tools are powerful and should be used only as directed.


4 Comments
Michael Foley
February 17, 2020 at 5:43 pmGreat, comprehensive post! This clears things up a bit. Cheers.
Suhana Morgan
April 22, 2020 at 6:29 amI am trying to find the right staple for one of my air staplers. The width. Of the staple measures .350 inches. Can you tell me what staple to use
Acme Tools
April 22, 2020 at 8:23 amHello, Thank you for your question. It is difficult to tell you the correct staple just based off of the crown measurement. If you can reply to this post with the make and model of your stapler it is much easier to find a possible solution for you.
Thank you,
Acme Tools
Nail Gun NZ
September 9, 2020 at 6:05 amThese are some great things about add a blast of productivity with pneumatic nailers and stapler.I really loved it and thank you very much for sharing this with us. You have a great visualization and you have really presented this content in a really good manner.