Our homes may be too cold or hot during the winter and summer. Instead of spending copious amounts on insulation for walls, ceilings, or flooring or having your energy bill skyrocket, it may secretly be the windows that are the actual problem.
Installing insulation is simple and inexpensive. This easy and painless solution can make an enormous difference. Below, you can learn all about the diverse types of insulation and how to install them yourself.
How to Tell If You Need to Insulate Your Windows
Knowing if your windows need insulation is vital for keeping your preferred room temperature from being tampered with by the weather. Start by inspecting your windows. Checking for cracks or gaps in your windows and frames is a good indicator of whether you need to insulate them. You can wait until summer or winter rolls around and try to feel for any drafts from your windows.
It is also important to note that if you have preexisting insulation, like caulking or weather strips, after a year or so, they can become ineffective, so you may have to remove them and reapply.
When to Insulate Windows
When deciding on an enjoyable time to start insulating your windows, it is better to be safe than sorry to begin before the heat or cold sets in from the season.
- You can also wait closer to the upcoming season and feel for drafts coming through your windows.
Types of Window Insulation
Many options exist when deciding how to insulate your windows best. The best and most inexpensive way is to use either caulk, weather strips, or insulation film. Below, you will find the diverse types of insulation for each category, what tools you will need, and how to apply them properly.
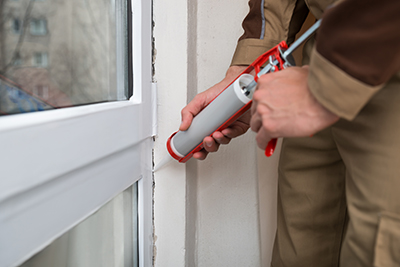
Caulk
The first type of window insulation is caulking. Caulking is inexpensive and easy to use. There are several diverse types of caulks.
Acrylic Latex Caulk
A water-based caulk that is easy to clean up and is meant for the window’s interior. It is used for the window sash, or it can be used around the window in tight spaces.
Siliconized Caulk
Siliconized caulk is like acrylic latex meant for the exterior of your window. The silicone is built with a solid resistance to weather and will be used on metal and glass surfaces.
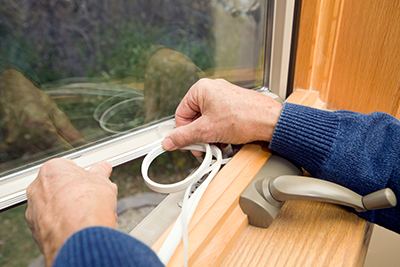
2. Weather Strip
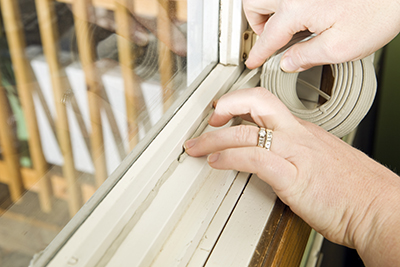
Another option for insulating your windows is using weather strips. These strips are applied to the movable parts of the window. Once you put the weather strips on, please do not open that window again for the season; otherwise, you will have to reapply it.
There are three types of weather strips you can use on your windows:
V Strip
V Strip can be folded into a “V” shape that will open to close gaps. The V Strip has a peel-and-stick, so it will stay once it has been put on. It can be applied to the sides of the window.
Felt
Felt is a cheaper but less durable option for a weatherstrip. This strip can be used on a window sash. Once you have the correct length for where to put it, you must staple or nail the strip in place.
Foam Tape
Sold in many sizes, foam tape is excellent for any crack size. Equipped with a stick back, it goes on quickly. Like the felt, this tape is meant to apply to window sashes.
3. Insulation Film
Window insulation film is a beautiful way to keep out the harsh temperatures. Applying an insulation film outside your window can cover up many gaps and reduce drafts. Additionally, insulation film protects you from UV rays and lets you enjoy natural light.
Tools and Materials Needed
| Caulk | Weather Strip | Insulation Film |
| Putty Knife | Measuring Tape | Measuring Tape |
| Utility Knife | Weather Strips | Scissors |
| Caulk | Rag | Extension Cord |
| Caulk Gun | Window Cleaning Accessories | |
| Long Nail or Coat Hanger | Insulation Film | |
| Smooth Utensil | Sticky Tape | |
| Hairdryer |
Caulk Window Insulation Instructions
Step 1: Clean the designated areas
Once you have addressed the areas where you must apply caulk, it is essential to have the designated areas ready and cleaned up. You can use your putty knife to chip away any old caulk or other protruding pieces.
Step 2: Preparing
Once the areas are properly ready, you must puncture the seal inside the caulk. You can use your long nail or coat hanger and insert it into the caulk until you feel it puncture the seal, allowing the caulk to flow. Then, you can now place the caulk in the caulk gun.
Using your utility knife, you can cut the top of the caulk to adjust it to fit the sizes of the cracks you are trying to cover.
Step 3: Applying the caulk
Now that the caulk gun is ready, you can start at the areas where it is needed and slowly apply the caulk. Make sure to use light pressure on the trigger when applying. Once you have covered up all the cracks, you can use a smooth utensil or finger to create a smooth surface on the caulk. Slowly, the caulk will harden and create an airtight seal for the window and cracks.
After finishing the task, clean the tip of the caulk gun so it does not harden.
Weather Strip Window Insulation Instructions
Step 1: Clean the designated areas
Before applying weather strips, cleaning the areas where you plan to put them is a clever idea. Using a damp rag, brush the appropriate areas and wait for it to dry.
Step 2: Measuring & Cutting
Once the areas have dried, use your measuring tape to find the specific areas’ dimensions so you will know where to cut your weather strips.
Step 3: Applying the weather strips
Lastly, you can now apply the weather strips to the cracks or window sashes you want to put them on.
Window Insulation Film Instructions
Step 1: Clean the designated areas
Use your window cleaning products and clean up the window if you would like, but primarily, clean down the window frames.
Step 2: Measuring and applying the film
You can start measuring once you have cleaned the windows and window frames. When cutting the film, try to leave some space, about 10cm, on all sides, just in case. You must grab your sticky tape and place it with the window frame. After that is complete, place the insulation film on the sticky tape.
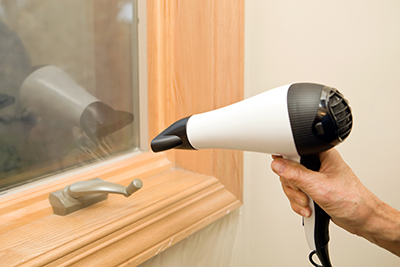
Step 3: Tidying up
Now that your insulation film has been put on, use a smooth utensil or even a finger and apply force to all the edges to ensure the movie stays on. After providing the insulation, the film is firmly on. Depending on the nearest outlet, grab your hairdryer and extension cord and check for any ripples in the film. Gently blow the hairdryer to those areas to give it a clean look. Ensure the movie is not overdried; otherwise, it may come off from the sticky tape. Lastly, once everything looks good, you can cut the extra film hanging off the edges and are ready to go.