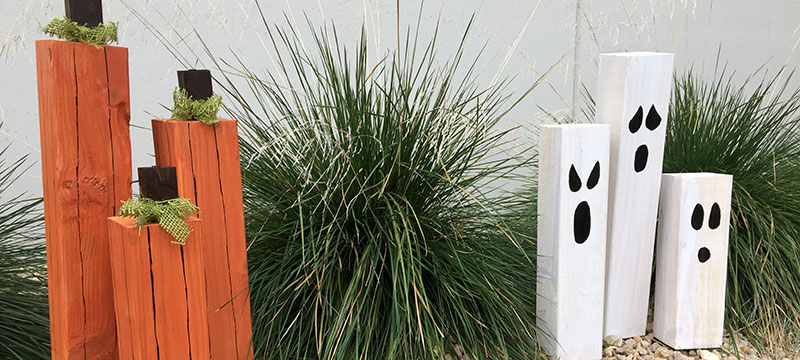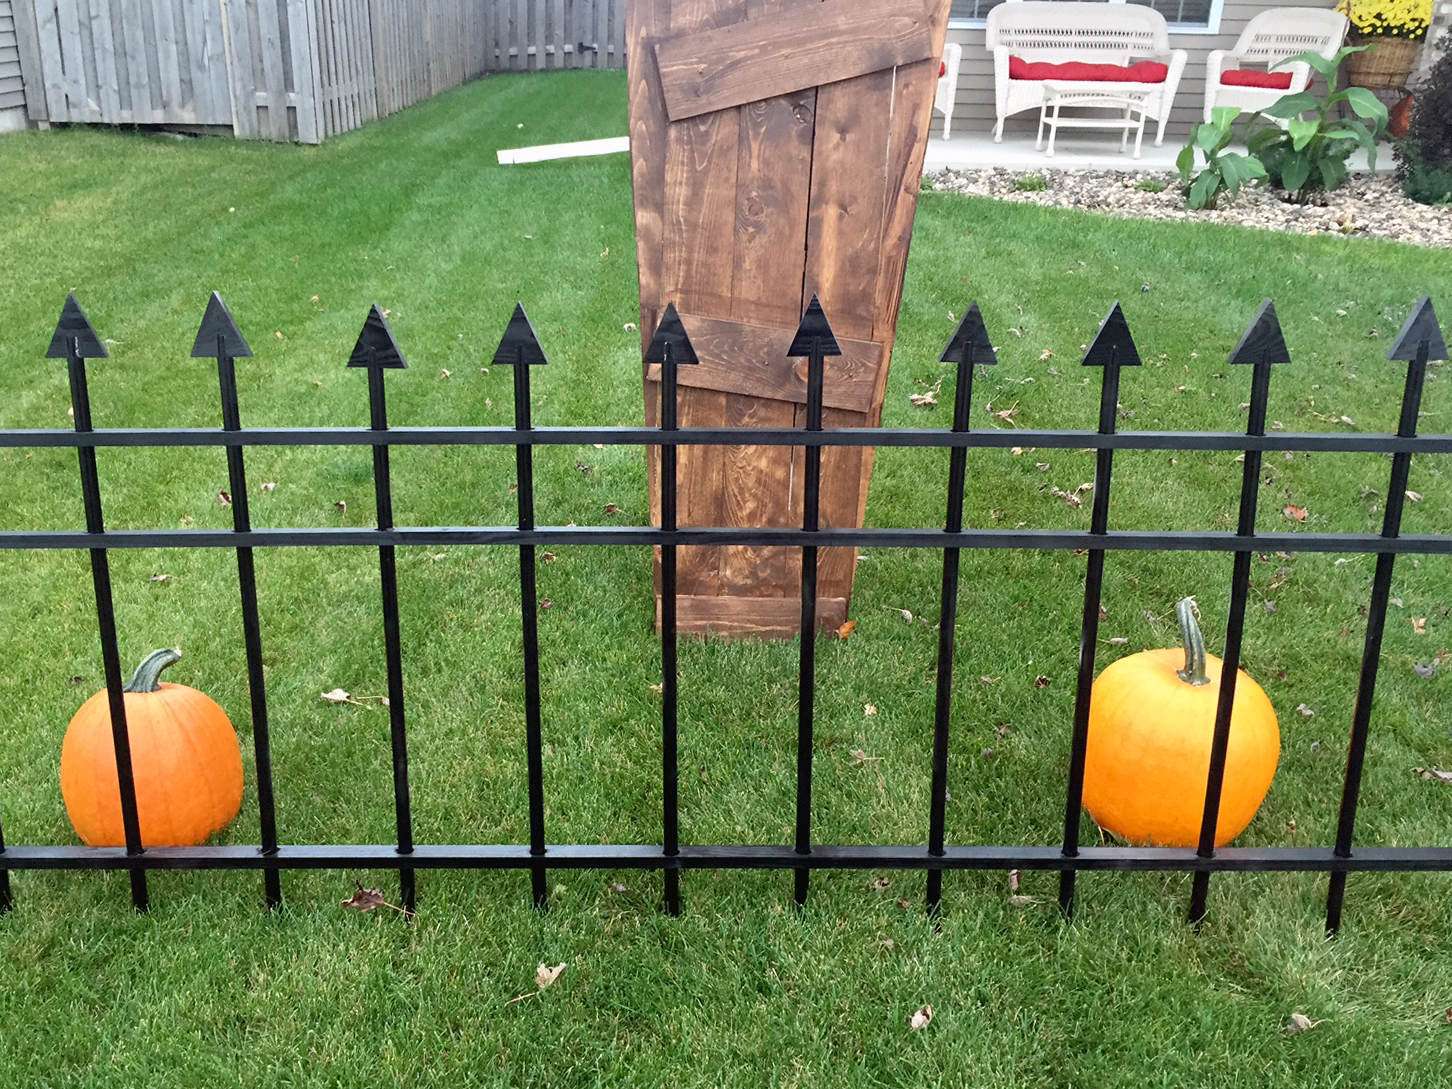
DIY Halloween Cemetery Fence
Decorating for Halloween can be a fun family event. Increase your yard’s spook appeal with this lightweight Cemetery Fence that keeps the neighborhood kids off your grass. We were blessed by Milwaukee Tools for this build, and they gave us free rein of their tools. The Milwaukee Cordless Tools we used are not mandatory for your build. Feel free to use any of your tools. On the other hand, we thought it would be fun to do this project with whatever we wanted to use.
Material List:
- (4) 1/2″x10′ PVC Pipe
- (3) 1x2x8′ Board
- (1) 1x4x8′ Board
- 1lb #6×3/4″ Metal Stud Self Drilling Screws
- Drop Cloth or Plastic Tarp
- Black Spray Paint for Plastic
- Copper Spray Paint
Required Tools:
- M12 PVC Shear
- Inkzall Marker
- 25′ Tape Measure
- Empire Rafter Square
- Milwaukee M18 Cordless Drill
- Milwaukee 7/8″ Hole Saw and Arbor
- (2) Milwaukee 4″ Hand Clamps
- 1/8″ Thunderbolt Drill Bit
- M18 Cordless Impact Driver
- M18 HIGH DEMAND Miter Saw
- 7/8″ Forstner Bit
Getting Started
Using a Milwaukee 25′ Tape Measure, Milwaukee Inkzall Marker, and the Milwaukee M12 PVC Shear, the (4) one-half” x 10′ PVC sticks were cut into 36″ long pieces. This gave us a total of (12) 36″ long pieces. The remaining PVC can be kept for future projects or disposed of properly.

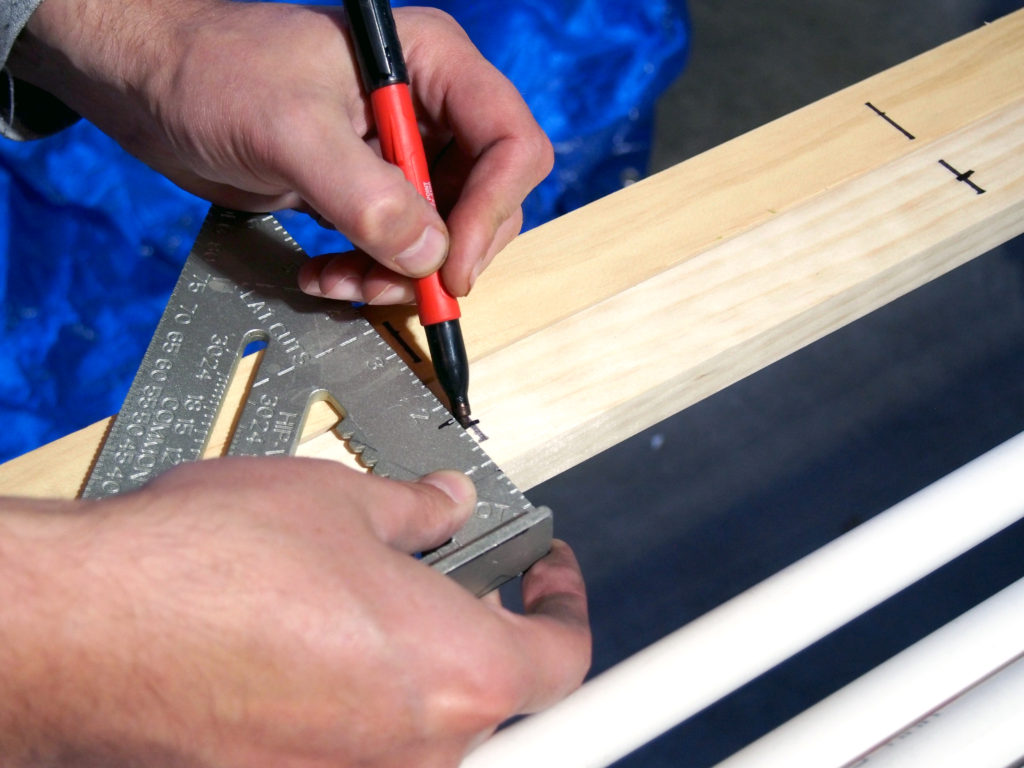
The next step is to prep the 1x2x8′ boards. We marked one of the 1x2x8′ boards at 8″ intervals with the Inkzall Marker but left 4″ at the start. We did this to allow for joining two or more fences together and giving us the 8″ rail spacing. The marks are at 4″, 12″, 20″, 28″, 36″, 44″, 52″, 60″, 68″, 76″, 84″, and 92″. The Empire Rafter Square was used to find the center of the board at the designated rail spacing.
This process must only be done once if you have clamps handy. Suppose you do not have clamps; repeat the process on all 3 1x2x8′ boards to make the cross-members. This will be your Halloween fence foundation moving forward.
The Drilling Process
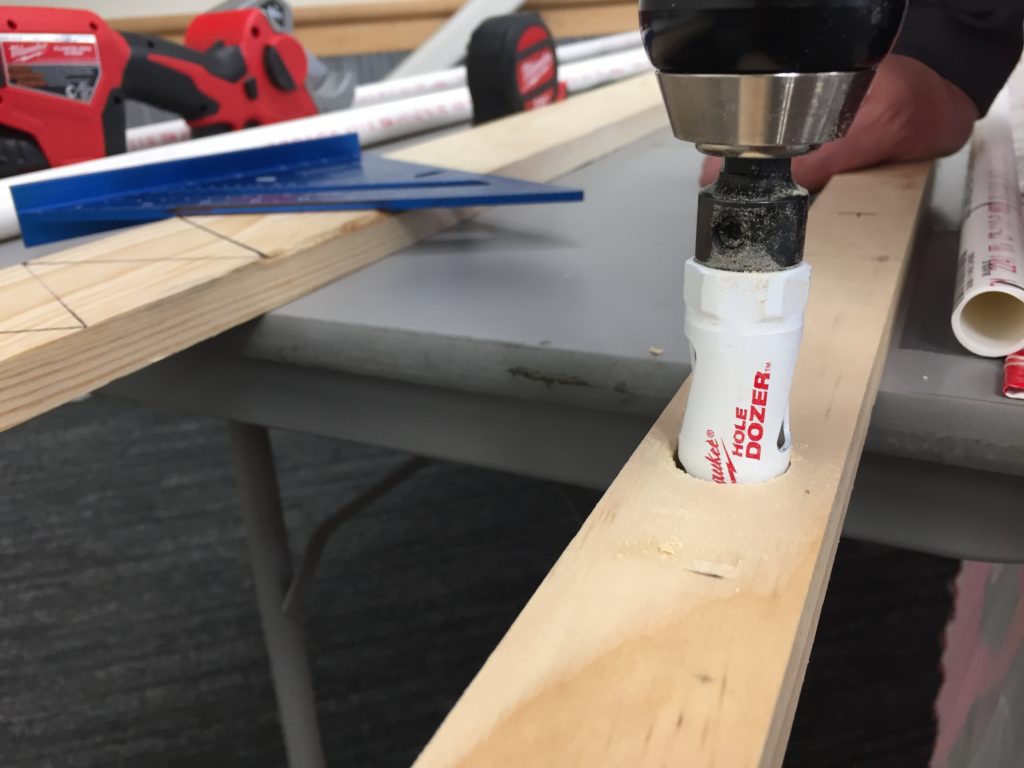
Using the Milwaukee M18 Cordless Drill and the 7/8″ Hole saw, we drilled holes at the intersections of our markings. Once this was completed, we clamped the other 2 1x2x8′ boards underneath the board just drilled. We used it as a template to drill the other boards simultaneously. This speed guarantees that the PVC rails slide through all three holes easily.
When you have completed drilling out all the 7/8″ holes in the cross-members for the PVC rails, turn the 1x2x8′ boards on their edge and change drill bits on your drill. We will now use the Milwaukee 1/8″ Thunderbolt Drill Bit in the M18 Cordless Drill. This will drill a pilot hole entering the 7/8″ hole drilled in the last step from the side.
- This will prevent the board from splitting when driving screws into the PVC rails.
Assembling the Halloween Fence
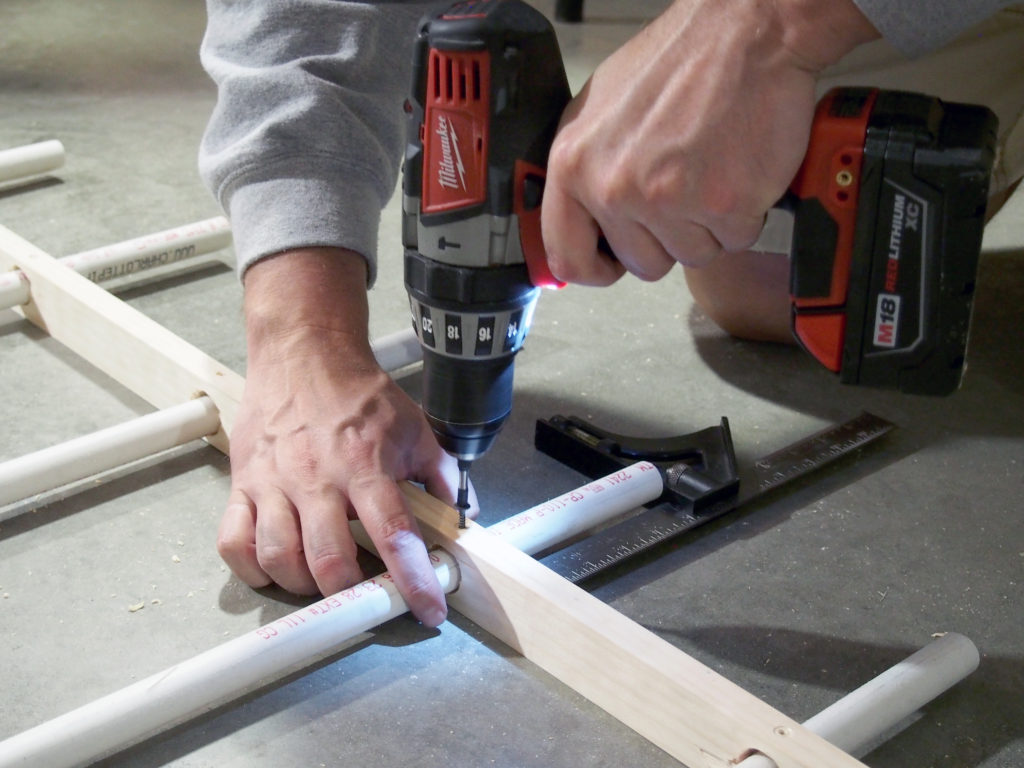
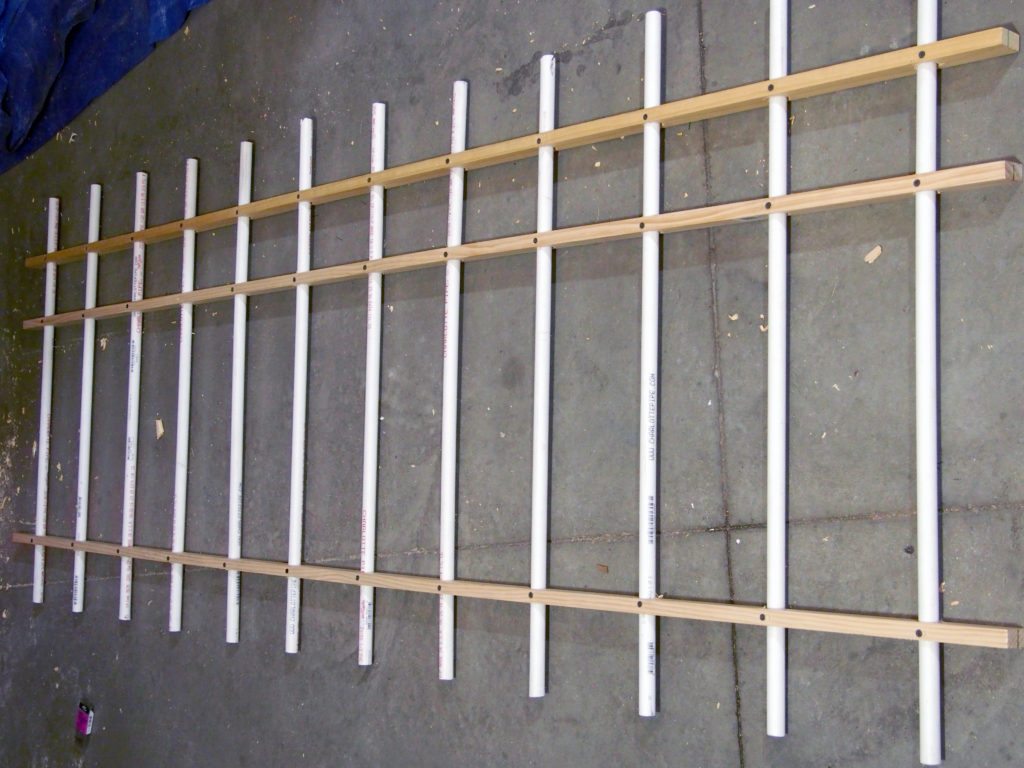
To assemble the Halloween fence, lay out all three 1x2x8′ boards on the edge with the pilot holes facing up. Installing the PVC rails when all three boards are stacked next is more accessible. The PVC rails can be inserted into the seven-eighths” holes. Using the tape measure, leave 5″ of the PVC rails sticking out of the bottom cross-member. Now install a self-drilling screw into the pilot hole and the PVC pipe using the Milwaukee M18 Impact Driver.
- Repeat this process until all the screws have been installed into the bottom rail.
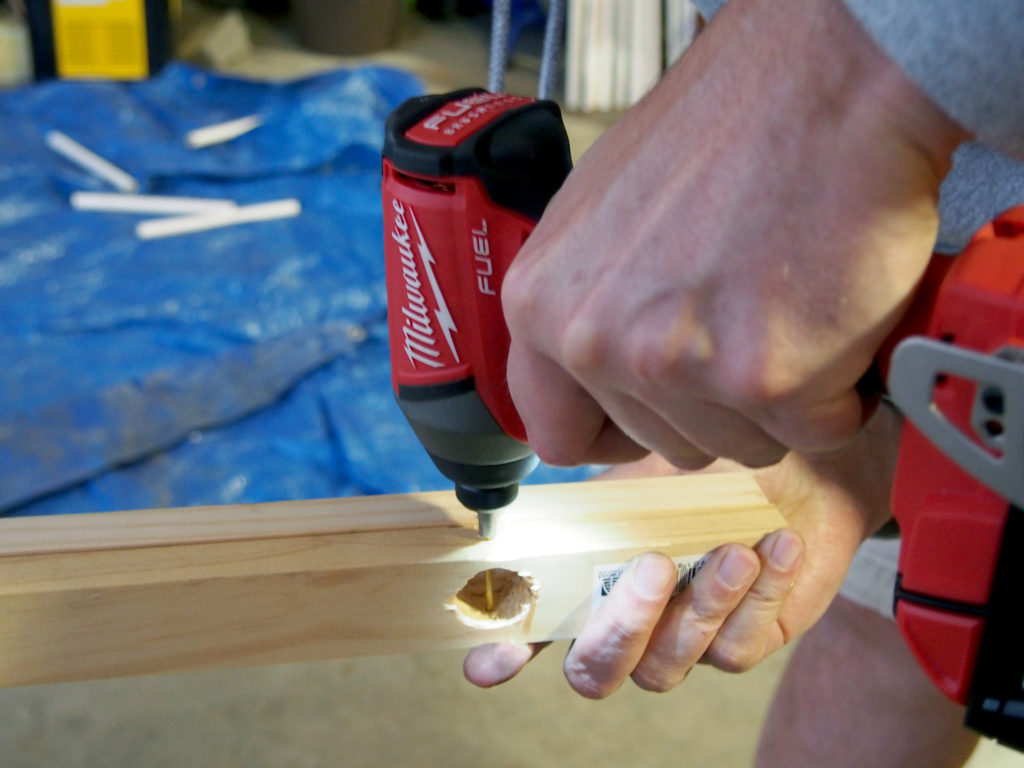
By using a self-drilling screw, the drill bit point of the screw will drill through the PVC without cracking it. Next, move the two boards not attached to the PVC rails toward the other end. The top or outside board will be the next to be attached. Like the bottom board, it will be screwed to the PVC rails with 5″ of PVC left exposed. When that cross-member has been connected to the PVC, measure down 5″ from it and attach the middle cross-member.
Making the Fence Tops
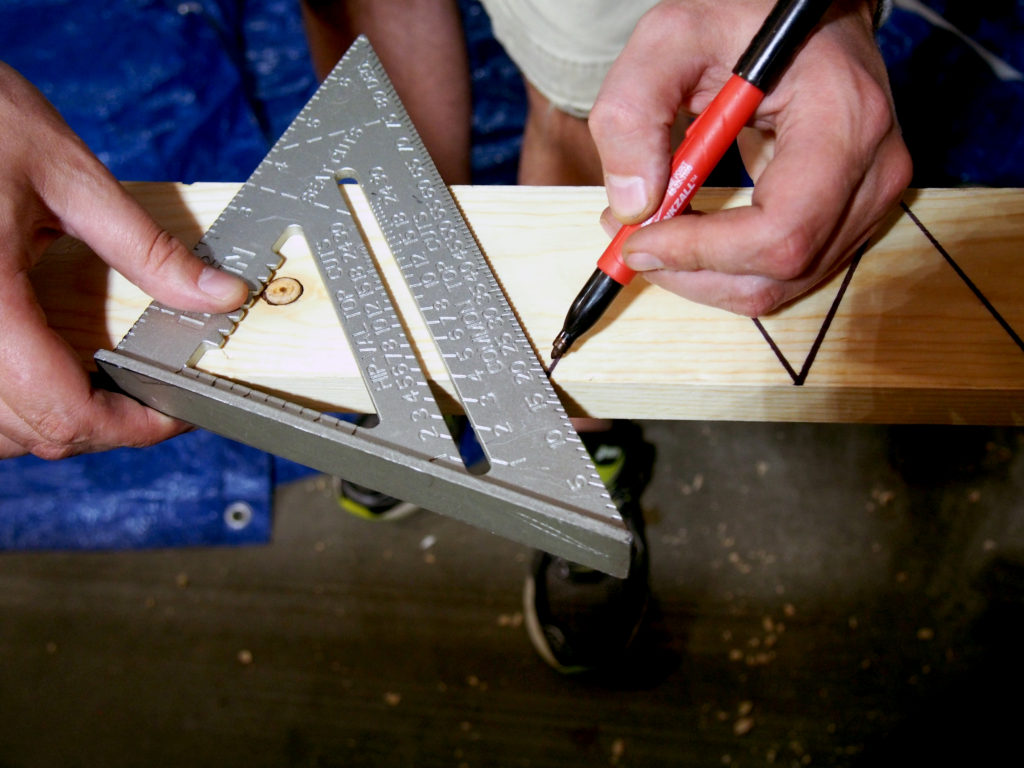
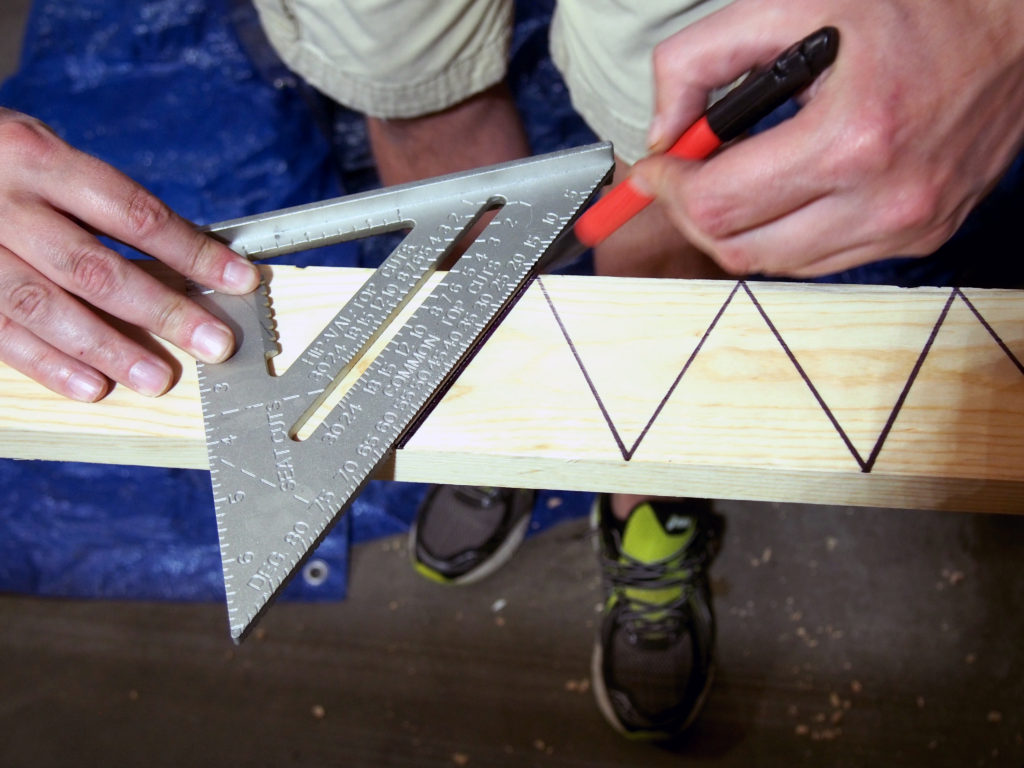
The triangular fence tops are made from the 1x4x8′ board. To determine the angle of the triangle, we placed the heel of the Empire Rafter Square onto the board. We then rotated it on the pivot until the 45-degree side was reading 20 degrees on the opposite side. Mark that line with the InkZall Marker. Next, we invert the rafter square and then repeat those steps. We continued to invert the rafter square until all twelve triangles were marked out.
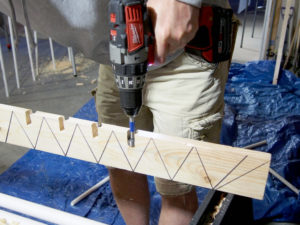
Once all the triangles had been marked out, we chucked a seven-eighths” Forstner bit into the Milwaukee M18 FUEL Cordless Drill. On the edge opposite the top of the point, we drilled a 2″ deep hole. We marked the depth of the hole on the bit with a piece of tape so we did not have to stop drilling and measure the depth of the hole.
Applying the Fence Tops
Suppose some holes are shallower or more profound than others, which is OK. The fence should look aged, and this will improve its appearance. We use the Forstner bit because the hole will be wider than the board, and the Forstner bit will be able to drill a straight, clean hole. Once all the holes are drilled, place them on the end of the PVC rail just above the side with two cross-members close to each other. The hole will keep the triangle fence top from falling off, and no screws are required.

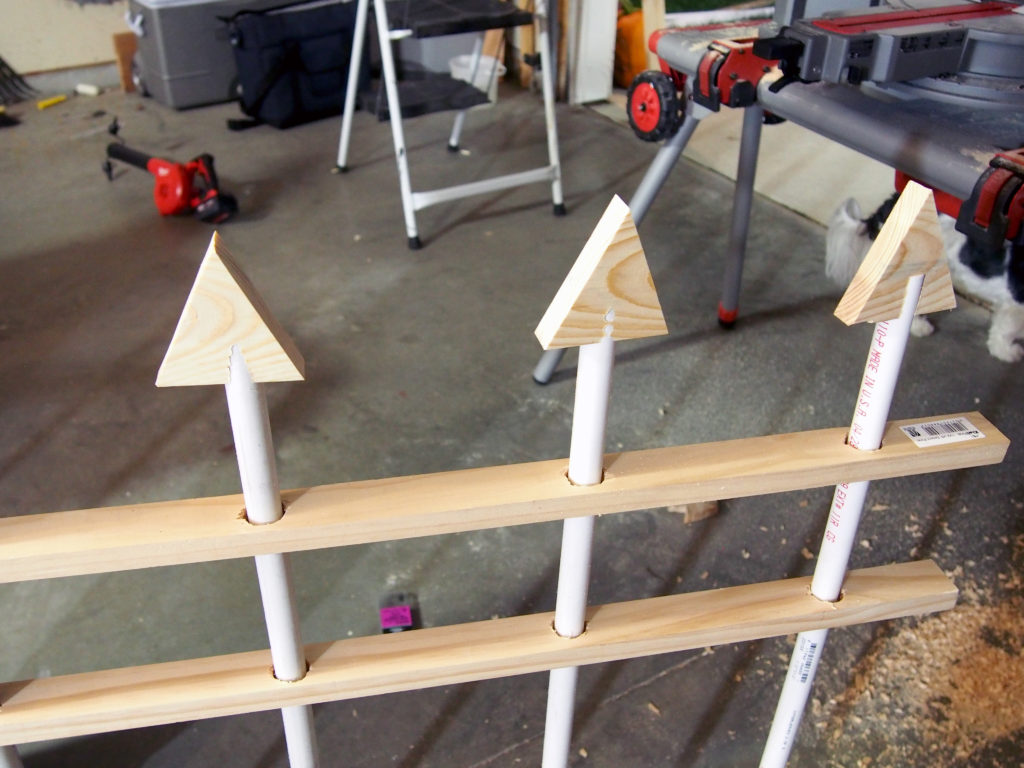
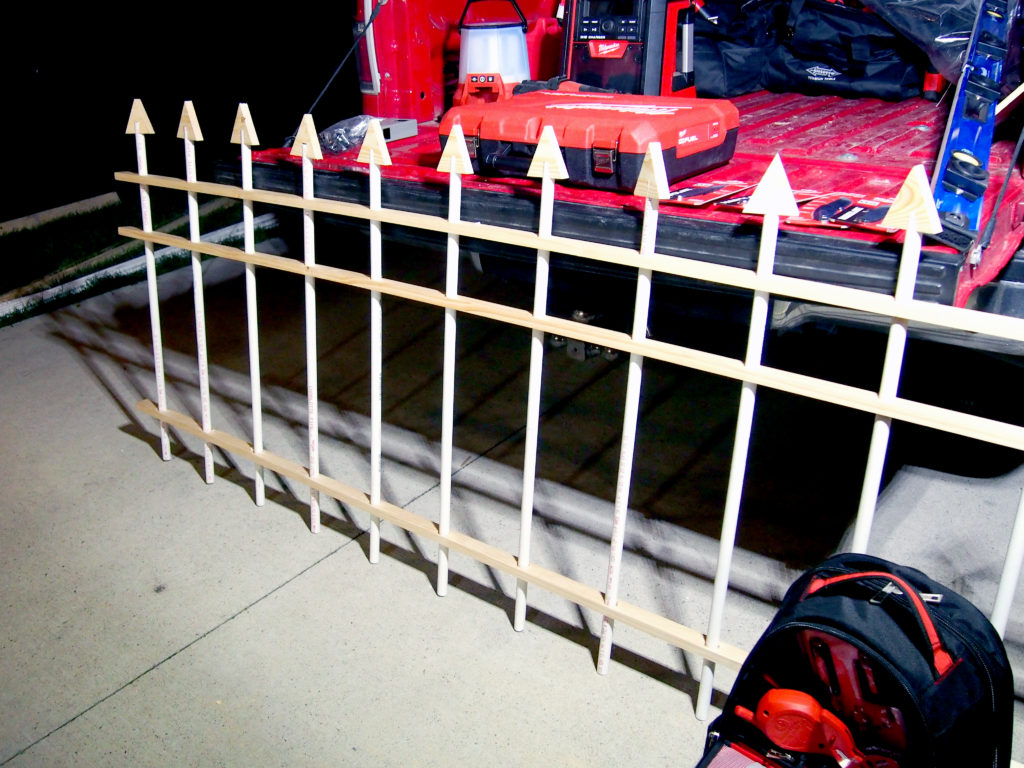
With the Milwaukee M18 HIGH DEMAND Miter Saw, we made mitered cuts to match the lines marked on the board and installed the tops to the fence assembly. Once all the pieces are cut, place them on the end of the PVC rail just above the side with two cross-members close to each other. The hole will keep the triangle fence top from falling off, and no screws are required.
Finishing Touches
We laid a blue poly tarp on the ground to finish the project and placed our Cemetery Fence assembly on top. Using a Black Spray Paint made of plastic, spray all assembly surfaces. If needed, a second coat can be applied. Once the black spray paint had dried, we used copper spray paint sparingly to give the black fence the effect of rust. Let the paint dry per the instructions on the can of paint, and you will be ready to place it in your yard.
You have several options for mounting the fence in your yard. The first option is to build multiple sections and have them arranged to support each other. On the other hand, you can hammer a thin piece of rebar into the ground and place the fence over it so the rebar that is above the ground goes inside the PVC rails. Or, you remove the triangle tops, hammer the entire unit into the ground, and then replace them once it is deep enough to hold. The last option is you can also screw the remainder of the 1x4x8′ board to one of the top cross-members perpendicular to the fence and angle it to the ground to have it function as a brace or kickstand.
One of the best parts of this project is that it is a large lawn ornament during Halloween, but when the season is over, it can easily be stored in one piece because it is so light. If eight feet of storage space is not available, you can easily take it apart by removing the screws. We suggest wrapping up all the parts so you can find all the needed parts when the next Halloween season comes around.