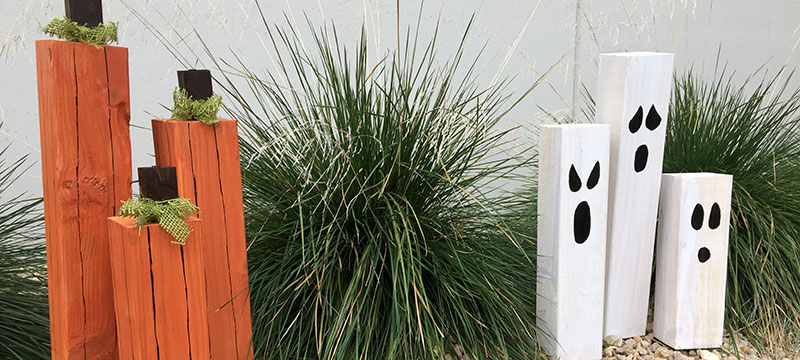
DIY Pumpkins and Ghosts
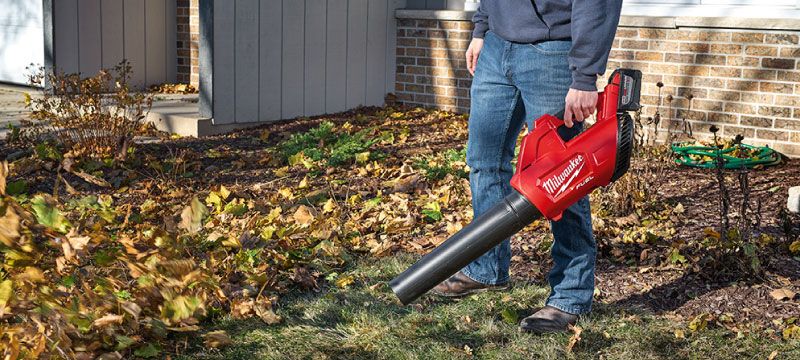
For this Halloween decor, we made (3) 4×4 Ghosts and (3) 4×4 Pumpkins that can be used anywhere around your home without taking up a lot of room, and with these simple steps, they are quick and easy to make. During our build, we had the luxury of using Milwaukee M18 Cordless tools, but please use any variation of these tools you may currently own to complete your project.
Required Materials
- (1) 4x4x8′
- (1) Scrap 1×2 or 2×4
- 3″ Wood Screws
- Orange Paint
- White Paint
- Dark Stain
- (2) Foam Paint Brushes
- (4) Plastic Disposable Cups
- Burlap Ribbon
Required Tools:
- M18 FUEL HIGH DEMAND Cordless Miter Saw
- Empire Rafter Square
- Milwaukee Inkzall Marker
- Milwaukee Tape Measure
- M18 Cordless Impact Driver
- Milwaukee Black Inkzall Paint Markers
Getting Started
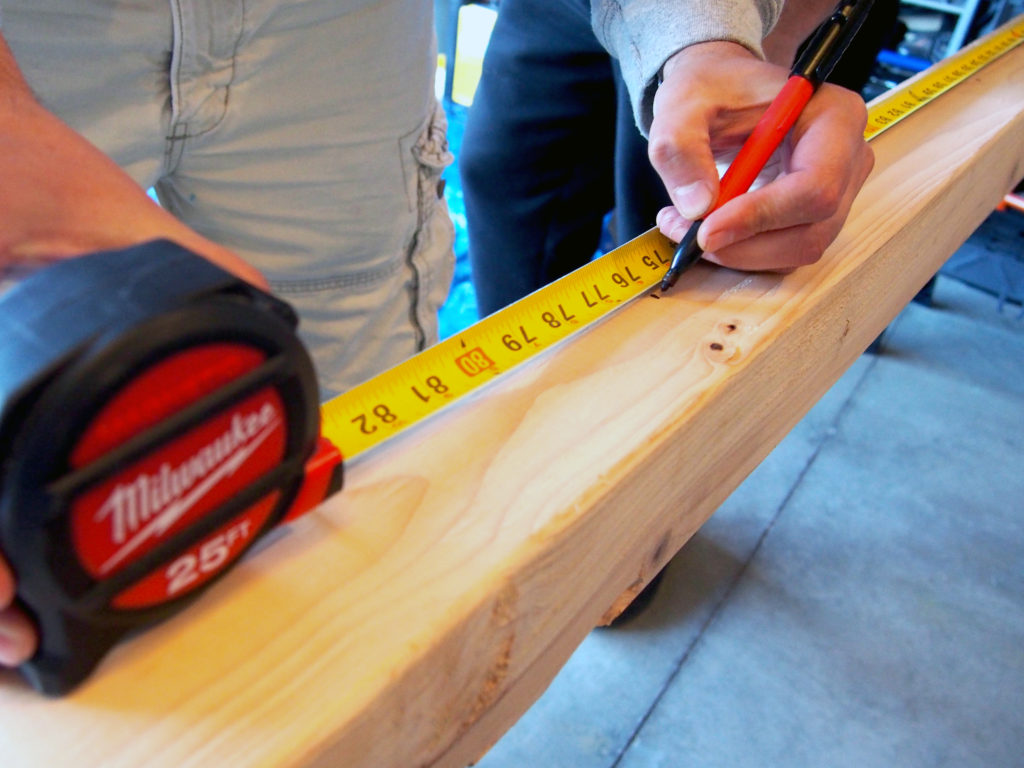
The first step is to lay out the cuts on the four-by-four. We made our Ghosts and Pumpkins 12″, 16″, and 20″ long and have two of each size.
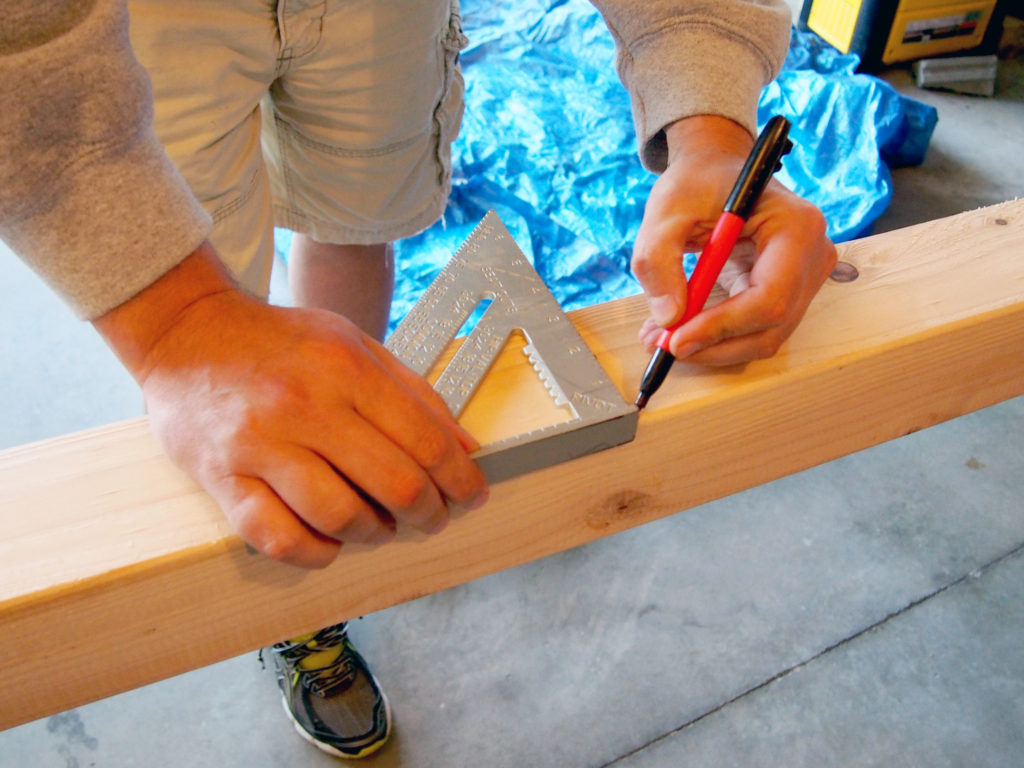
Using the Milwaukee 25′ Tape Measure, a mark was made on the 4×4 at 12″, 24″, 40″, 56″, and 76″ with the Milwaukee Inkzall Marker, by using these measurements the complete 8′ 4×4 is used. The Empire Rafter Square was used to square up our lines to make cutting on the miter saw easier.
Making your Cuts
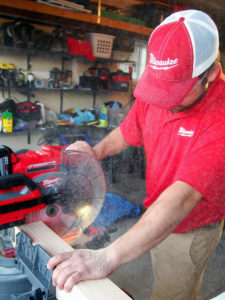
Using the Milwaukee M18 HIGH DEMAND Cordless Miter Saw, the pieces were cut on the marks to give us the start of our Ghosts and Pumpkins.
A scrap 1×2 was cut to a length of 2″ for the stem of each of the pumpkins. If you would like to use a scrap two-by-four for this, you may. The nominal width of a 2×4 is 3-1/2″ wide so you can cross cut the 2×4 at 1-1/2″ and then use 4″ wood screws instead of 3″ wood screws to attach it later.
Time to Paint
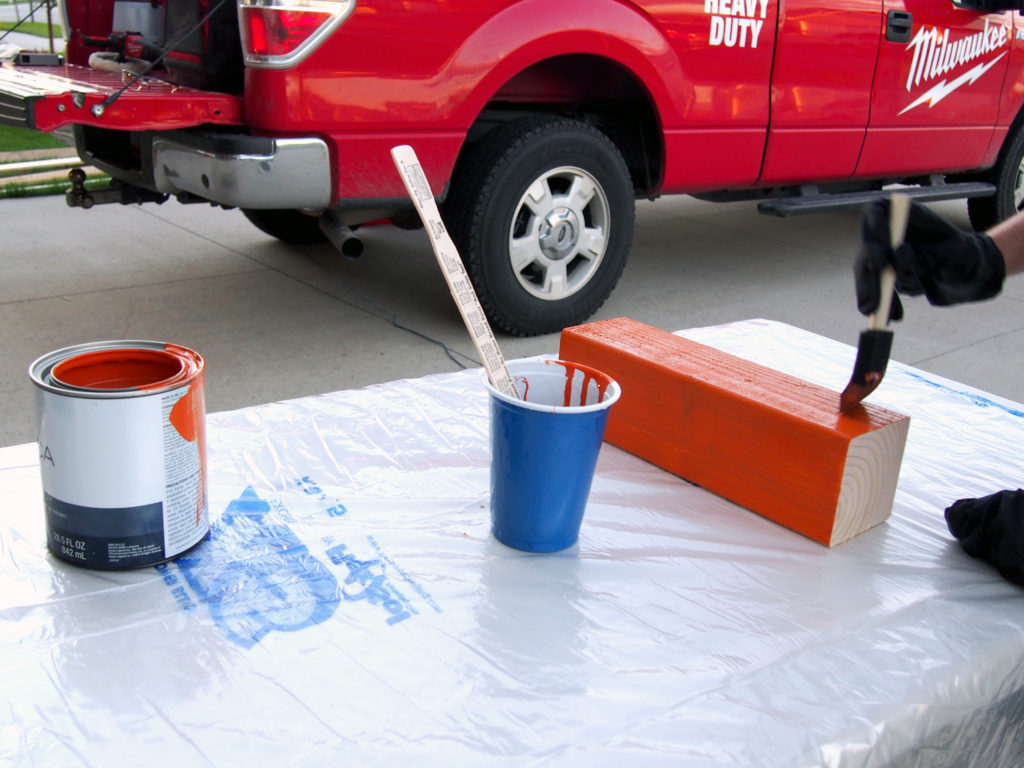
With the (6) four-by-four pieces and (3) one-by-two pieces cut, we added some orange and white paint to the disposable cups and watered down the paint so the grain of the wood would be visible through the paint. Once the desired look was achieved, one of each size four-by-four was painted white and orange. The pumpkin stems were stained with foam brushes.
When the paint was dry to the touch, the Milwaukee Black InkZall Paint Markers were used to draw in the eyes and mouth of the ghosts and the segment lines on the pumpkins. The Ghosts have been completed and can be moved to a location to allow the paint to fully dry.
Adding the Finishing Touches
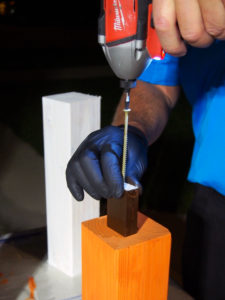
The Stems were attached to the pumpkins by drilling a 3″ wood screw. It was attached from the top down into the 4×4 with a Milwaukee M18 Cordless Impact Driver. The burlap ribbon was tied around the pumpkin’s stem to add the final change. They were placed with the Ghosts to dry thoroughly.
Once the paint has dried, you can position it around your home or yard to maximize your Halloween decor’s seasonal effect.