
Watching someone pour and finish concrete is much different from finishing it yourself. You know you will need concrete, a shovel, and a trowel, but what else should you use? The intricacies of properly and professionally finishing concrete take time to master, so it is okay for even the experienced general contractor to read up on techniques and take notes. In any case, find every concrete tool you will ever need at Acme Tools, your premier authorized online retailer, for every project.
Required Tools for Finishing Concrete
- Concrete Mix
- Obviously, correct? We are just making sure all our bases are covered.
- Bucket
- A five-gallon bucket works beautifully to mix concrete.
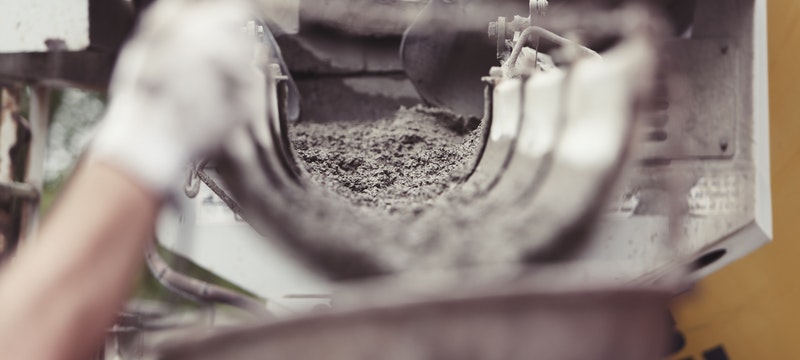
- Concrete Mixer
- An electric concrete mixer will make the job easy. A wheelbarrow mixer or towable concrete mixer would be best for larger jobs.
- A long 2×4 for leveling
- Any straight two-by-four will work. Make sure it is long enough for the job.
- Bull Float or Darby
- To flatten edges that may be left after you initially flatten the concrete with the two-by-four.
- Hand Float or Magnesium Float
- To create that perfect, flat surface and smooth finish. The magnesium float is best for air-entrained concrete.
- Edging Tool
- Do not just leave the edges unattended. You are going for a perfect finish; make it perfect.
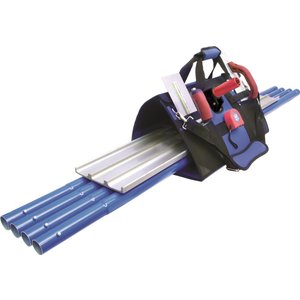
- Straightedge or Snap Line
- The best way to make straight lines before edging or grooving concrete.
- Grooving Tool
- Grooves help give concrete that perfectly finished appearance, but they do much more. Grooving concrete helps control cracking.
- Concrete Dye
- Color your concrete or create designs during finishing. You can make concrete look like various things, including rock, brick, or marble.
- Broom or Concrete Brush
- Concrete troweled to perfection looks fantastic, but it also creates the potential for serious accidents. The perfectly flat and smooth surface presents a slip-and-fall hazard when wet. Creating a texture helps prevent future accidents.
1. Make it look Finished
This tip is the most important, even if it is not a step in the process, so that we will start here. We all want our artistry to be remembered as quality work, not just a load of concrete poured into a square or other predetermined shape. Never leave a job without making sure it looks professional and with a feeling of pride in your work.
2. Choosing and Mixing Concrete
Keep in mind that not all concrete is created equal. Some types of concrete handle extreme temperatures better than others, while others can take on more weight. Make sure the concrete you choose to use fits the purpose for which it is required. You will want to use at least 3,000 PSI concrete for sidewalks and driveways, but the best concrete for heavy loads is at least 4,000 PSI.
Mix the concrete precisely like the instructions recommend. You will always get the best results when you measure and mix precisely instead of going by eye.
3. Pouring, Tamping, and Troweling
Pouring
There is no specific rhyme or reason when you are pouring concrete. You do, however, want to make sure there are no bubbles that will cause craters later.
Tamping
The process of tamping, or compressing, is rarely needed with many types of concrete mixes today. Tamping some kinds of concrete can weaken the slab and ruin the project. Double-check the type of concrete mix you are using before tamping.
Troweling
Troweling concrete is not the most straightforward job. When ready to trowel, use a wooden or magnesium float to smooth the surface. Remember that some texture is good, especially in an area exposed to water or the elements.
One thing you can do to finish the surface of your concrete if you are unhappy with your troweling job is to use a broom. All you must do is lightly drag the broom across the surface of the concrete until it is flat. Get an old broom and be prepared to replace it if you do not clean it quickly. A broom-finished concrete surface offers much more traction on wet concrete than a smooth, trowel-finished surface.
4. Know When to Finish
Inexperience in finishing concrete often leads to one of two mistakes – troweling too soon or too much. Both mistakes pull too much water to the surface.
You end up with a white, dusty, cracked surface. Concrete sets more quickly on warm days, so make sure to work at a pace that is appropriate to the weather.
5. Work Bleedwater Back into the Concrete
Water will rise to the surface of the concrete while it is setting, but do not allow the water to evaporate. Work the surface with a trowel to back the water into the concrete, preventing dusting, scaling, and cracking simultaneously in the concrete finishing process.
6. Add Color
Many contractors have learned the art of being creative with finished concrete. We have seen some impressive, finished concrete that resembles marble, stone, brick, or tile. All it takes is some colored concrete dye and severe dedication to perfect your work.
7. Protect Your Concrete
Apply a sealant to the concrete after it is finished, dried, and cured. Applying a suitable sealant will protect the concrete for 3-5 years.
Places You Can Use Concrete
You can use concrete for many applications, including:
- Basement Flooring
- Utility Room Flooring
- Warehouse and Commercial Flooring
- Driveway
- Garage
- Carport
- Footers
- Mailbox Pads
- Patio
- Dog Runs
Property owners tend to love the simplicity of concrete. It is an easy and inexpensive project that lets the artistic general contractor show off their skills.


11 Comments
Deb Pearl
October 23, 2017 at 9:20 amMy neighbors recently got a concrete carport on their house and I was curious on what you had to do to finish concrete. That is good to know that you trowel the concrete to make it smooth, and if you aren’t happy with how it looks you can use a broom to help add some texture to the concrete. I didn’t know that having some texture to the concrete gave it more traction! No wonder you see textured concrete in more places now. Thank you for the information!
Chris
November 9, 2017 at 11:00 amGreat list of steps for the process of placing and finishing concrete. I would also add prepping the base before placing the concrete. Adding the right amount of aggregate and compaction will help with any movement and also add strength. Great post!
Acme Tools
November 9, 2017 at 11:04 amHi Chris, Thank you for your comment. We do agree that a proper foundation makes any project easier, stronger, and will make it last longer.
Thank you,
Acme Tools
Roger Middleton
January 31, 2018 at 9:37 pmI liked that you had mentioned that it can be important to make sure you finish at a good time of the day to avoid possible problems. My wife and I have been wanting to pour a concrete patio and we haven’t been sure how to do that. We’ll have to start looking around for the right concrete supplies, and we’ll be making sure that we can pick a decent time to finish.
Lilia Robberts
July 26, 2018 at 8:16 amThank you so much for your tips about choosing concrete. I found it interesting that some concrete mixtures can handle extreme temperatures better than others, and that other mixtures can handle weight better than other. I’ll need to figure out what type of concrete mixture would work for me. Now I just need to find a concrete contractor who can do all the compressing and troweling correctly.
Mark
August 19, 2018 at 7:58 amGreat article, thanks for sharing. For those reading, do NOT skip the last step! I have seen plenty of jobs in my experience where people do it themselves and do not apply sealant. This is beyond my understanding but it happens! Do not skip! Thanks again
Mitch
November 18, 2019 at 5:53 pmExcellent advice for those starting out, and a reminder for those that have been around a while!
James Borst
December 20, 2019 at 8:19 pmI like your recommendation to use concrete dye to make the concrete look like marble or brick, etc. My wife and I are considering expanding our back deck so that we can have barbecues on it. We may consider ready mix concrete or something like that.
NC
March 15, 2020 at 5:44 pmRight before any concrete is ready for the first time float you will see water sitting on the surface after the pouring is completed….You absolutely never ever want to work that “Bleed water” back in to the concrete mix. It must disappear first before you think about even touching the concrete at all, or you will get Dusting scaling, or even mass delamination of your final product……I have been finishing concrete since I was 19, I am now 39…..Telling people NOT to let water evaporate off the surface and “work it back in” is completely wrong.
Concrete Contractors Redding CA
July 9, 2020 at 6:36 pmDefinitely some very good concrete tips. We are a professional concrete company ourselves, and we use most of the tips provided on here. Thank you for taking the time to share!
Concrete Company
August 19, 2020 at 12:19 pmI think one of the best tips you mention is adding dye to the concrete. This technique is amazing and produces results that will really impress customers and clients. The results are truly stunning, when done correctly. Thanks for all the info above. Well written!