We know hand tools like the back of our hand! I guess 65+ years of experience in the tool and construction industry will do that to you. We’re sharing our favorite hand tool tips, tricks, and hacks that we’ve discovered over the years with you.
These fabulous hand tool tips, tricks, and hacks are about to blow your mind, help you work smarter, and save you time…you can thank us later.
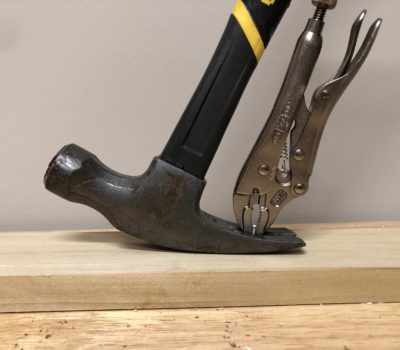 To remove a nail that has lost its head, firmly clamp a Vice Grip on the nail so there’s something to pull.
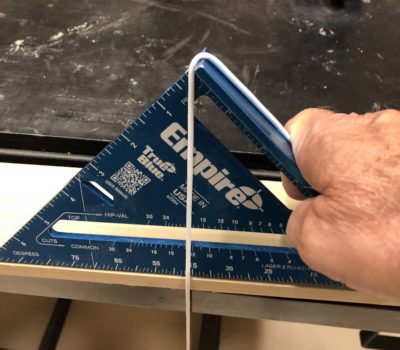 Need a level but only have a carpenter's square and chalk line handy. Wrap the chalk line over the top of the square at the 90° angle and when the string lines up with the 45° mark on the square, your surface is level.
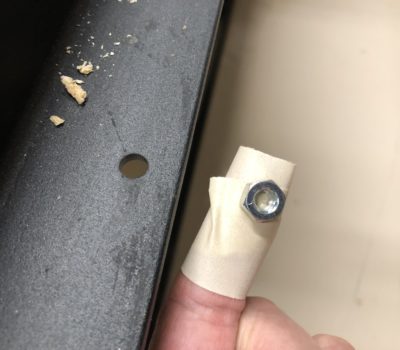 Tired of accidently dropping the nut when you try to hold it in a tight space as you attempt to thread it? Just wrap some masking tape, sticky side out, on your finger to keep the nut on your finger until the treads hold.
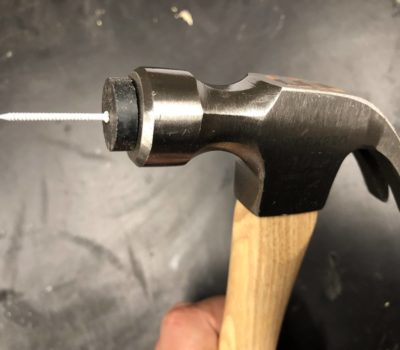 Need to drive a small nail into a hard to reach place? Put a magnet on the face of your hammer and stick the nail where you need it. Once the nail has been started you can remove the magnet and nail it in as normal. Need to add more precision to the nail placement? Just put the nail where you need it and tap the back of the hammer to get it started.
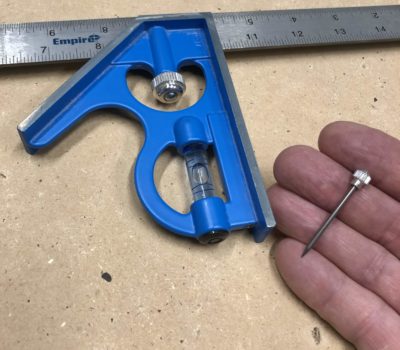 The little knob on your combination square is not for fine adjustments. It holds a secret that could really hit the mark. Remove the onboard scribe whenever you want a real precise mark or when you find yourself looking for that lost pencil. Pssst, it's behind your ear.
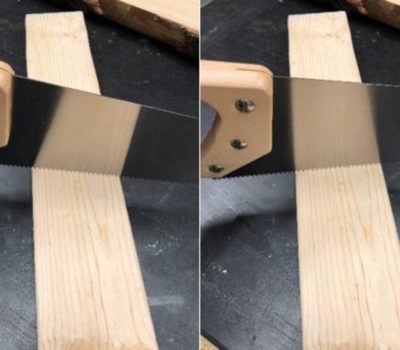 If you find yourself needing to use a hand saw and don't have a square to assist in the cut, the wood's reflection in the blade can help you make a square cut. Move the saw until the reflection is aligned with the material as in the right side image.
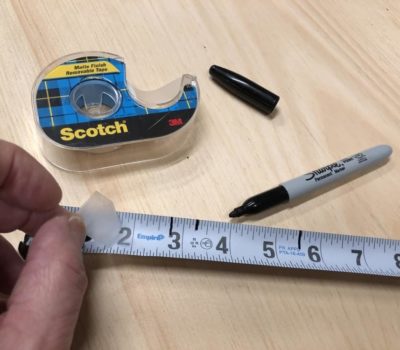 Put removable transparent tape over your rule, measuring tape, or other measuring tool. You can now mark your repeatable measurements right on the tape. No more having to remember your measurements (or remember where you wrote them down). When the project is done, just pull off the transparent tape and your measuring tool is clean as a whistle.
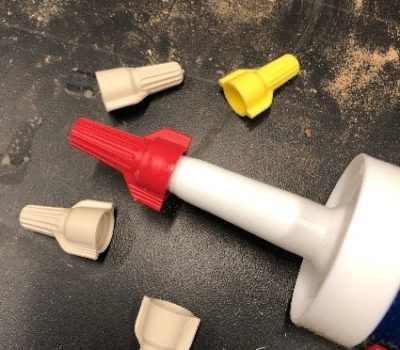 Screwing a large wire nut onto the nozzle of a partly used tube of caulk or sealant will help keep the contents from drying out. As an added precaution, put a dab of petroleum jelly down the nozzle before you screw on the nut. When re-opening the tube be sure to discard the product that first comes out that could have mixed with the jelly.
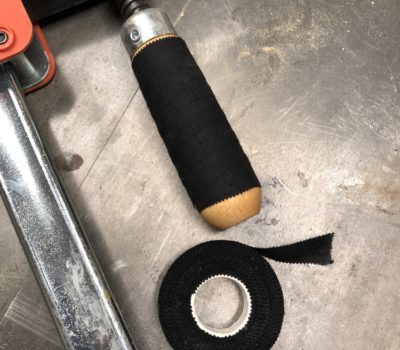 Relive those glory days and add baseball bat tape to your clamp handles to provide added torque and comfort. It might not make you young again but it will help increase your grip on those smooth clamp handles. If you don't have baseball bat tape grab hockey or golf tape instead.
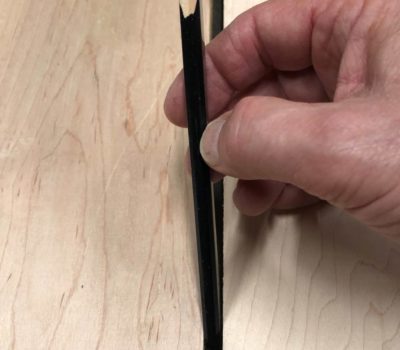 Most rectangular Carpenter's Pencils are 1/4" which, either 1/2" or 5/8" wide so the next time you are in a bind for a quick measurement grab your pencil and leave the tape measure in your tool belt. You can also use them for a spacer when doing decking.
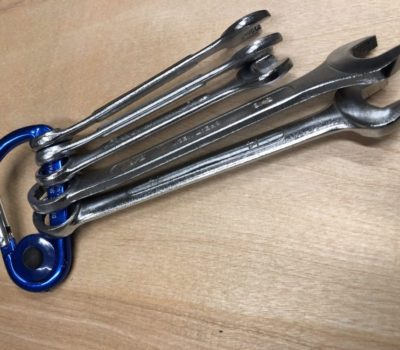 Are you tired of losing your combination wrenches? Use an inexpensive carabiner to lock them all together and just remove the one you need. Bingo, no more lost 10mm wrenches.
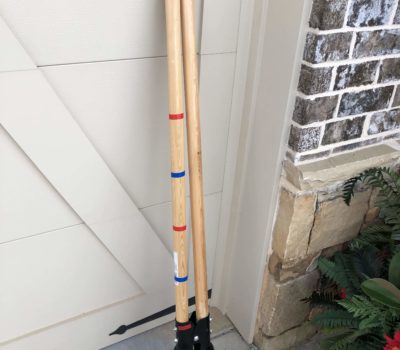 Measure once and just keep digging. Use tape or permanent marker at measured increments on the handle of your post hole digger, shovel, or auger to know how deep you have made your hole. This will keep you from constantly measuring your progress with a tape measure and slowing down the job.
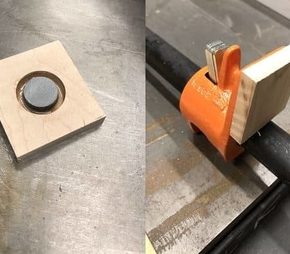 Are you tired of losing your clamp pads or having them move at the last second? Make your own that will stay in place and can be used on different metal clamp faces. Inset a magnet into the wooden clamp pad with epoxy and when needed just attach them to your clamp leaving your hands free to position the clamp and worry free about the position of the pad.
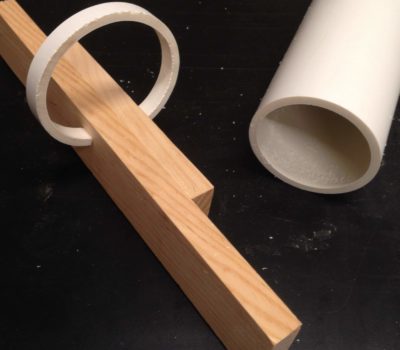 Sometimes you don't need a lot of clamping pressure but you need a small clamp. Try cutting off a thin slice (1/4" or less) of a 3" PVC Pipe and then cut a slit into it. The spring action of the PVC will hold your items in place and not damage your work. Quick, easy, and hopefully painless.
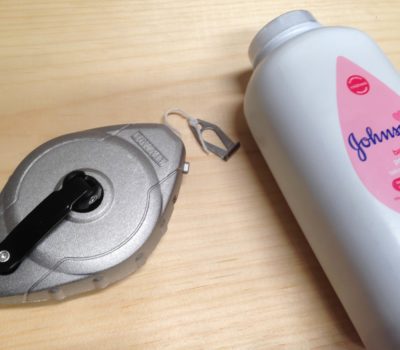 Do you need to snap a chalk line on a delicate workpiece or painted surface? Consider filling the chalk box with baby powder. It leaves a fine line that is much easier to wipe off than some chalks that can also leave a permanent mark. The light color can be especially helpful if working on a dark wood or a piece that has already been finished.
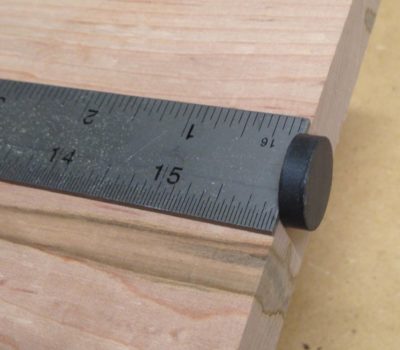 Metal rules typically have finer graduations than a standard tape measure but they are harder to align with the edge of your work piece. To ensure the rule is right at the edge, attach a rare earth magnet to the rule and it will self align with the edge of your work.
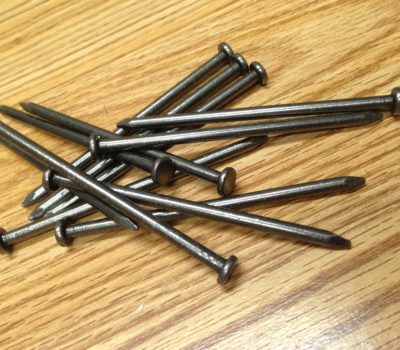 When describing nail sizes, we talk about “penny”. As in, it’s a “16-penny” nail. But, when you look at the box, it says “16d”. So, where did the “d” come from? And, what does “penny” mean anyway? Well, believe it or not, it is traced back to when there was Roman rule in England. Back then, an English penny was called a denarius. At that time, as one story goes, 100 nails that were 3 ½” long would have cost 16 pennies. So, it’s called a “16-penny nail” (after 16 pennies) and it’s marked 16d (after 16 denarius).
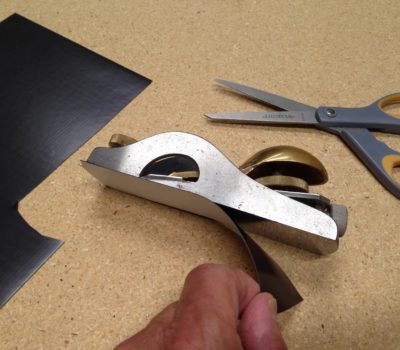 Protect the blade and shoe of your plane, especially if the plane is stored in your day to day tool box. Cut a strip from a sheet of magnetic air vent covering and place it on the bottom of the plane. This will protect the shoe from nicks and chips and protect your hands from cuts if you leave the blade out.
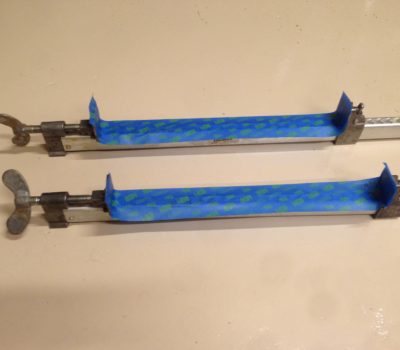 To minimize clamp clean up when gluing put painter’s tape on the bars or pipes to keep the glue that squeezes out from sticking to them. After you take the clamps off the workpiece, simply peel off the tape and, voila, the clamps are clean as a whistle!
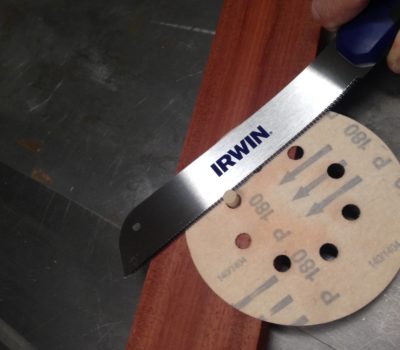 A dovetail saw can easily and quickly trim plugs with minimal scratching to the surrounding wood. As an additional precaution against damage to the wood, place a well-worn sanding disk (abrasive side down) over the surface, with the plug sticking through a hole. Then, as you cut, flex the blade against the sanding disk and cut on the pull stroke.
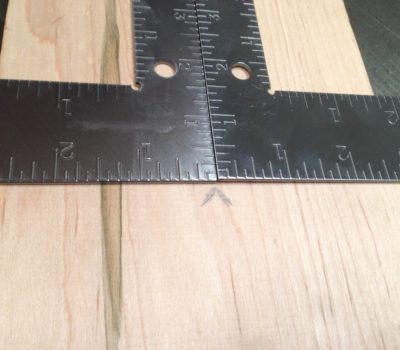 Butt two squares (or steel rulers) together and then adjust them on the workpiece until the measurement at both ends is the same. Mark the center where the squares meet. This is a super-fast way to make an accurate measurement. And, no division is required!
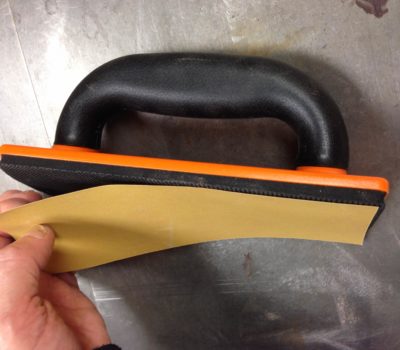 If you have a push block with a foam rubber bottom for your table saw or router table, then you also have a dandy sanding pad. The grips are great, and the bottoms are perfect for self-adhesive sandpaper.
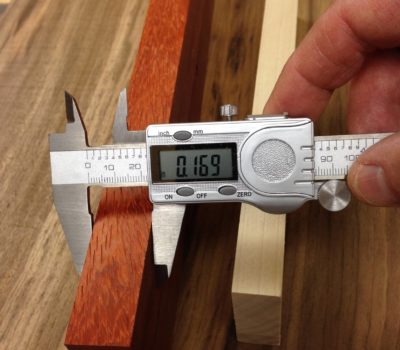 To quickly find the difference between the thickness of two pieces, first measure the thinner one. Then, tighten the jaw lock and zero the scale. Next, loosen the lock and measure the thicker piece. The display shows the difference between the two. In the example shown, the skinny piece is .746” thick, and the other is .169” inches thicker. Bam! No math required!
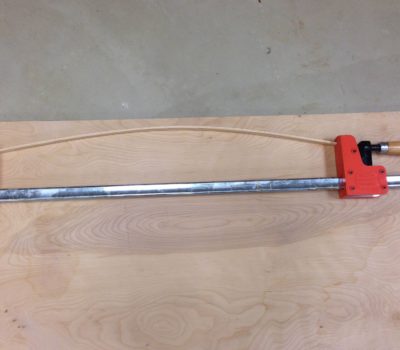 Here’s a nifty way to create an arc without any fancy drafting tools. Simply clamp a thin wood strip until it forms a smooth arc that connects the center height of the arc with the end points. Now there’s an arc of triumph!
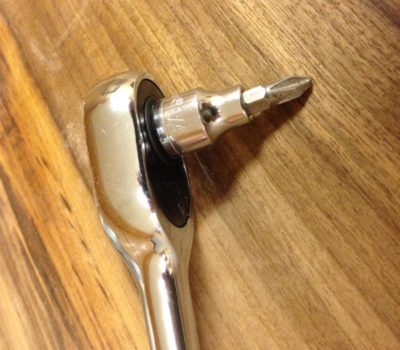 Sometimes even the stubbiest of screwdrivers is too big for tight areas. A socket wrench can come to the rescue! Just insert a 1/4″ hex screwdriver bit into a 1/4″ socket and, wham, you have a high-torque solution! If that is still to big for your situation, try using a 1/4″ wrench around the screwdriver bit, this gives you more clearance but is harder to get down pressure on the screw.
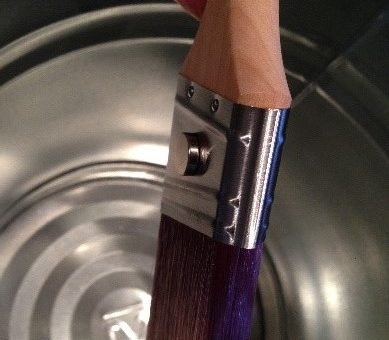 Stick a strong magnet on the side of a metal pale or on the metal portion of your brush. The magnet securely holds your brush when it’s time to drip dry. If you don’t have a metal bucket just get 2 magnets. One can be placed on the paint brush inside the plastic bucket and the other can be placed on the outside of the plastic bucket with the polarity reversed. This outside magnet will hold the inside magnet attached to the paint brush.
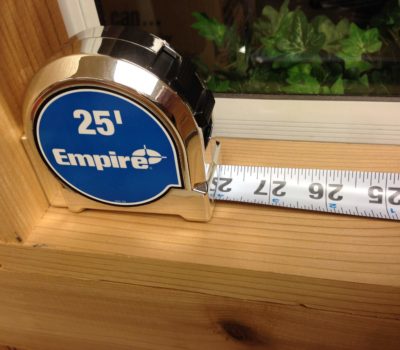 Know the width of your tape measure. Then, you can use the body of the tape measure to quickly take inside measurements. In this example, the tape measure is exactly 3” wide. So, just add 3” to the 28’” reading on the tape to get the full inside measurement of 31”. If you take a close look at your tape measure, most manufacturers will have this measurement printed on the back of the tape.
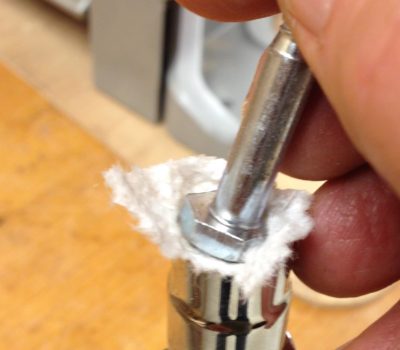 When you can’t use two hands, it can be tough keeping the bolt in the socket as you try to start it. Simply put a little piece of paper towel around the head of the bolt to snug things up as you slip it into the socket. Wham! Uptight…outta sight!
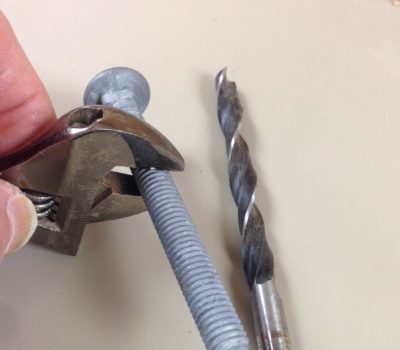 When drilling a hole for a nut and bolt assembly, you can use an adjustable wrench to determine the bolt’s diameter. Then, just match the jaw opening with the corresponding drill bit diameter. This will take place of holding multiple drill bits up to the bolt to eye up which one matches the best or keeping you from getting the bolt stuck into the drill index. Holy crude calipers Batman!
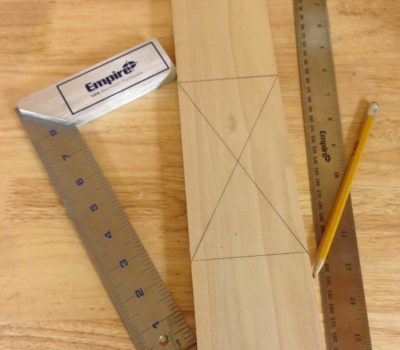 First, draw two parallel lines with your try square. Then use a ruler to draw diagonal lines connecting the ends of the parallel lines. Boom! X marks the spot!
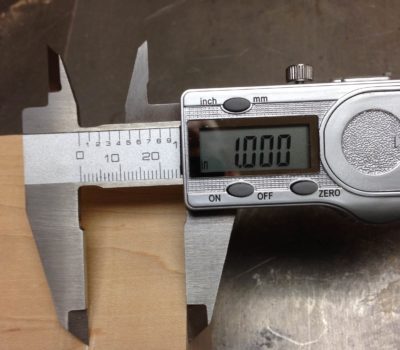 Calipers are great for super accurate measurements. And, with the sharp edges on the jaws, they can scribe a line that is spot-on. Just run the lower jaw along the edge of the workpiece, while scoring with the upper jaw. Make sure to lock the head once you have your measurement or the motion of the jaws could move it causing a mis-marked line.
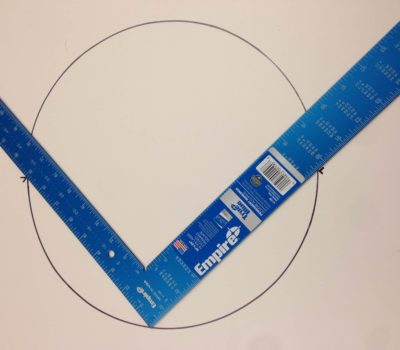 To find the diameter of a circle, put a framing square on the circle with the corner touching the circle’s perimeter. Mark where the square crosses the circle. A line between these two points is the diameter. To find the center of the circle, do this process twice in different locations on the circle. Where the two diameter lines intersect is the center.
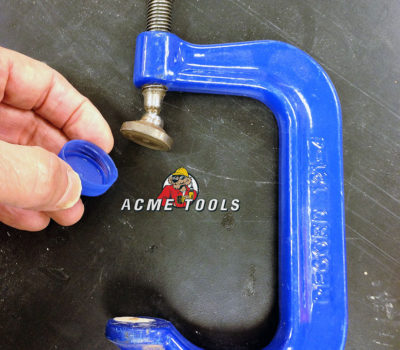 To keep C-clamps from damaging the workpiece, slip on a plastic milk jug cap. Use a little hot melt glue to secure it if needed.
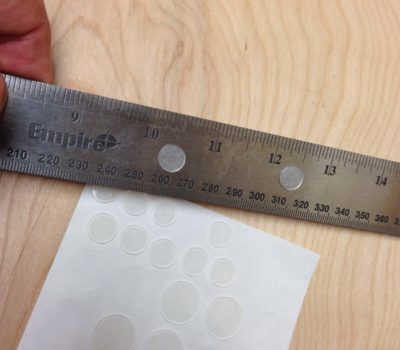 When marking a workpiece with a straight edge, often the straight edge will accidently shift when you are drawing the line. Give it some staying power by sticking small, thin picture frame bumpers on the underside of the straight edge. No more sliding around and you’ll get perfect lines every time.
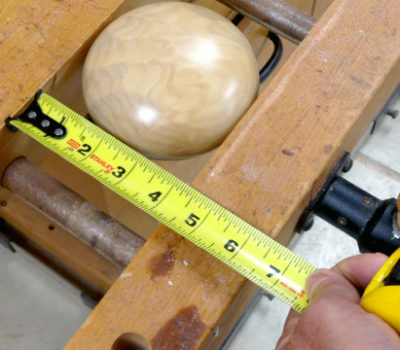 When you need the dimensions of an object that is hard to measure, secure it in a vice. Then, simply measure the distance between the jaws of the vice.
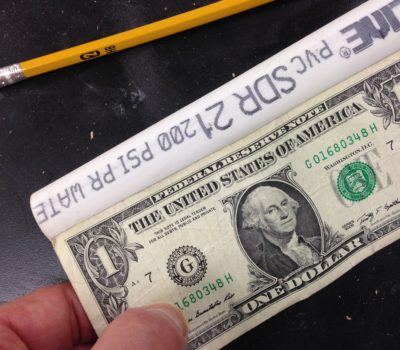 If you need to make a quick measurement, and you don’t have a tape measure, what’s in your pocket may help. A dollar bill is 6 1/8” long. A Typical business card is 2” wide. For smaller measurements, dig into your pockets. A quarter is approximately 1” in diameter. A penny is ¾” in diameter.
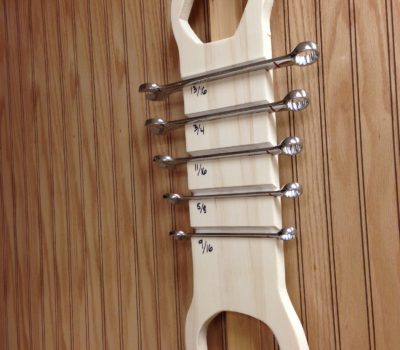 Keep your wrenches neat and within reach by making this unique hanging wrench organizer. Start by drawing a pattern on ¾” thick stock. (We made a wrench design, but you could be more creative with a fish, beer bottle, etc.) Then make dado cuts at an angle in your stock before you cut your design with a jigsaw or band saw.
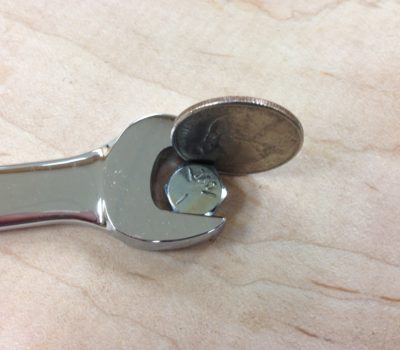 If your wrench is too big, fill the gap with a coin. This works surprising well. No coin, or the gap is still too big? A screwdriver wedged in the gap can do the trick!
Also, check out our power tool tips, tricks, and hacks and our general garage tips, tricks, and hacks.


3 Comments
Larry Weaver
November 27, 2017 at 7:35 pmThanks for the tip to cover the markings of sizes on a socket or drill bit with correction fluid or white paint to make them stand out. Working with my socket and drill bits to make the size readings stand out is something I’ll also have to do when upgrading my tools.
Db
June 3, 2018 at 8:15 amForget 2 rulers/squares. Take a number easily divisible by 2 and large enough to place a ruler diagonally from edge to edge using your chosen number. IE 10″ 1/2 of that is 5″ mark at the 5″ and that is center…simple!
Acme Tools
June 4, 2018 at 8:09 amHello Db, Thank you for your comment and your tip. We try to give our readers several options to save time on sometimes difficult tasks and we thank you for sharing your tip.
Thank you,
Acme Tools