Cut Perfect Dado Joints With Your Table Saw
The dado joint makes a solid and straightforward connection between component pieces of bookshelves, drawers, cabinets, and other casework. It is simply a square-cornered channel cut across the grain of a workpiece (such as a bookcase side) that accepts the end of a cross piece (such as a bookcase shelf). You can also use a dado set to cut a groove or a channel cut with the grain of a workpiece. Dado sets also work great for cutting rabbets along the edges and ends of workpieces. |
One of the easiest, fastest, and most accurate ways of cutting dadoes is with a dado set installed in your table saw.
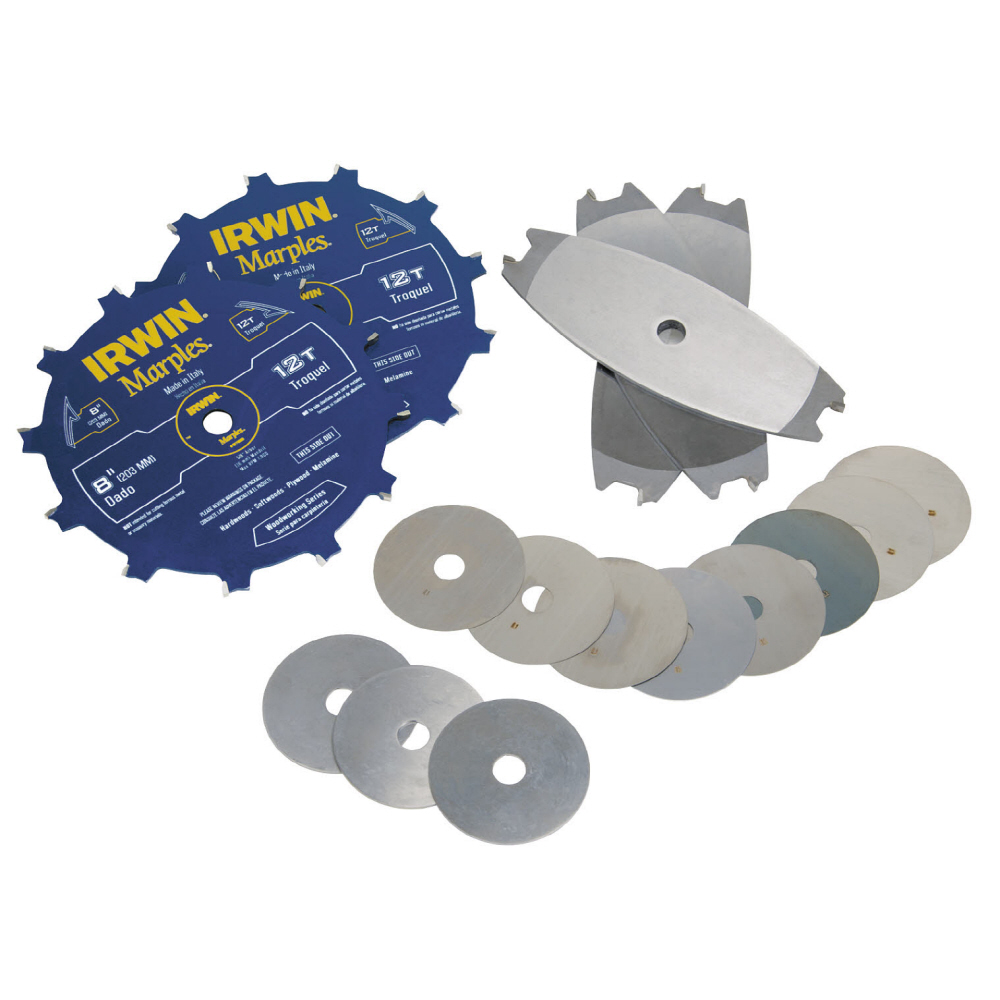
Stackable dado sets consist of two outside blades that each cut a “⅛” kerf and several “shippers” that typically cut “⅛” kerfs, too, but can be “1/16” “or “3/32” “wide. The dado set will cut a ¼” d” do using just the two outside blades. To increase the width of the cut, simply add chippers between the outside blades. You can infinitely fine-tune the width of the stack by adding the plastic or metal shims that may come with the set (you can also make paper ones yourself). With all the chippers and a few shims, a typical dado set can cut a dado nearly 1″ wide.“
Chippers come with either two carbide teeth or four carbide teeth. The two-tooth chippers will produce perfectly acceptable results for most users. Opt for a set with four-tooth chippers if you want exceptionally flat and smooth dado bottoms.
| You’ll set in “6” or “8” diameters. The “6” sets will cut dadoes deep enough to satisfy most users. An “8” set requires a heavy-duty, cabinet-style table saw with at least a 3-horsepower motor. A new variation of the dado set is the “Dial-A-Width” set” from Freud, “which allows you to dial the exact width without using shims. Another option is the so-called “wobble” dado—the “se mak” rough cuts with rounded bottoms, which are inappropriate for woodworking. However, they may be acceptable for rough carpentry tasks. |
Getting ready to make a dado with your table saw is as easy as 1, 2, 3
1. Determine the width of the groove. Measure the thickness of the workpiece that will fit into the Dado. This measurement will be the width of the channel to be cut. Install the outside blades and include the necessary chippers to approximate the desired cutting width. When “stacking” the blades, stagger the teeth so that the blades fit together correctly. Make a test cut in scrap, check the fit of the workpiece in the Dado, and subtract chippers and/or add shims as necessary until you arrive at a snug fit (or simply use the dial if you have a “Dial-A-Width” set).“
Tip: The plywood is undersized. You’ll have to measure the exact width of the plywood to determine the groove that will accept tit
2. Adjust the height of the dado set. This height will determine the depth of the Dado. The dado depth should be no more than one-half the thickness of the stock being dadoed, and its depth should ideally be one-third the stock thickness. For example, in “¾” stock, the Dado should ideally be “¼” deep and no deeper than “⅜.” Using the steel rule, measure from “the tabletop to the top of the blade. The same rule applies to grooves and rabbets. |
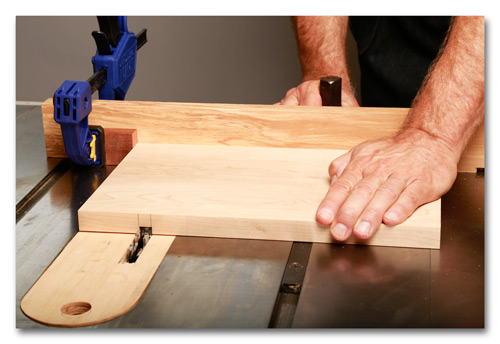
3. Position the rip fence. Finally, the fence is set as a stop to define the location of the Dado on the workpiece. Although you should not usually use the fence as a stop when cross-cutting, you can when making a dado. Because you don’t cut through the workpiece, there is no cutoff piece to be pinched between the fence and the blade. Still, support longer workpieces with a miter gauge outfitted with an attached auxiliary wood face.
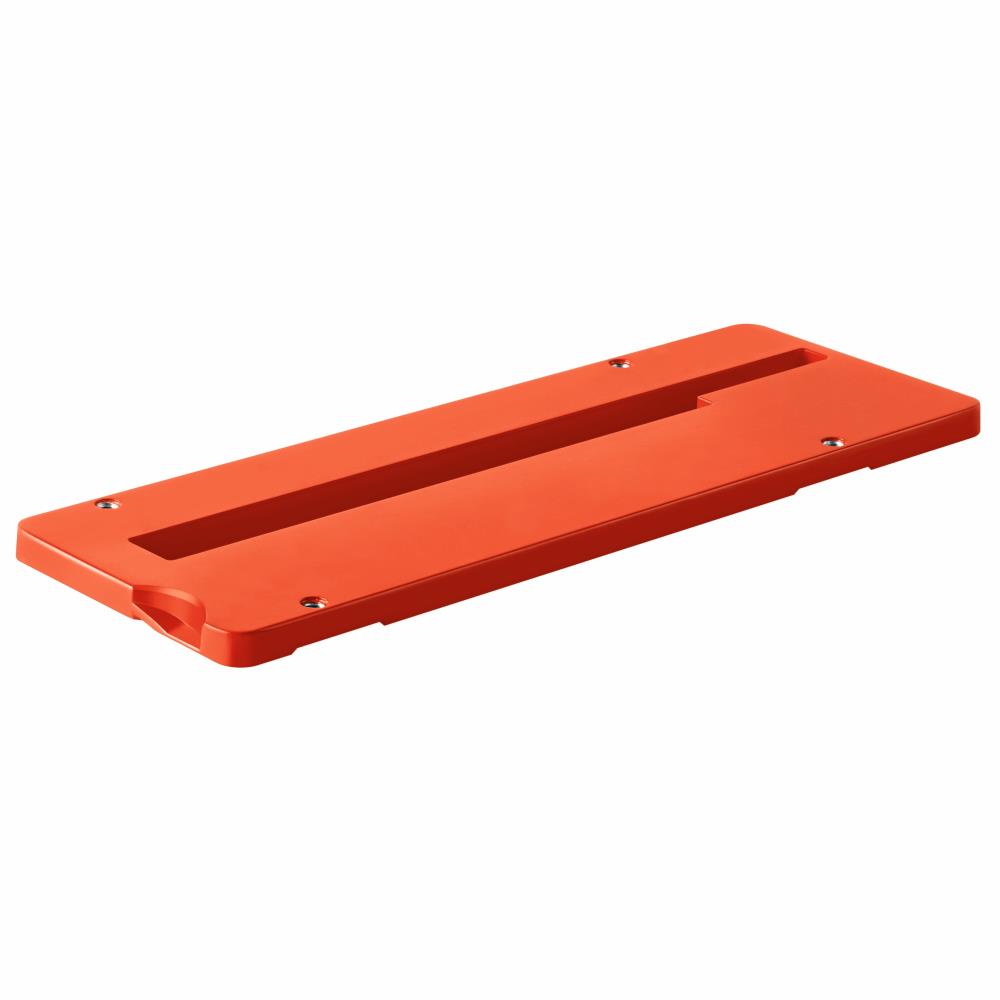
Make another test cut to check your results. Suppose the cut is not clean and free of tear-out. The problem is likely not your Dado set if it’s a good quality, undamaged, and sharp model. Check to make sure that the table saw miter slots. Fences are aligned perfectly parallel with each other. If you’re still getting a bit of tear-out, add a zero table saw throat insert. These surround the blade with a wood surface that supports the fibers at the edges of the Dado. You can make your own zero-clearance inserts from plywood or buy metal ones with replaceable wood inserts. |
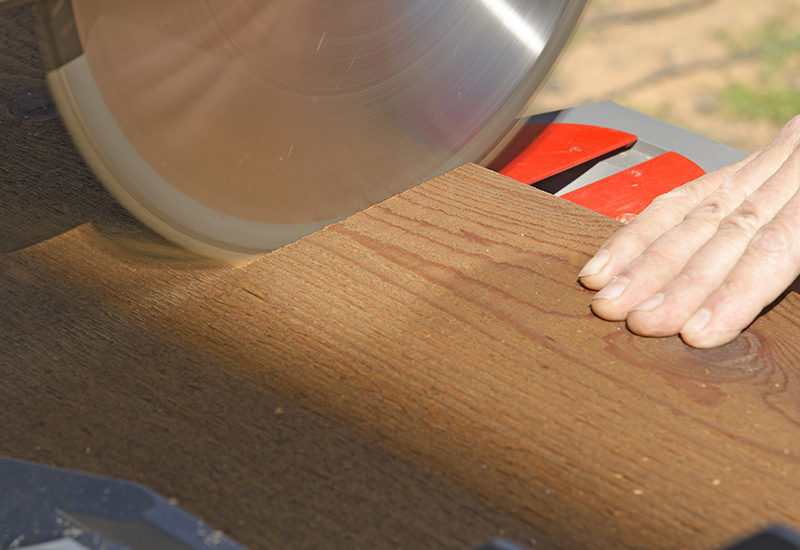
When ready to cut the Dado in your good stock, place a backer board between the miter gauge and the workpiece to prevent tear-out. When cutting the Dado, feed the workpiece slowly and steadily over the blades. You are removing a lot of wood, making your saw work harder and giving you more resistance as you push through the cut.