The dovetail joint is the most robust way to join two pieces of wood at a right angle. We often use dovetail joints while making cabinets, drawers, and other furniture. They are one of the most attractive joining methods and one of the more complex. Today, we will describe how to cut a dovetail joint by hand and with the help of modern power tools.
What is a Dovetail Joint?
The dovetail joint gives corners a much more muscular tensile strength using a series of trapezoidal-shaped tails and pins that fit together much like a jigsaw puzzle. The tensile strength provided by the dovetail joint improves the quality of the piece of furniture or structure immensely. The angle of the pins and tails are much more effective at delivering strength than a series of nails or screws. Add wood glue, and you will have a solid and reliable joint.
To fully explain how to cut a dovetail joint, we need first to describe the various parts of the joint. The corners of any structure, whether furniture or a building, must be strong enough to help support the structure. A few nails or screws will hold a corner for a while, but they lack tensile strength. The slope angle used for the tails and pins depends on the type of wood used. We use a slope of 1:6 for softwoods and a 1:8 slope for hardwoods. We often use a slope of 1:7 if 1:6 or 1:8 is inappropriate.
How to Cut the Joint by Hand
Cutting a dovetail joint by hand requires a lot of patience. One mistake can ruin the entire joint. Here is what you will need for cutting a dovetail joint by hand:
- Wood blocks or lengths of wood are about three-fourths inch thick by three inches wide by five inches long.
- A pencil is needed to mark each piece of wood as needed.
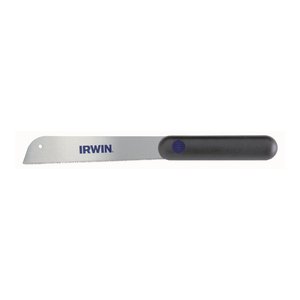
- A backsaw.
- A coping saw.
- Two Chisels in three-fourths inch and one-half inch sizes.
- A mallet.
Make sure all your tools are sharp and in proper working order. Lubricate or wax anything that needs it before you start to have the smoothest dovetail joint possible.
- Pencil the thickness of the wood on all four sides. You will not need a marking gauge; hold one board tight against the other and make the marks.
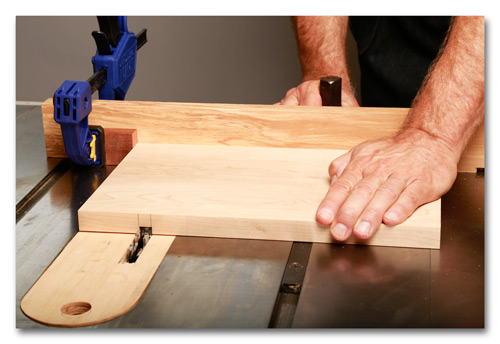
- Set the angle and cut to the line using the backsaw.
- Cut a mirror angle on the other side of the board using the backsaw.
- Turn the piece of wood so you can use the backsaw to remove the waste from the sides, effectively creating the tail.
- Use a one-half-inch chisel to square up the cuts.
- Transfer the layout of the tail to the second board using a pencil. Hold the cut board tightly against the uncut board and trace the outline of the tail.
- Cut the center piece out to create the pin where the tail will be situated.
- Use the coping saw to remove the waste and create a smooth cut.
- Use the chisels to chip away excess wood from the baseline slowly. Angle the chisels as needed to prevent gaps in the dovetail.
- Place the tail into the pin and hope for the best.

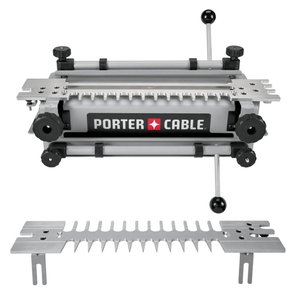
While creating something entirely with our hands is possible, modern machinery like the jig and router make it much more manageable. The jig makes cutting both the tail and the pin much more straightforward because the same settings can be used repeatedly.
Types
The dovetail joint is complex and provides as much beauty and finesse as it does tensile strength. Many people paint the tails and pin assorted colors or use other types of stains to create a unique appearance when they are joined.
- Through Dovetail
- Half-Blind Dovetail
- Secret Mitred Dovetail
- Secret Double-Lapped Dovetail
- Sliding Dovetail