I had some leftover White Oak from some Arts and Crafts Dining Chairs I built a little while back, and it was precisely the amount I needed for a pair of Mid-Century Modern nightstands. Because most of the stock I purchased for that project was 8/4, I had a lot of dimensioning and resawing to do.
Getting Started on the Body of the Night Stand
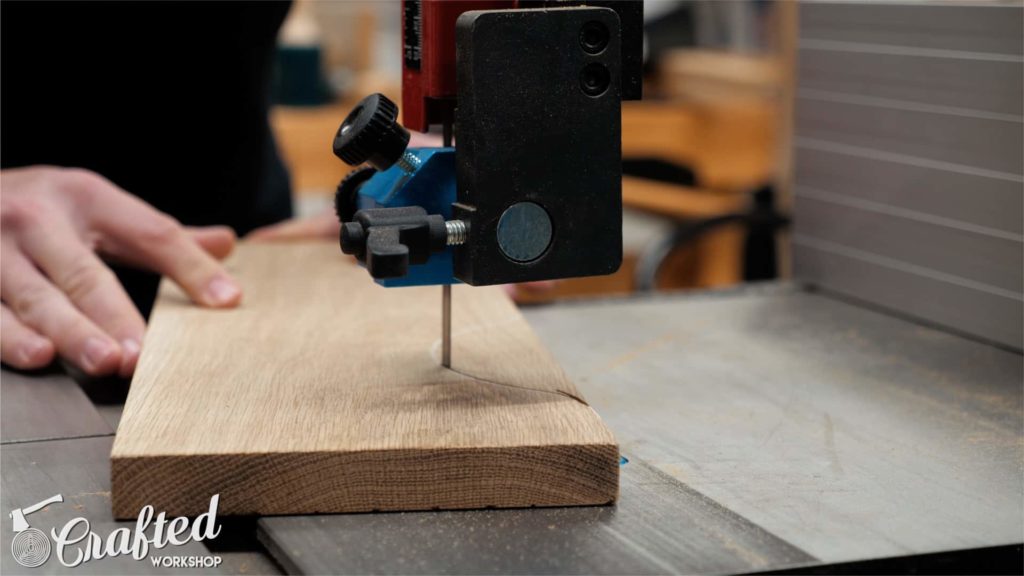
I set my table saw blade to 45 degrees and cut a beveled edge on each panel, riding the square edge against the fence. At this point, I wanted to trim as little off the panels as possible, as I wanted plenty of room for final trimming. With a 45-degree angle cut on one end of each panel, I set my fence to nineteen inches to trim my top and bottom panels to the final length. I cut all four top and bottom panels for my pair of nightstands while the fence was set to ensure the measurement was the same on each panel.
After trimming the top and bottom panels to length, I repeated the same process for the sides, setting the fence to thirteen ¼.” The last cut to make on the panels was a 45-degree angle on the front edge of all the panels. This is optional, but I think the angle on the front edge is one of these mid-century modern nightstands’ most significant design elements.
Assembling the Night Stand
Step 1:
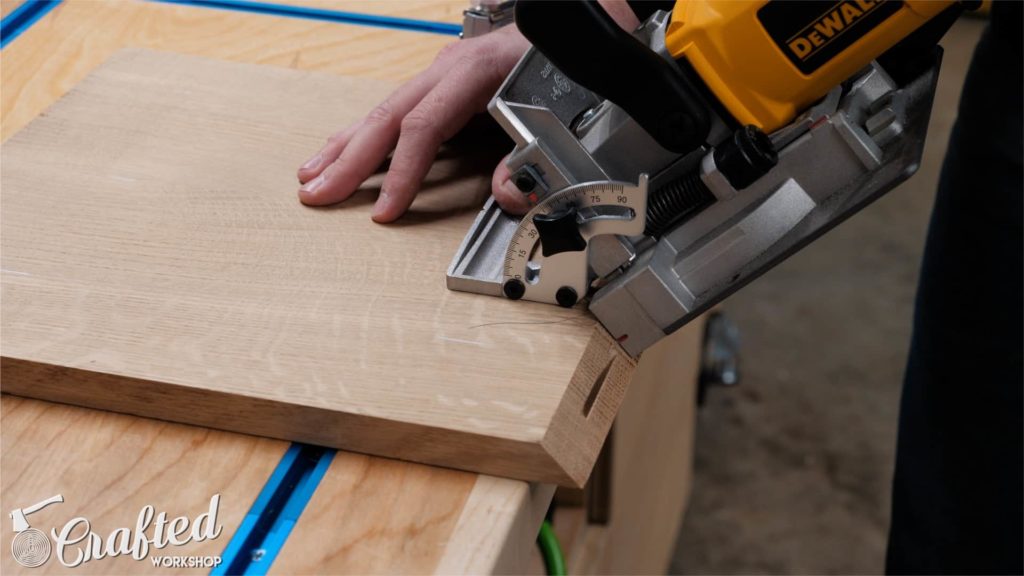
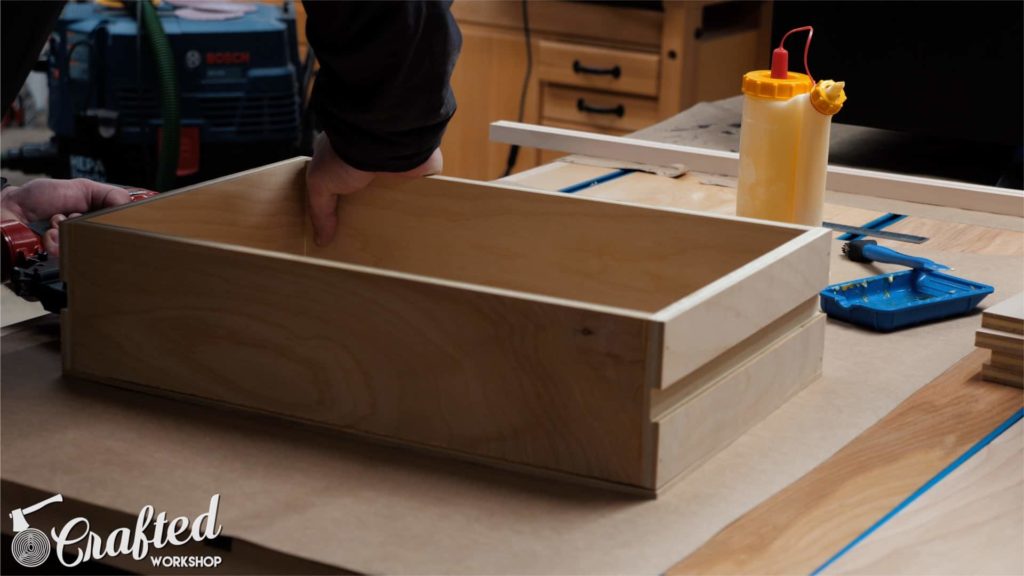
To help with assembly, I decided to add some biscuits in the corners of the nightstand carcass. Biscuits are extremely helpful when it comes to aligning the corners of a beveled cabinet like this, and they also add a good bit of strength to the mitered corners. After cutting the biscuit slots, I assembled the carcass, which went smoothly. I like to use strap clamps when assembling mitered carcasses as they help hold things in place while I add clamps. One of the panels bowed slightly overnight, and the straps helped persuade the panels to lie flat during the glue-up.
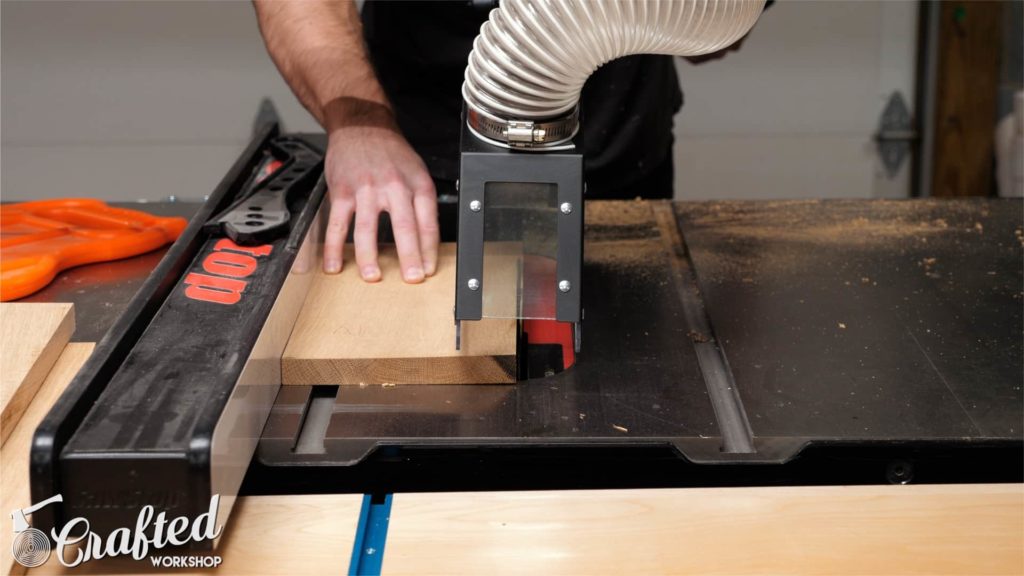
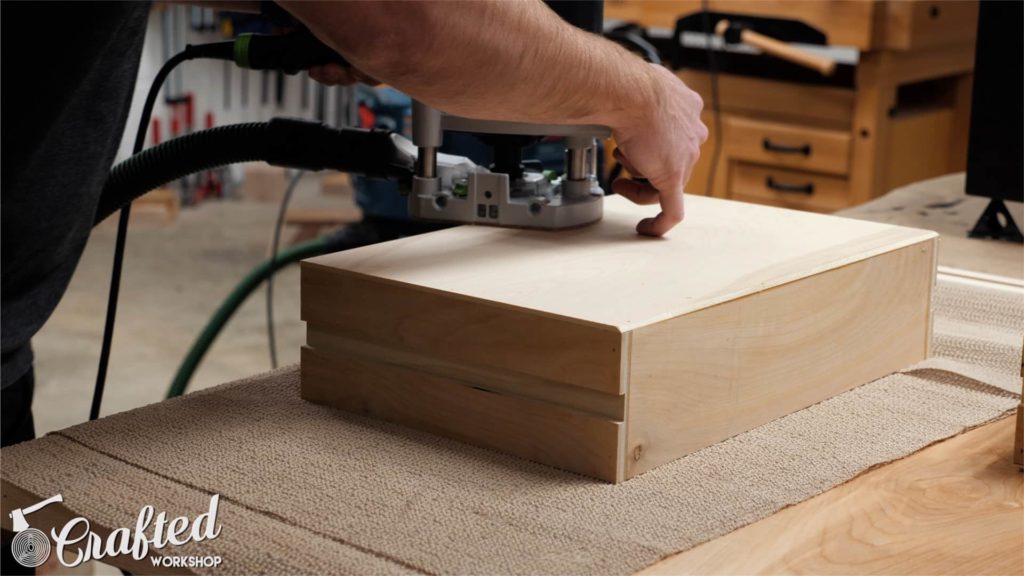
Once the glue dried, I removed the clamps, sanded off any glue squeezed out, and then moved over to the router table to cut the rabbit into the back of the cabinet to accept the back panel. I used a ½” rabbeting bit and should have made this cut in two passes because Oak is highly stringy and loves to tear out in huge chunks, but luckily, I did not have any significant issues.
Step 2:
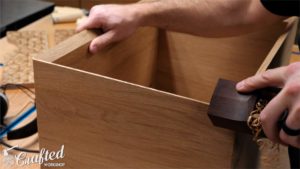
Next, I cut the back panels to size from some scraps of ¼” plywood on hand, then rounded the corners with my random orbit sander to fit into the rabbit. I could have used a chisel to square up the corners of the cabinet, but sanding the back is usually faster. I used a little glue and a few brad nails to attach the back panel to the nightstand.
Once the back panel dried, I chamfered the sides and back edges using my router. Since the front edges are beveled, the chamfer bits bearing didn’t have anything to ride up against, so I pulled out my trusty block plane to chamfer those edges. Before chamfering, I recommend doing this because the front edges were highly fragile Also, chamfering edges with a block plane is one of woodworking’s greatest pleasures.
Time to Start the Drawers
Step 3:
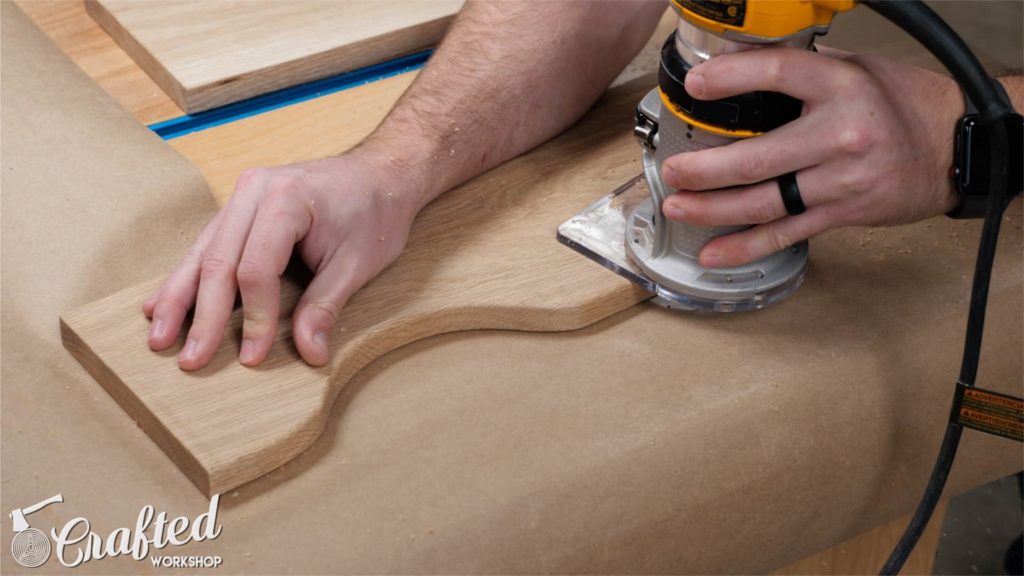
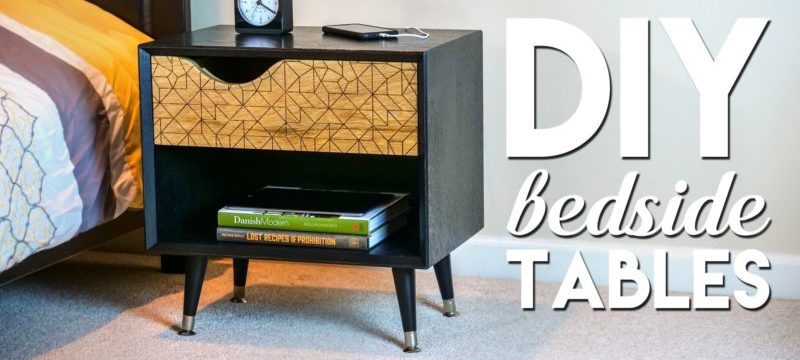
With the cabinets done, it was time to move on to the drawers. For the drawer fronts, I wanted to give them an exciting aesthetic, so after cutting the drawer fronts to size, I drew a little curve that would serve as the drawer pull. I cut out the curve on the bandsaw, and although a jigsaw would work fine if you do not have one, I refined the curve using my oscillating belt sander.
Next, I traced the curve onto the second drawer front, cut away the excess at the bandsaw, making sure to stay proud of my line, and then moved over to the router table. I attached the drawer front with the refined curve to the other drawer front with double-sided tape, then used a flush trim bit to match the second drawer front. Next, I rounded over the top edges of the drawer front, where your hands will meet it, and then moved to the laser cutter.
Step 4:
I use Full Spectrum Muse, their new hobby laser. Its camera inside allows you to place your artwork on the piece of laser engraving with reasonable accuracy. I found this geometric pattern on Google Images and dragged and dropped it into RetinaEngrave, Full Spectrum’s software. After getting my settings dialed in, I sent the job to the laser, and it got to engraving. This engraving process took about 30 minutes, and I ensured the artwork bled over the edges so it would be an edge-to-edge design. This step is entirely optional. Since the laser only cuts in a small focus area, it will not damage the bed of the laser cutter, even though it cuts over the edges. While the laser cutter worked, I went to work on the drawers.
Drawer Specifications
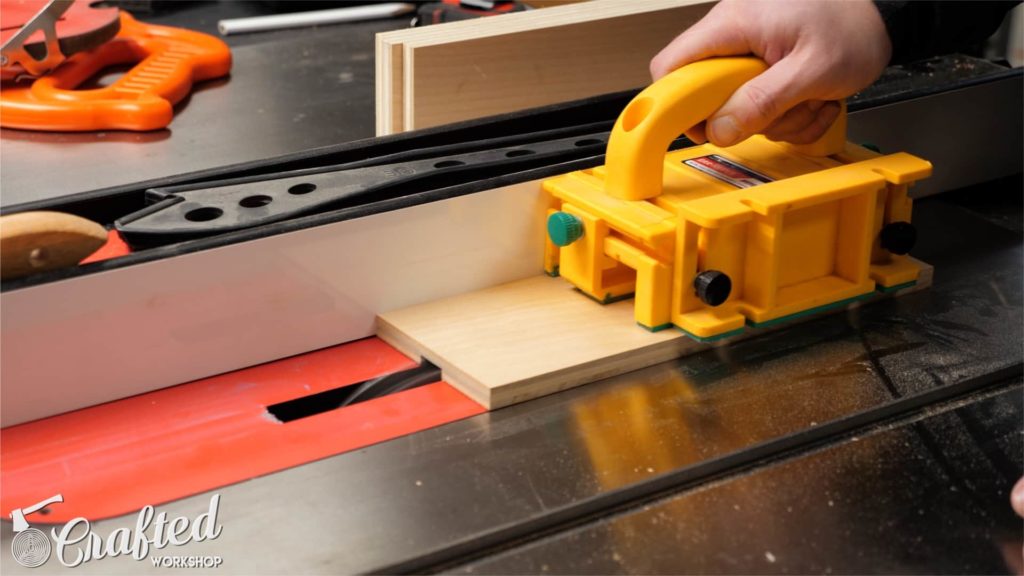
The drawer sides are ½” plywood, and the bottoms are ¼.” Using a table saw, I cut the sides, fronts, and backs to sizes. I chose hardwood drawer slides since these drawers will not bear much weight. To fit these, I used a dado stack to cut a ¾” wide groove into the drawer sides. The groove is ¼” deep, but the depth can vary based on your slides. Next, I used the table and miter saws to cut the drawer bottoms to size. I used one” Brad nails and glue for assembly—keeping it simple to see how they hold up without additional fasteners. To hide the drawer bottoms from view, I chamfered the edges to align with the bottom of the drawer sides. This quick step significantly improves the appearance of the drawers.
Drawer Recommendations
Something I should have done before assembly was to cut a portion of the drawer front so that the interior drawer box would be hidden once the drawer front was attached. I traced the shape of the drawer front onto the box, cut it out with a jigsaw, and sanded it smoothly. The last piece for the nightstands was the hardwood drawer slides, which I cut from a scrap piece of Hard Maple I had on hand. The slides ended up at ¾” thick by ½” wide.
Drawer Research
Now, you might be asking yourself, what about legs? That is a good question. I had initially intended to turn some tapered legs on the lathe using some more leftover Oak I had. Overall, I spent a few hours last week getting my lathe all setup, cutting up some leg blanks, and then getting two out of the eight legs turned. I enjoy turning, but I do not do the same thing repeatedly. It is tedious and honestly stressful. After finishing the second leg, I hopped online quickly to see how much a similar leg would cost. $2.50. Yes, two dollars and fifty cents, including the hardware to attach the legs to the brackets I am using and some metal feet on the bottoms of the legs. I scrapped the idea of turning and bought eight legs.
Applying the Final Finish
Step 5:
Anyway, back to the project, I decided to ebonize the Oak and, after some research, found that some people were using Indian ink for this, and I love how it came out. This bottle cost around $13, and I did not use half of it for this project. I just wiped on a heavy coat using a shop towel and let it dry overnight. The ink dried exceptionally quickly; it is alcohol-based and has shellac. A second coat would not hurt, especially on wood with an open-grain pattern like Oak, but it is unnecessary.
Step 6:
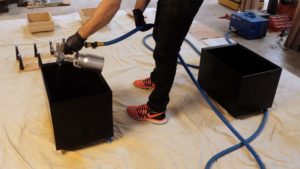
For the finish, I sprayed on a few coats of water-based polyurethane using my Q3 Platinum HVLP system by Fuji Spray. If you have watched many of my videos, I love spraying on finishes, and the Q3 is an outstanding HVLP system. The sheer adjustability in the air flow, fan shape, and amount of material passing through the gun allows you to dial in your finishing, and adjusting when finishing various parts of a project is super simple. After the finish dried, it was time to assemble the nightstands.
Final Assembly of the Legs and the Drawer
Step 7:
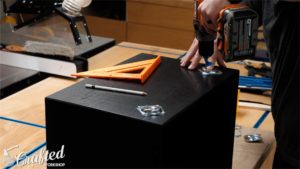
First, I installed the legs. I just needed to add these brackets I picked up online. I wanted my legs to splay both towards the sides as well as towards the front and back of the nightstand. Moreover, I needed to mount the brackets at a 45-degree angle to the corners. I marked a center line using a speed square and measured it four inches, then centered the bracket and added the included screws.
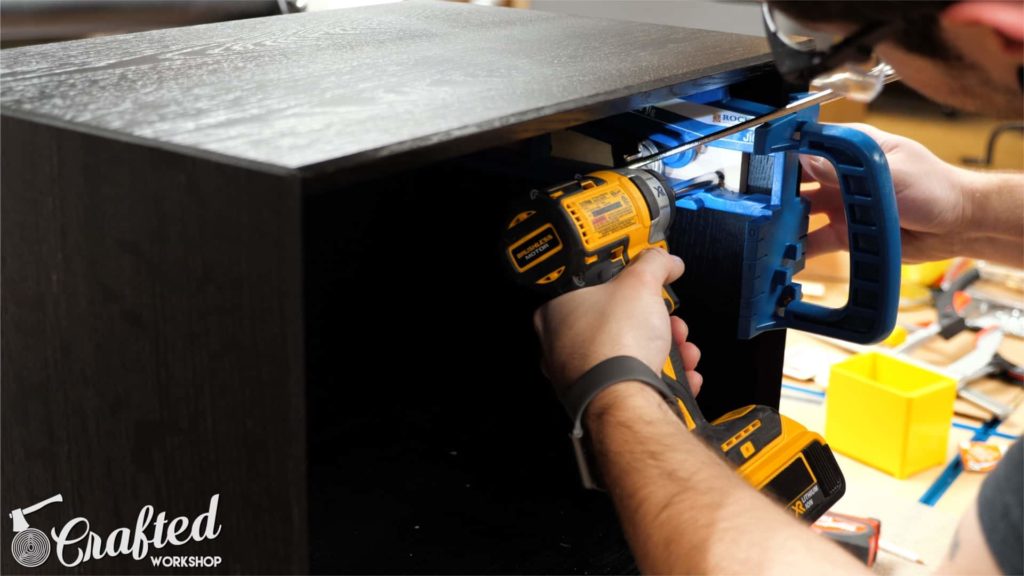
With the legs installed, I moved on to installing the drawer slides onto the sides of the cabinet using a few one-screws. I made sure to pre-drill and countersink the holes so that the heads of the screws were below the surface of the slides. The next step involved adding some paste wax to the drawer slides to make the drawers slide a little easier. I applied the wax periodically to keep the drawers riding smoothly. Next, I added the drawer fronts to the drawer boxes, using the playing card trick to space the drawer fronts evenly. The little handle cutout allowed me to get a clamp onto the drawer front, and then I added a few screws from inside the drawer. Finally, the nightstands were done!


Johnny Brooke of Crafted Workshop helped create this blog post and video with our Acme Tools team. For more information on Johnny or Crafted Workshop, check out more of his work on this Live Edge River Coffee Table, Walnut Conference Table, or his website at Crafted Workshop.
Bio: Johnny Brooke & Crafted Workshop
“Johnny started Crafted Workshop in May 2016 and has built countless projects since then. He loves making things with his hands, but when he is not in the shop, Johnny also loves crafting beer, playing music, and hanging out with his wife. Johnny took Crafted Workshop full-time in July 2016 and has not looked back since!”