
Are you looking to upgrade your home or office network infrastructure for improved speed and performance? Setting up a 4×2 efficiency hub is a fantastic solution. This guide will help you install a 4×2 hub efficiently by providing step-by-step instructions and listing the required tools and materials. So, let’s dive in!
Tools Needed:
Screwdriver Set: A good screwdriver set is essential for any installation project. Make sure you have a variety of screwdrivers to fit different types and sizes of screws. That way, you can perform a 4×2 efficiency hub wiring and setup.
Pliers: Pliers will come in handy for gripping and manipulating wires during installation. Get a quality set of pliers for the best results.
Crimping Tool: A crimping tool strips and terminates ethernet cables. Invest in a good quality crimping tool to ensure clean and secure connections for efficient hub wiring and setup.
Cable Tester: It is crucial to test the Ethernet cables for continuity and proper connectivity before completing the installation. A Klein Tools cable tester will help you identify any issues and troubleshoot them effectively.
Labeling Machine: You can avoid future confusion by labeling your cables by using a labeling machine. Identifying cable connections makes it easier later on for you or anyone else.
Drill and Drill Bits: Depending on the mounting method you choose for your hub, you may need a drill for the installation. Make certain you have proper drill bits for the mounting holes.
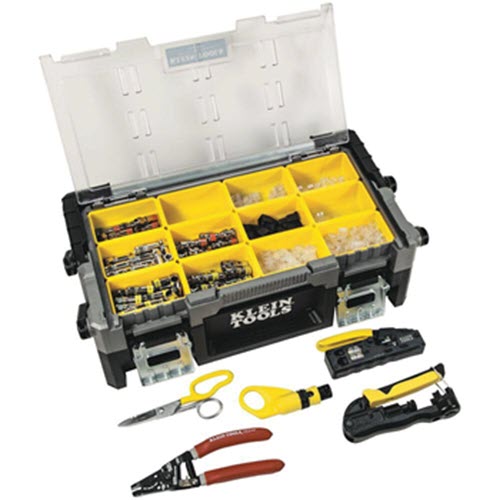
Kits: An easy way to ensure you have all the tools you need, a data or data and coaxial kit from Klein Tools may be a good investment. These kits include all the tools you need to install twisted pair and coax cables, including things like data plugs and connectors as well as strippers, crimpers and cutters.
Materials Needed:
4×2 Hub: The centerpiece of this installation is, of course, the 4×2 hub itself. Choose a hub that suits your requirements and seamlessly fits your network setup.
Ethernet Cables: You will need ethernet cables of suitable length to connect your devices to the hub. It’s a good idea to have some extra cables on hand.
Wall Mounting Brackets: If you decide to mount the hub on a wall, you will need wall mounting brackets. Opt for sturdy brackets that can support the weight of the hub.
Mounting Screws: Depending on the specific hub and wall mounting brackets you choose, you will need the right size screws to secure the brackets and the hub to the wall.
Patch Panel (Optional): If you plan to connect multiple devices to the hub, using a patch panel is recommended. It will provide a neat and organized solution for managing your Ethernet connections.
Power Supply: Most hubs require a power supply to operate. Check the hub’s specifications to ensure you have the correct power supply.
Ethernet Connectors and Boots: If you need to create custom-length ethernet cables or repair existing ones, you’ll need connectors and boots to terminate the cables cleanly.
Now that we have covered the tools and materials for installing a 4×2 hub of efficiency, let’s briefly overview the installation process.
Installation Process:
- Choose the ideal location for your hub, considering factors such as accessibility, cable routing, and heat dissipation.
- If wall mounting, use the drill and drill bits to install the wall mounting brackets securely.
- Connect the hub to the power supply, ensuring it is receiving power.
- Connect one end of an Ethernet cable to a port on the hub and the other end to a device you want to connect to the network.
- Repeat step 4 for the remaining devices you want to connect to the hub.
- Optionally, if using a patch panel, connect one end of an Ethernet cable to a port on the hub and the other end to a corresponding patch panel port.
- Repeat step 6 for the remaining devices you want to connect using the patch panel.
- Use the cable tester to verify the continuity and proper connectivity of each Ethernet cable.
- Label the cables using the labeling machine for future reference.
Congratulations! You have successfully installed a 4×2 hub of efficiency.
For efficiency hub maintenance best practices, refer to the user manual for additional instructions or specifications specific to your model.
In conclusion, installing a 4×2 hub of efficiency can enhance your network performance, and with the right tools and materials, the installation process becomes a breeze. So, equip yourself with the necessary tools and materials mentioned in this blog, follow the provided installation process, and enjoy your network’s improved speed and efficiency.