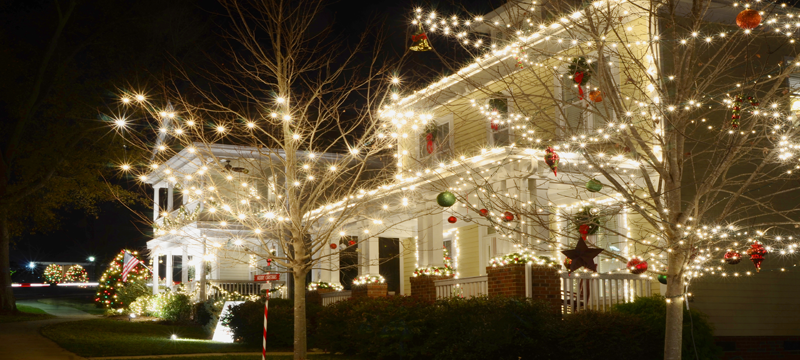
Brighten up this Christmas season by adding some festive lights to the inside and outside of your home. If it is your first time decorating or you want to revamp your current display, this guide will help you pick and hang your lights like a pro this year.
Pickup Christmas Lights
Whether you decorate inside or out, lighting options are abundant, from LED to icicle lights to large bulb lights like C9 Christmas lights, and dozens of choices in between. Before going out and buying the first lights that catch your eye, figure out your decorating plan. Determine whether you want white, colored, or multicolored lights. You would also like to decide the shape and style of your bulb.
What You’ll Need
- Ladder
- Tape measure
- Paper
- Lights of your choosing
- Light clips
- Zip ties
Make a Diagram
While decorating for the holiday season can be exciting, planning before jumping right in is essential. First, grab your phone or camera and take pictures from the street in front of your house. Viewing your home from the perspective of a passerby can help you plan your design. From there, grab a pencil and paper to make a diagram of where you would like lights to go and how many feet of lights you will need for each location.
Measure Twice, Buy Once
Before shopping for holiday lights, grab your tape measure and figure out how many feet of lights you will need. Be sure to consider every place you would like to put lights. If you plan on wrapping lights around banisters or columns, use string and wrap it around the path you would like the lights to take, then measure the string. You will also want to measure the distance to the nearest grounded outdoor outlet and plan accordingly.
Time to go Shopping
When purchasing your lights, ensure they are for outdoor use; they can also be for indoor/outdoor use. Make sure they can withstand the various outdoor elements such as extreme temperature, rain, snow, and heat; this will depend on the climate where you live.
After deciding which lights you’d like and where they’re going, you’ll want to grab some zip ties and light clips, like the 3M Command Small Clear Outdoor Rope Light Clip. Unlike fasteners such as nails and staples, light clips help prevent damage to your home. Depending on where you will be hanging them, there are diverse types of light clips, i.e., gutter clips, all-in-one, shingle clips, etc., so you will need to figure out how you will want to hang your lights.
Test your Lights
Before you start hanging your lights, you will want to ensure they all work – even if they are brand new. You will also want to check all your lights to ensure no missing or broken bulbs. If you see anything that needs replacing, your lights usually come with replacement bulbs.
Hanging Your Lights
Step 1: Attach the Clips to the Strings
Clip the plastic light clips onto the light strands. Follow the directions on the clip package. You want to space the clips 6 to 12 inches apart, depending on your plan.
Step 2: Connect the Clips to Your Home
Grab your ladder and attach the clips to the gutters, siding, railings, shingles, or wherever you need to bring your design to fruition. Take advantage of the picture you took and the diagram you drew to avoid needing to climb the ladder continuously.
Step 3: ZipTie Where Necessary
The lights can droop even with only a few inches of space between the clips. If your design has straight lines, or you do not like a look with sagging strings, you can zip-tie between the clips to achieve the desired look. Zip ties can also help keep the lights in place in extreme weather, such as fierce winds or heavy snowfall. Zip ties are also significant for areas where the clips will not work, such as around decking.
Step 4: Turn the Lights On
Plug your lights into your outdoor extension cord. Then, plug the extension cord into the outdoor outlet. If possible, plug them into a GFCI-protected outlet to avoid shock or short-circuiting.
Once the lights are turned on, it would be an enjoyable time to check your finished design and decide if any adjustments need to be made.
Christmas Light FAQs
While LED and incandescent lights come in assorted colors and bulb shapes, there are a few differences. LED lights typically use less energy and are longer lasting. They burn at a lower temperature and come in both cool- and warm-glow varieties. Incandescent lights are often less expensive than LED and have a warm glow.
The amount of lights needed will depend on the desired outcome of your design, how many feet of lights you will need, and where you intend to decorate. It is essential not to skip the design/measuring steps in the guide.
Yes! They make light clips that connect to the singles of your home, or you can use nails on the house’s eaves.
Lights that are left on for too long can become a fire hazard. You will want to turn them off anytime you are not home. Lights can be left on all night if you are home. However, some say the rule is to turn them off before midnight.
Connecting your lights to a timer is unnecessary but can decrease energy usage and save money. They are also great if you regularly forget to shut your lights off or turn them on.


