
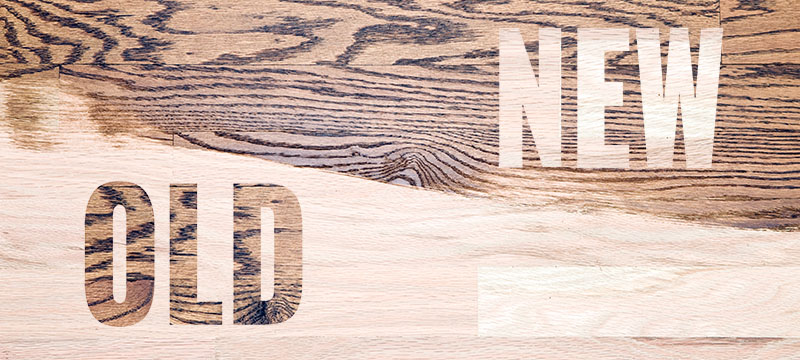
Hardwood floors will ultimately need refinishing with the wear and tear of everyday use. Before you decide to call a refinishing service, consider learning how to refinish a hardwood floor effectively on your own and save hundreds.
On average, hiring someone to refinish your hardwood floors can cost upwards of $2,500, averaging out to $3-$8 per square foot. Refinishing your floors yourself is estimated to cost $500-$1000, saving you a lot more money and rewarding you with the proper skills and knowledge for the future. Following the steps below, you can learn to efficiently refinish your hardwood floors, making them look better than ever.
Tools and Materials Needed
Before you begin sanding and refinishing your floors, make sure you have the proper equipment:
- Dust mask
- Ear protection
- Safety glasses
- Safety gloves
- Plastic sheets
- Vacuum
- Pry bar
- Trowel filler
- Putty knife
- Drum sander or belt sander
- Hand sander
- 40, 60, 80, & 120-grit sandpaper
- Floor buffer
- Oil-base stain (color of your choice)
- Staining sponge or bristle brush
- Sealer
- Sponge roller
How to Sand & Stain Wood Floors
1. Prepare Your Home for Refinishing

Before refinishing your wood floors, ensure the area is thoroughly cleaned. Take out any furniture or rugs in the room and use a pry bar to take off any shoe or base moldings. Next, you will want to use your plastic sheets to seal any vents, lights, doorways, windows, and electrical boxes to prevent them from being exposed to dust.
Now that you’re about to begin, make sure to put on your safety equipment, such as dust masks, earplugs, and eye protection, to avoid any possible injuries or exposure to debris.
2. Patch Holes and Cracks
Once you have cleaned everything up, check for any holes or cracks in the floor. Use a trowel filler to repair damaged areas and spread it out using a putty knife to cover the holes and cracks. Now that the filler has been applied, you must let it fully dry before moving on to the next step.
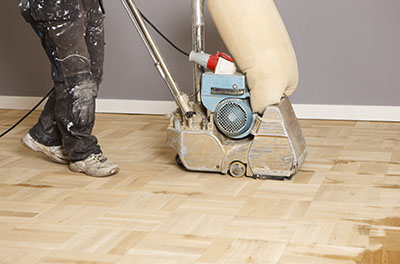
3. Rough Sand the Floor
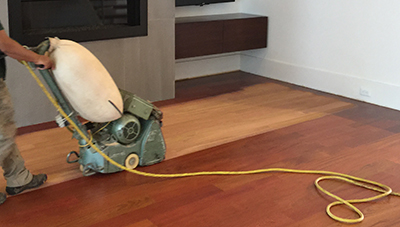
Now that everything has been cleaned and patched up, grab a drum sander or a belt sander. You will also use a hand sander for sanding up against the wall for the room’s edges. You will then use the drum or belt sander along the length of the boards, moving back and forth at a steady pace. When starting a new strip, overlap the previous strip by at least a third of the belt width or one board length to remove any scratches. The sandpaper is usually good for about 20 square feet, so remember to check it to see if it needs a replacement frequently.
You will begin with the 40-grit sandpaper on your drum sander on the entire floor; this paper is very coarse and will remove any scratches. Once you’ve finished with this grit, make sure to vacuum the floor with a brush attachment before moving on. Then you will continue this process with the 60-grit, then the 80, and lastly, the 120-grit if the floor is still feeling a bit rough. Using each type of sandpaper, you will slowly see a smoother surface.
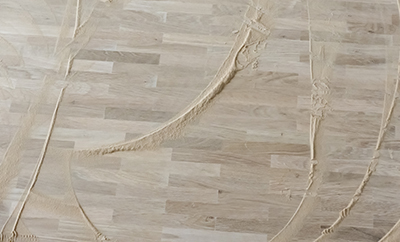
4. Screen Sand With a Floor Buffer
After sanding, you will now use a floor buffer. A floor buffer with a fine-grit screening pad will help level minor unevenness and help achieve a more professional, smooth look. With a 120-grit sanding screen, you will move the buffer back and forth along each board.
5. Preparing to Stain (Optional)
If you plan to stain your hardwood floor, another necessary step is to clean the area again with a vacuum to prepare your floor for the best finish. Errant dust and sand may still be there, and leaving it will cause imperfections to your staining.
Next, wipe down your walls to avoid any debris from falling. Once this step is complete, wait about 24 hours for the floor to be fully dry before you begin to stain.
6. Stain the Floor (Optional)
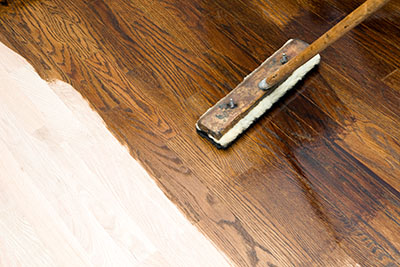
If you’re looking to change the color of the wood, then follow the steps below on how to apply the stain properly. If not, skip to the next step. You will also want to ensure that the area is ventilated while performing this step, as the stain can release harmful vapors.
First, pick a color of an oil-based stain of your choice. Then grab a staining sponge or a bristle brush, dip it into the stain, and squeeze out the extra liquid. Your starting point should be the furthest corner away from the exit, so you won’t step on the stain as you work your way towards it. When applying the stain, make sure to brush against the direction of the grain to help fill in deeper pores and avoid letting any extra stain dry on the floor by wiping it away. Once you have stained the floor, let it dry for 24 hours. After it has dried, you may have to do a second coat (or more) to have the right color.
7. Apply the Wood Finish
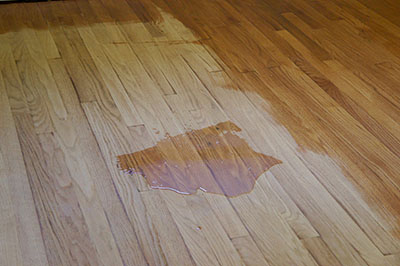
The last step for your new hardwood floor is applying the sealer. Doing so will protect your floor and make it more durable. It will also add a nice gloss to your hardwood floor.
One of the more commonly used types is polyurethane. Polyurethane has the option of water-based or oil-based. Since it lays on the top of the hardwood, it provides excellent protection from water and other possible impact damages.
Once again, before you start, make sure that your room is ventilated and that the floor is clean. Then, grab your sealer and begin applying it using a sponge roller along the grain and then across it, overlapping each previous pass. You may want to use your bristle brush along the edges for the best finish. Once you’re done with that, you’ll have to wait about 3 hours before applying another coat by repeating the same steps.
Now that you’ve finished your new hardwood floor, it’s important to wait about one day before walking on the floor and three days before putting your furniture back.
Other D.I.Y. Flooring Guides
Need to get rid of your carpet before working on your hardwood floors? Check out our previous blog on How to Remove Carpet Safely to get your carpet removed quickly and efficiently.


One Comment
Albat
November 5, 2022 at 7:51 amThanks for share…….