

Popcorn is not harmful unless it is on your ceiling. If you are ready to say goodbye to a dated popcorn ceiling, there are three ways to get the job done. You can scrape the popcorn away, cover the ceiling with a new layer of drywall, or use a skim coat with plaster to create a new texture. Unless there is a lot of damage to the ceiling, most DIYers scrape the popcorn off. Scraping your ceiling is messy, but it is also the least expensive and can be completed by one person quickly. Here is a step-by-step guide to removing the popcorn ceiling.
How To Remove Popcorn Ceiling
Check for Asbestos
If the popcorn was added before 1979, get it tested for asbestos. You can either use a home-testing kit or have a professional test. If asbestos is in your ceiling, the project is best completed by a professional trained and certified in asbestos abatement.
Prepare your room’s walls and floor.
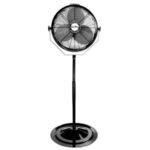
Remove the furniture. Protect the walls and floor by hanging plastic sheets from the crown molding and placing a waterproof drop cloth on the floor. Put a fan in the window to add good ventilation. This will keep the humidity lower and provide you with some relief while working in the room.
Remove all light fixtures and tape off electrical switches and outlets.
Be sure to turn off the power at the fuse box before removing the fixtures. Pay close attention to disassembling any light fixtures and label wire connections. This will make putting them back up easier so that the correct wires get connected. Another clever idea is to cover electrical switches and outlets with plastic. You will be using water in the area and do not want to accidentally get any water in the outlets.
Protect yourself with safety glasses and a dust mask.
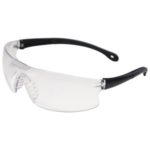
Removing popcorn texture is a dirty job. It is best to leave the protection equipment on throughout the entire process. Safety glasses or goggles are necessary when working above your head; you will always work over your head in this project.
Spray the ceiling with water.
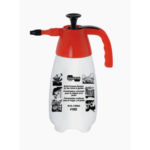
Most people prefer to dampen the ceiling before scraping, making the job go faster. Others prefer to rub it dry as this method is usually much less messy. You may wish to test both ways to see which method you choose. If you decide to spray, use a basic garden sprayer filled with water to wipe down the ceiling. Work in small sections at a time, and do not apply too much water, which could damage the drywall surface. You need to put on enough to dampen the texture and not enough to get the drywall paper wet.
Scrape off the popcorn texture from the ceiling.
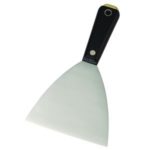
Use a 4-inch utility scraper or a putty knife to scrape away the texture and create a smooth surface. Keep a plastic bag handy while scraping to dispose of any wet debris quickly. Using the dry method, you can use a shop vacuum to collect scraped pieces. This will make the final cleaning of the floor much more accessible.
Wipe with a damp sponge.
Once all the popcorn has been removed, wipe down the entire ceiling with a damp sponge to remove any straggling pieces and to get your ceiling ready for repair and paint.
Repair any damage or scraper marks.
Inspect the ceiling for any imperfections. Spread spackle over any area that needs smoothing. After the spackle dries, sand smooth and wipe again with a damp sponge. Now is the time to be fussy. If you can see an imperfection now, you can see it after primer and paint.
Prime and paint the new ceiling.
Depending on how much damage was caused to the ceiling during texture removal, you may need to prime the new ceiling. Once that is done, one or two coats of excellent flat, matte, or eggshell paint should do the trick.


One Comment
Bruna
September 12, 2022 at 7:57 amThanks for sharing.