Pumpkin Carving Tools
Pumpkin carving is something many people look forward to each October. Carving a pumpkin into a fun, wacky or scary face lets you embrace your creative side. However, doing so with nothing more than a kitchen knife can make this task a tough job. The right Milwaukee® power tools can make it easier. Here are five tools to use that will amp up your pumpkin carving skills and introduce your children to tools in a fun and safe way.
Reciprocating Saws
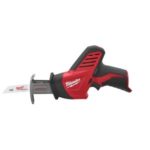 The first step to take when you carve a pumpkin is removing the top and getting all the ‘guts’ out. A reciprocating saw like the Milwaukee 2420-20 Hackzall slices through the tops or bottoms of large, thick pumpkins like butter. A small tip here is to let the saw and the pumpkin work together. Instead of forcing the saw around the cap in a perfect circle, hold the saw steadily and rotate the pumpkin.
Drills and Bits
 Once you’ve removed the seeds and innards of the pumpkin, the next step is creating a one-of-a-kind design. There are many pumpkin carving ideas available in books and online that will help. Once you have an idea of what you want, draw or trace the pattern onto the pumpkin with a Milwaukee InkZall marker.
For round holes and intricate, interesting patterns, use a drill like the one found in the Milwaukee 2407-22 drill kit, along with spade bits and hole saw bits. Hole saw bits and steel Hawg cutters cut through a pumpkin quickly, creating perfectly round eyes and clean, crisp holes in seconds. These are available in multiple sizes suitable for various design details such as eyes and noses.
Grinders
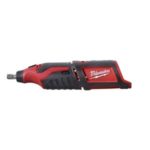 The details are what make or break your finished jack-o-lantern, so when you carve a pumpkin, consider altering its shape and making it unique. For example, an oblong gourd can be squared off to create a Frankenstein head shape. This is easily done with an angle grinder or a rotary tool. The Milwaukee 2460-20 rotary tool is lightweight and only 9.5 inches in length, and features a variable speed design that lets it run between 5,000 and 32,000 rpm. While it can polish and cut, it also works as a grinder. Exhaust ports prevent pumpkin debris from gumming up the tool.
Multi-Tools
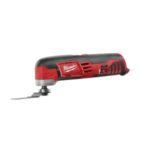 Tools, like the Milwaukee 2426-20 multi-tool, also boast features that allow you to carve details into the pumpkin without actually breaking through to the interior. Its small size and variable speed dial make it easy to choose how deep and at what angle each cut is. This precision can help you create amazing shadow cutouts that don’t penetrate all the way through the flesh of the pumpkin, which lends the finished design an eerie glow.
Lanterns and Stick Lights
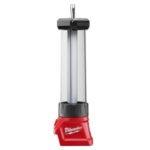 You’ve read the news stories; candles in pumpkins can be hazardous. While the flickering light may look cool, using candles can lead to fires. Since you want your autumn experience to be a fun one, use an M12 Cordless Lantern or Stick Light instead.



One Comment
jagadeesh
May 29, 2017 at 1:37 amThank you I was really want to get some more detail and information about the and Pumpkin carving your blog helped me so much thank you for sharing it.