Floating Shelves
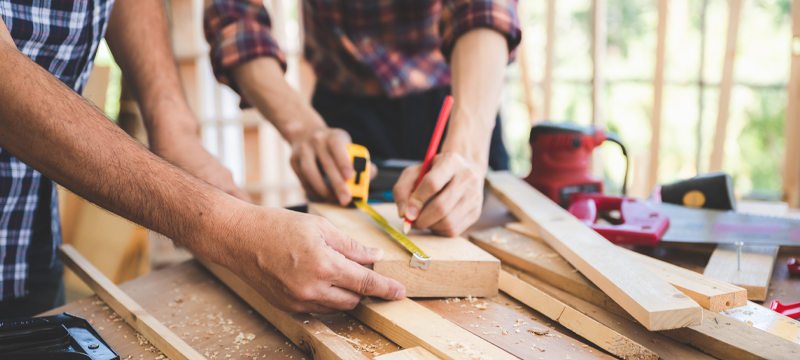
Floating shelves are a great way to save space and keep your home organized. Keep items you use regularly or art on display and out of the way. Use floating shelves where traditional shelves may not be suitable. Not only are floating shelves easy to install, but they’re easy to make!
What you’ll need:
Tools
• Drill
• Drill bits
• Pocket Hole Jig
• Miter Saw
• Pencil
• Stud finder
• Tape measure
• Safety glasses
• Sandpaper
Materials
(2) 1in x 12in x 6ft wood board
(2) 2in x 4in x 8ft wood board
(1) 1in x 6in x 8 ft wood board
• 1-1/4in pocket screws
• 3-1/2in wood screws
Cut List
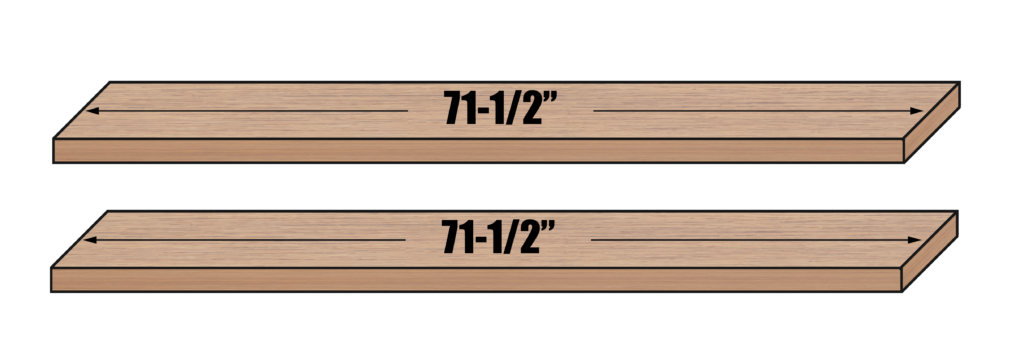
On the 1in x 12in x 6ft boards:
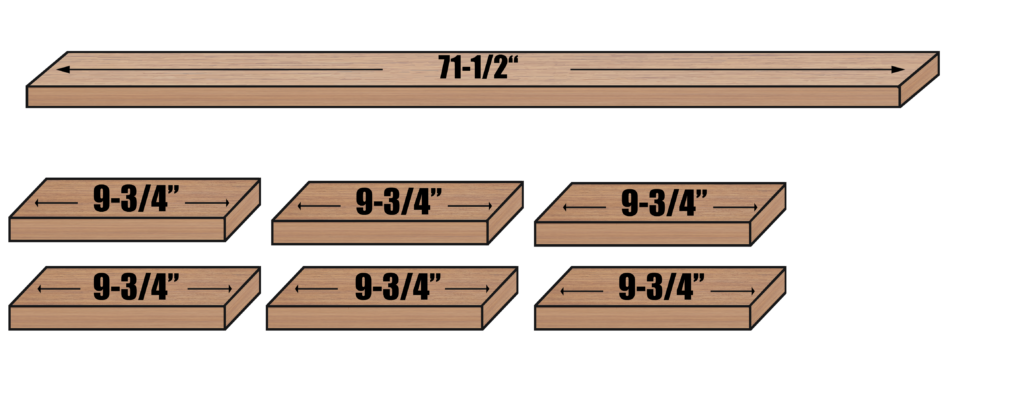
(2) 71-1/2in cuts
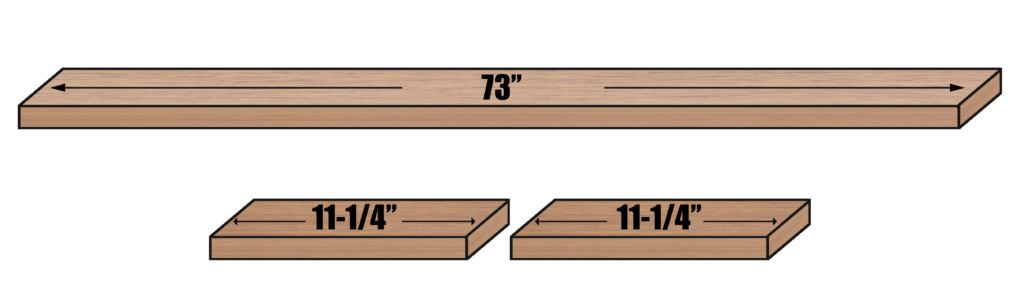
On the 1in x 6in x 8ft board:
(1) 73in cut
(2) 11-1/4in cuts
On the 2in x 4in x 8ft boards:
(1) 71-1/2in cut
(6) 9-3/4in cuts
Instructions
- Use a pencil and tape measure to mark the wood with the measurements under the above cut list.
- Get your PPE on to prevent injury.
- Use a miter saw like the Metabo HPT 10″ Compound Miter Saw or a miter to make the following cuts marked in step 1.
- Sand the edges of the boards until they’re smooth.
- Stain the wood of the box at this time.
- Assemble and Install Frame
- Arrange the 2in x 4in x 9-3/4in wood pieces along the 2in x 4in x 71-1/2in wood cut with 14 inches of space between each piece as shown in figure 1A.
- You can use a carpenter square to ensure your edges are flush and perfectly square.
- Use your Pocket Hole Jig to create two pocket holes as shown in figure 1A.
- Connect the six 2in x 4in x 9-3/4in pieces of wood to the 2in x 4in x 71-1/2in piece using 2-1/2in pocket screws.
- Assemble the Box
- For the box, you’ll need the following wood cuts:
- (2) 1in x 12in x 71-1/2in
- (2) 1in x 6in x 11-1/4 in
- (1) 1in x 6in x 73in
- Drill the pocket holes and as shown in figure 1B.
- Assemble the box using 1-1/4in pocket screws.
- For the box, you’ll need the following wood cuts:
- Complete the Box
- Drill pocket holes as shown in figure 1C.
- Attach the last 1in x 12in x 71-1/2in board to the bottom of the box using 1-1/4″ pocket screws.
- Attach the frame to the wall
- Using a stud finder, find the wall studs.
- If you’re using a wall in which a stud does not make sense to use, be sure to find wall anchors that support the weight of the shelf and items on the shelf.
- Once the studs are found, mark them and hold the frame to the wall and level it.
- Mark the frame and use a small drill bit to predrill a hole on the mark.
- Use an impact driver to drive the screw through the frame and into the studs.
- You’ll be attaching the frame to the wall with the 2in x 4in x 71-1/2in board touching the wall using 3-1/2in wood screws.
- Using a stud finder, find the wall studs.
- Attach the Box to the Frame – figure 1D
- Fit the box over the frame and mark where the screws will be.
- Take the box off the frame and make a small predrilled holes.
- Place the box back over the frame and attach using 1-1/2in wood screws using your impact driver.
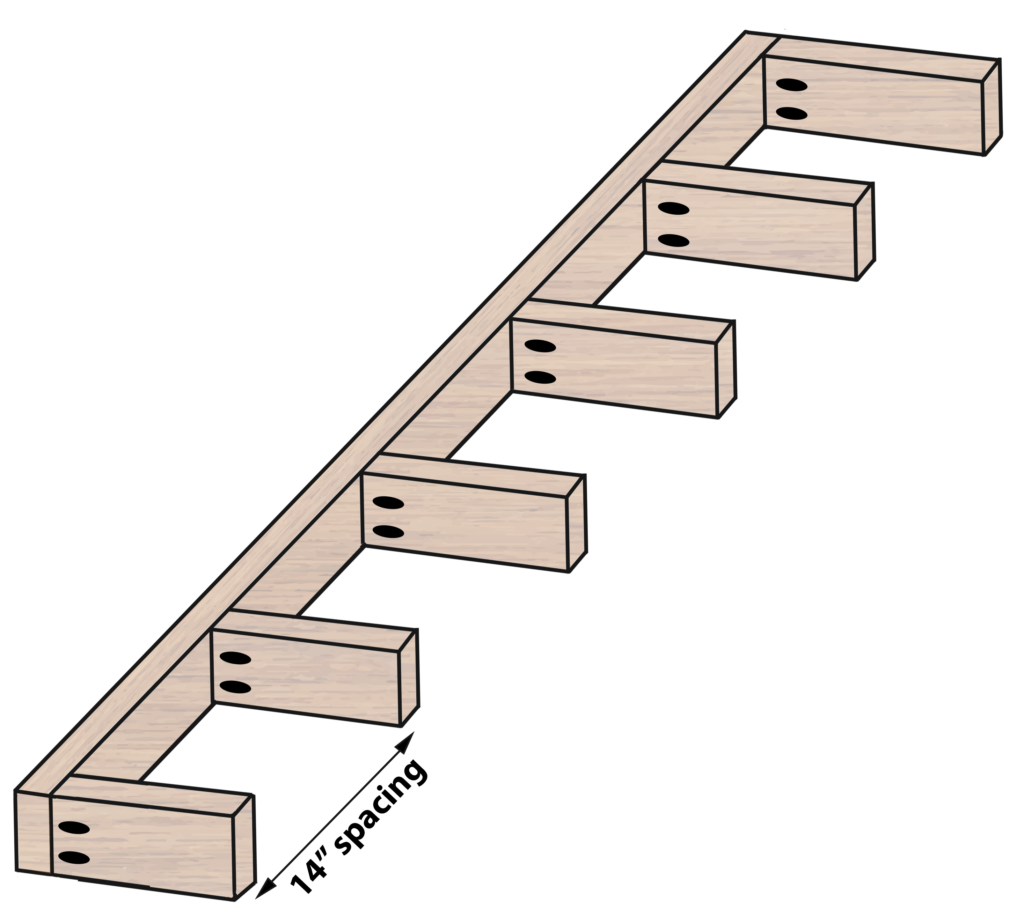
Figure 1A
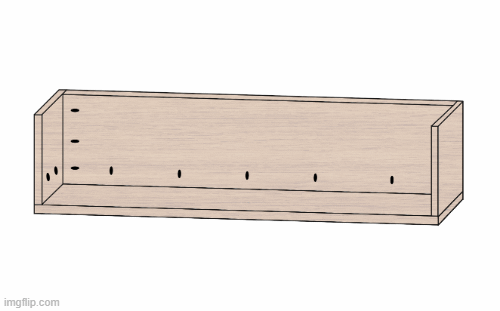
Figure 1B
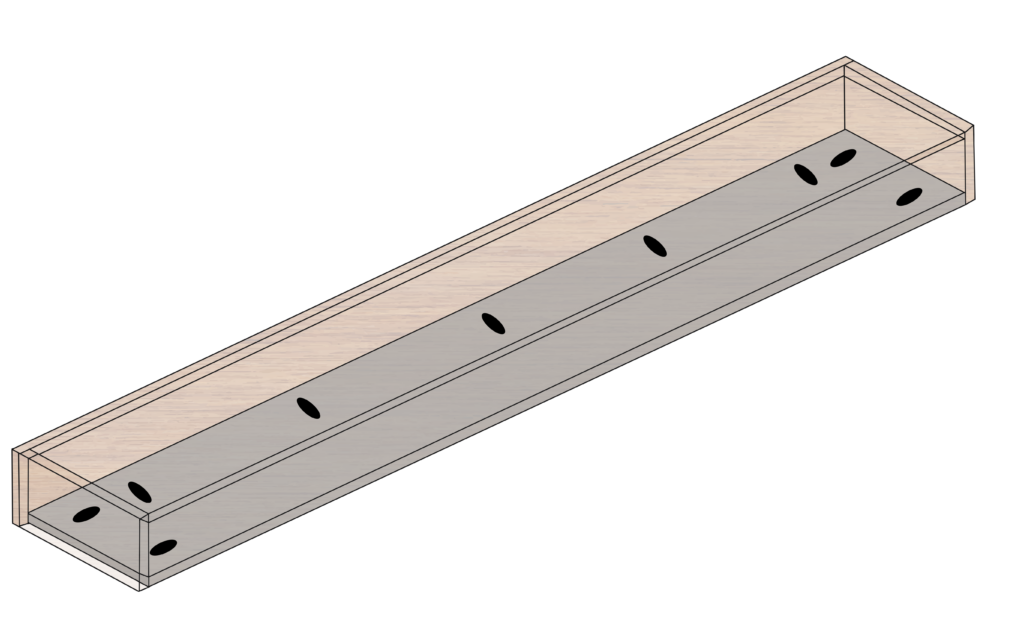
Figure 1C
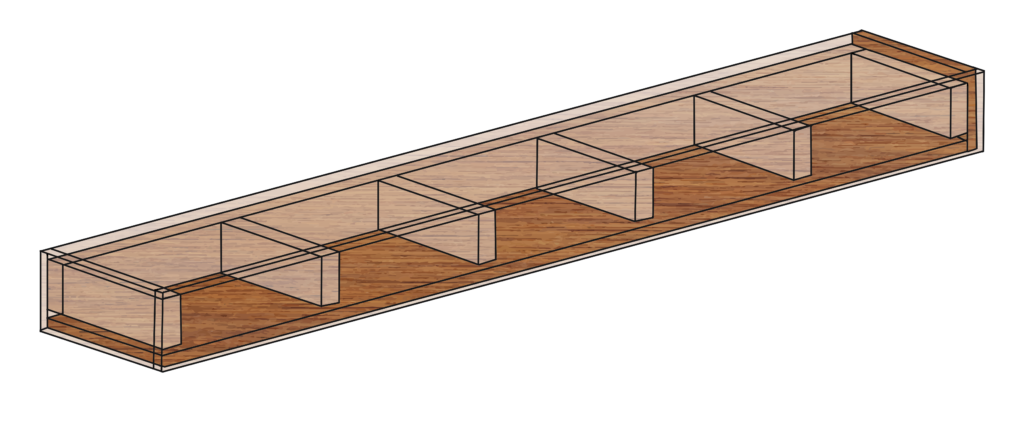
Figure 1D