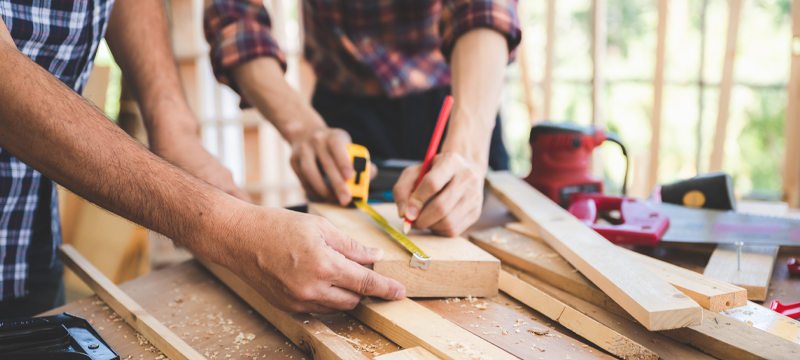
Woodworking is a broad hobby, so getting started can be challenging. Knowing what woodworking tools to use or purchase can be confusing, and picking a starting project can be overwhelming. But diving in is the best way to get over the woodworking intimidation. If you know it’s something you’re interested in but need to figure out the first steps, let us help you get started.
If you’re here because you’re new to woodworking, you’ll probably want to start with some simple woodworking projects and work to more difficult ones as you get more comfortable. Here are a few beginner woodworking project ideas:
Picture Frame
Whether you have a picture you want to hang in your house or need a quick gift for family or friends; a homemade picture frame is a great way to showcase your newfound hobby. Picture frames are great beginner projects using simple miter cuts.
These instructions are for an 8″ X 10″ frame.
What you’ll need:
(1) 8″ x 10″ glass insert
(1) 1″ x 2″ x 8-foot softwood board
(1) 1″ x 3″ x 8-foot softwood board
(1) 1/8″ x 2″ x 4-foot plywood board
(2) sawtooth picture hangers
- Miter or circular saw
- Sandpaper
- Carpenter Square
- Clamps
- Marking pencil
- Screwdriver
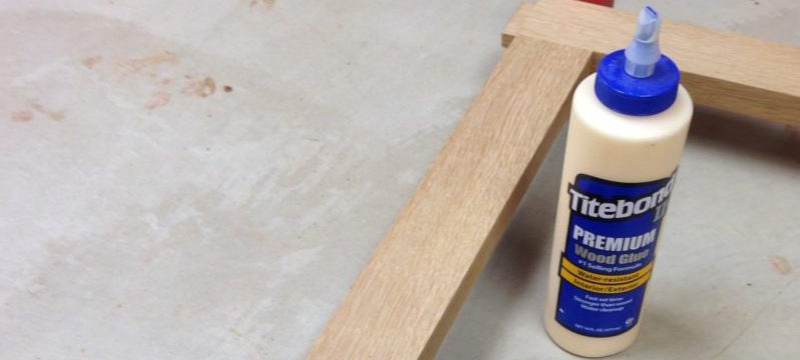
- Wood glue
- Finishing nailer
- Tape measure
- Finishing nails
- Screen clips
- Paint/stain of your choice
Instructions
- Use a pencil and carpenter square to mark the wood with the measurements under step 3.
- Get your PPE on to prevent injury.
- Use a circular saw like the Makita 18V LXT 7-1/4″ Circular Saw or a miter saw like the DEWALT 12″ Sliding Miter Saw with Stand to make the following cuts:
- On the 1″ x 2″ x 8-foot softwood board:
- (2) 14-1/4″
- (2) 13-3/4″
- On the 1″ x 3″ x 8-foot softwood board
- (2) 9-1/4″
- (2) 12-1/4″
- On the 1/8″ x 2″ x 4-foot plywood board
- (2) 2-1/8″ x 14-1/4″
- (2) 2-1/8″ x 8″
- (2) 2-1/8″ x 12-1/4″
- (2) 2-1/8″ x 10″
- (1) 8″ x 10″
- On the 1″ x 2″ x 8-foot softwood board:
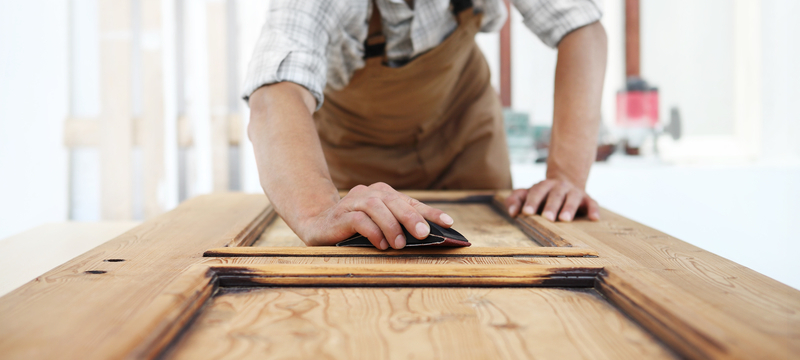
- Sand the edges of the boards until they’re smooth.
- Start constructing the inner frame – Fig. 1A
- Arrange the 9-1/4″ and 12-1/4″ boards with the two shortest pieces on the inside.
- Use a carpenter square to ensure your edges are flush and perfectly square.
- Use clamps, like the Irwin 8pc Clamp Set, to secure the wood to your workbench.
- Connect the four pieces of wood using wood glue, then secure the hold using a finishing nailer, such as the DEWALT Precision Point Finish Nailer.
- Attach the outer trim – Fig. 1B
- Start by grabbing and stacking three (3) pieces of the plywood.
- Lay the inner frame on the stacked plywood; this will create an offset needed when the outer frame is attached and allow the glass sheet to lay flush.
- Align the (2) 14-1/4″ and (2) 13-3/4″ around the inner frame with the 1″ side facing upward.
- Clamp each joint to secure
- Attach the inner and outer frames using wood glue and the nail gun.
- Remove the plywood pieces to avoid them accidentally getting glued to the frame.
- Allow the glue to dry completely.
- Dry fit the remaining wood pieces and glass sheet
- Once the glue has dried from connecting the inner and outer frame, place the plywood and glass to ensure everything fits correctly.
- If everything fits as it should, remove the plywood and glass.
- Attach the plywood
- Spread the wood glue along each edge of the inner frame.
- Attach the first layer of plywood using the finishing nailer.
- Repeat with a second layer of plywood.
- Allow the frame to dry completely.
- Attach the hardware – Fig. 1C.
- Center and attach the two sawtooth picture hangers horizontally and vertically along the outer frame’s edge.
- Measure the inner frame area on all four sides and attach one screen clip on each side.
- Ensure the screen clip isn’t over the edge of the wood.
- Using a pencil, mark the wood through the hole of the screen clip.
- Use a drill, such as the Skil 20V 1/2″ drill, to carefully make a small hole over the pencil mark.
- Use a screwdriver to attach the screen clip with the provided hardware. Tighten it enough so the clip will stay in place, but you can still turn it to keep the glass in place.
- Use fine-grit sandpaper to sand the edges of your DIY picture frame and the seams where the boards meet.
- Skip this step if you want a distressed or rustic look.
- Paint or stain the frame
- Use paint or wood stain to customize the picture frame.
- If you want the distressed appearance, you can lightly sand the edges once it’s dried.
- Use paint or wood stain to customize the picture frame.
- Place the glass into the frame, insert your picture, and place the remaining piece of plywood. Turn the screen clip to keep everything in place.
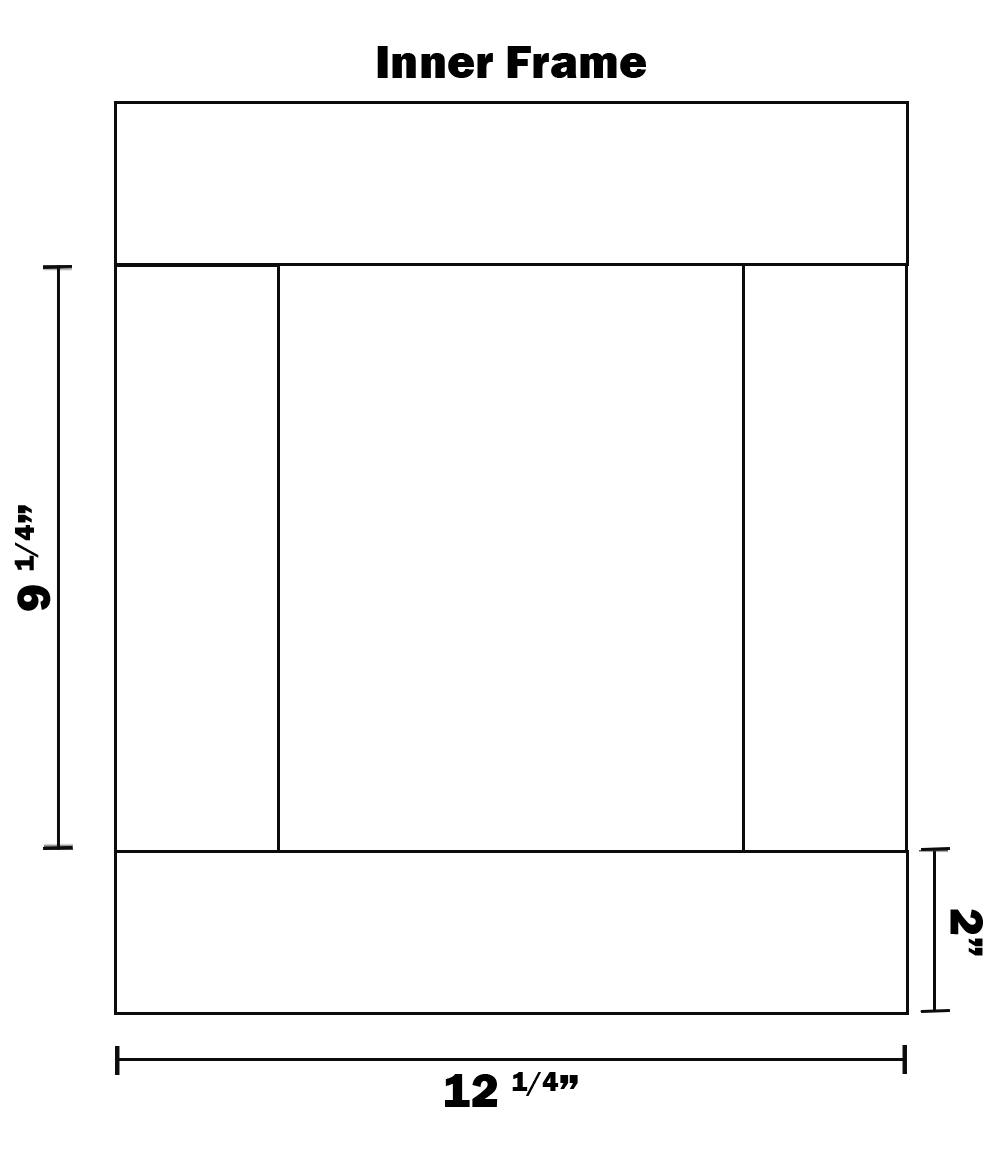
Fig. 1A
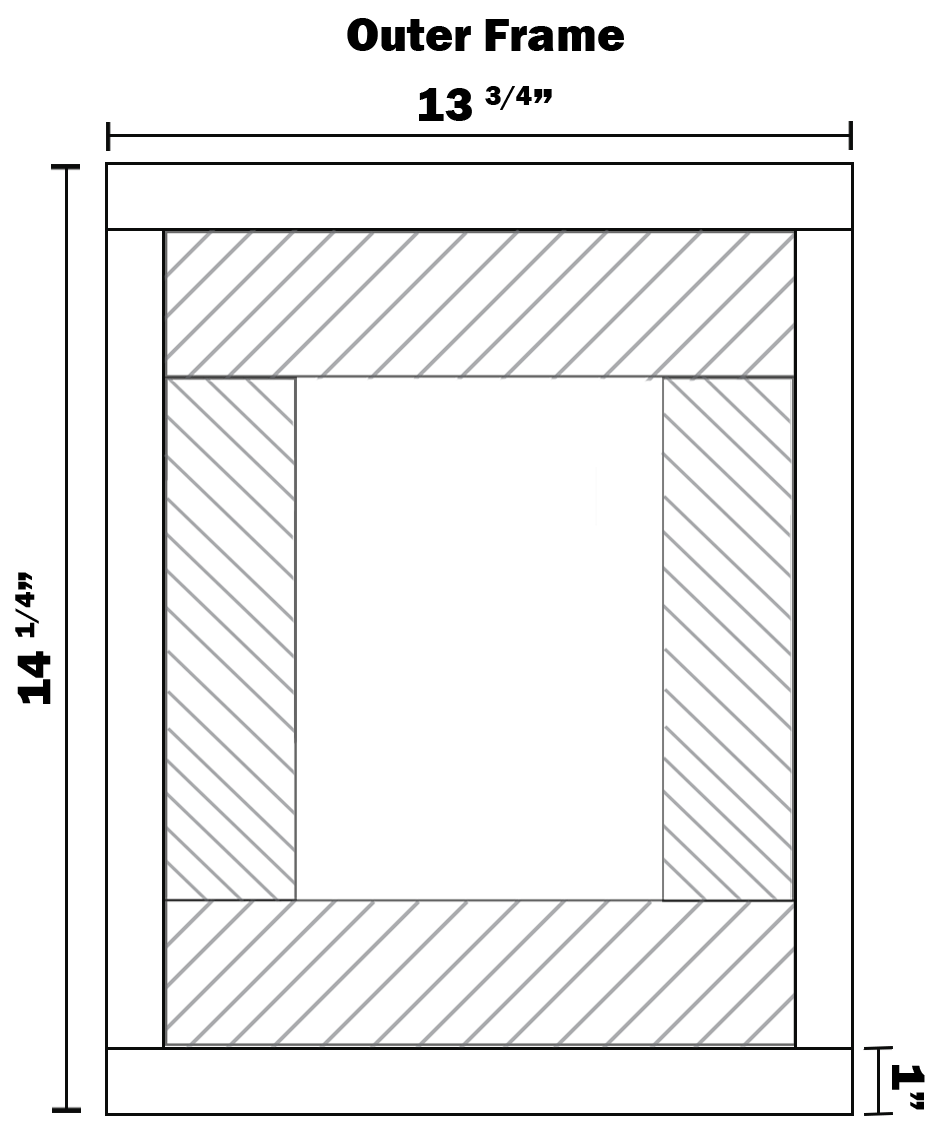
Fig. 1B
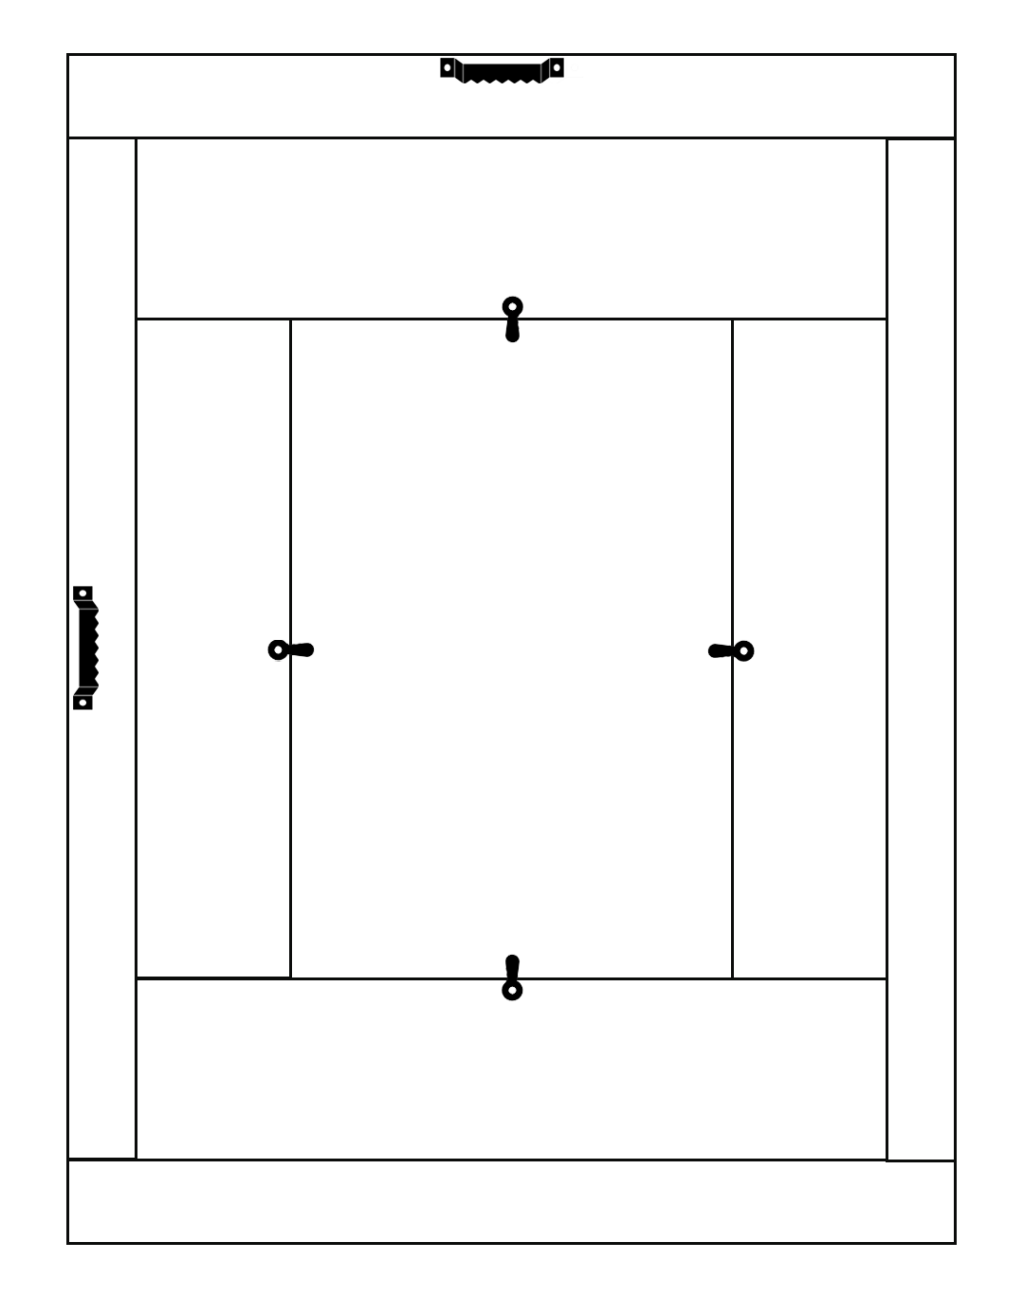
Fig. 1C
Wooden Picture Holders
The picture holders are customizable and easy! These are the perfect projects for beginners with limited materials needed and wiggle room to make them your own. Grab your favorite pictures or your kids’ adorable artwork to fill these cute DIY picture holders.
What you’ll need:
- Glue
- Medium clothespins
- Paint
- Painter’s tape
- Miter saw or handsaw
- Carpenter square
- Marking pencil
- Saw horse (if using handsaw)
- Sandpaper
- Paintbrush
(1) 4″ x 4″x 6-foot wood board
Instructions
- Start by using the carpenter square to measure 4″ sections – this will make (18) 4″ x 4″ x 4″ square picture holders.
- Once your wood is marked, use a miter saw, like the Makita 10″ Dual-Bevel Sliding Compound Miter Saw with Laser, to make your cuts.
- If you don’t have a miter saw, these cuts can be made using a handsaw and saw horses, such as Bora Saw Horse Twin Pack.
- Use sandpaper to smooth the cuts.
- Paint the blocks.
- Use painter’s tape to create fun or sleek designs
- Once the paint is dry, use the glue to attach the clothespins to one of the wood block.
- You’ll an the clothespin to be just slightly above the edge of the picture holder – see fig. 2A
- Let the glue dry completely before attaching your photos or art.
Simple Display Shelf
This modern DIY shelf is excellent for any room in the house. Display your favorite books or use it to keep your plants off the floor. This quick, easy project is perfect for anyone who wants to dip their toe in the woodworking water.
Woodworking Frequently Asked Questions
Starting a new hobby can come with a lot of questions. We took the time to answer some of the newcomers’ most common questions about woodworking.
The projects you’ll be working on determine the woodworking supplies you’ll need; however, there are essential woodworking tools that you’ll consistently use among most projects. Check out this article for more information on must-have woodworking tools.
There are two basic categories of wood: softwood and hardwood. These terms don’t actually refer to the hardness of the wood but, instead, if the wood comes from trees with needle-like leaves or trees that reproduce through flowers. Here are a few commonly used kinds of wood in woodworking:
Softwoods
Pine is a cheaper, sustainable wood that is typically farmed in plantations. Lower-grade pine has knots and can be easily warped, so it’s primarily used for framing. Higher-grade pine has fewer knots and blemishes, making it great for everyday items like shelves and benches. It’s ideal for inside use as it needs to be treated and can quickly decay and break down when outdoors.
Cedar is slightly more expensive than pine but still a cheaper wood. It can be used inside and outside as it’s naturally resistant to pests and rot. There are both white varieties, which have a silvery color, and red, which has a variety of deep colors. Some people can be allergic to the oil in cedar, which is something to be aware of.
Hardwoods
Birch is a dense wood that sands easily, allowing it to hold paint well. It can be used as an oak substitute as it’s often cheaper than oak. Due to the hardness of birch wood, you will need sharp tools to resharpen them often.
Oak is a heavy, dense wood great for hard-wearing projects such as flooring, barrel making, and furniture building. Like cedar, there are white and red oak varieties. Red oak is typically softer, while white oak is better for hard-wearing uses like flooring.
Engineered Woods
Plywood is made by stacking and gluing layers of veneer, which are thin slices of wood and sometimes bark, then using pressure and heat to hold them together. Most things you can make from natural wood can be made with plywood; however, the strength can vary.
Medium Density Fiberboard is made from wood fibers bonded with a synthetic resin adhesive. MDF is a low-cost alternative to wood. MDF holds nails, screws, and glue well. It will split if you screw into the board’s edge. MDF does not tolerate water well; it will swell and lose strength when moisture is subjected.
Absolutely! Woodworking can take up a bit of room once you acquire all the tools and accessories needed, but there are plenty of storage options to ensure you have all the space you need. Make sure your workspace has proper ventilation and dust collection.
Anytime you’re working with tools, especially power tools, there is a risk of injury. However, following proper safety precautions, reading manufacturers’ user manuals, and wearing appropriate PPE can significantly reduce the chance of injury.
Tons of websites and magazines offer free woodworking plans. Woodsmithplans.com has furniture, gifts, outdoor, indoor, and storage plans that you can download free of cost. Wood magazine has free, downloadable project plans on its website. You can also subscribe to the magazine.
Check out the tools and accessories used for these projects and more at Acme Tools.