Did you know that your Dremel rotary tool can etch glass? Pretty cool, huh? If you need a personalized gift or want to give your glassware a unique flare but are unsure how you have come to the right place! Here are all the steps you’ll need to customize glassware. Dremel provides you with easy step-by-step instructions on how to complete your etching project! Beginner or pro, ready, set, GO!
Materials You Need:
This project is as simple as we say it is. With the following supplies, you will be ready to etch.
- Dremel 8050 Micro Rotary Tool: a tremendous lightweight tool that gets the job done
- Dremel 107 Engraving Cutter
- Glassware Design– Surf the internet or hand draw the perfect design that suites your creative needs
- Permanent Marker: to trace your design
- Tape: Secure your design onto the glass if you are choosing to trace a pattern/design
- Glassware of choice
- Safety Glasses: Remember to protect your eyes!
How To Etch Glass
Starting point

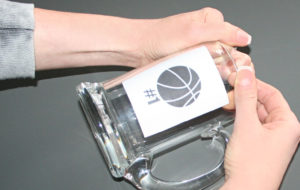
Find or create your favorite pattern or design. You can make this as simple or intricate as you prefer. When etching in glass, remember the diamond points will provide the finest line, the silicon carbide stones will provide the thickest line, and the tungsten carbide lines will give the most profound line. Once you have your pattern, you need to decide if you will trace it onto the glassware with the marker or if you want to print the pattern out and securely tape it onto the glass.
Turn on your Dremel

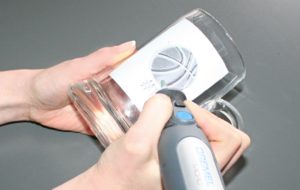
Once you have put on your safety glasses, turn on your Dremel and begin etching the pattern onto your glassware using the Dremel 8050 Micro Rotary and 107 accessories. You may want to change accessories to give your design lines different thicknesses and depths. You can also shade with the silicon carbide stones.
Wash and show off
Once completed, wash your glass with warm, soapy water to remove any remaining debris. You are now ready to enjoy and show off your custom glass! Who knows, maybe you will get some orders from Friends and turn this into a thriving business.


