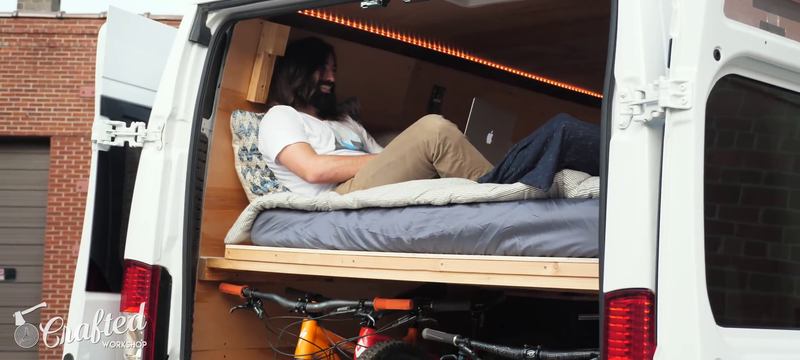
Have you ever wanted to go out and take a road trip without getting a hotel? How about camping without having to bring a tent? What if you are tired of being tied down to leases and unable to move when you want? In collaboration with Johnny Brooke from Crafted Workshop, we have a build for you that anyone with some woodworking experience can do.
List of Tools You Need
- Table Saw
- Sander
- Miter Saw
- Glue Gun
- Clamps
- Wood Glue
- Impact Driver
- Track Saw
- Hammer Drill
- Brad Nailer
- Pocket Hole Machines
- Countersink bit
List of Materials You Need
- (1) 2”x8”x16’ (can be substituted for 2×4)
- 30” long piano hinges x 2
- 12” x 24” HDPE sheet
- 1” brad nails
- (2) 4’x8’ sheets of ½” plywood
- Sandpaper/ pads
- (7) 2”x2”x10’ boards
- 1-¼” screws
- 2-¼” Structural Screws
- Barrel Bolt
Phase 1: Building the Rails
Step 1:
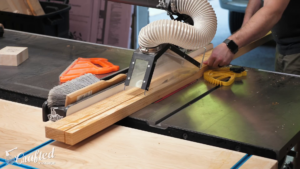
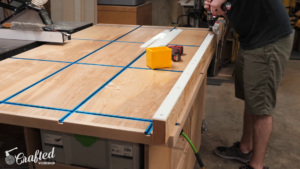
The first thing to create for the bed is the rails which support the platform. Made from 8, a long two-by-eight, the first step is to rip the board in half at the table saw. (Tip: If you do not have a table saw, use 2×4’s here.) Also, include a cross-support rail to maintain; add as many as you need to have good support.
After ripping the boards to width, cut them to their final length with the miter saw. Take note of any curves in the vehicle as you lay down the platform and trim any edges necessary so that it can clear the walls. In this project, they were cut to eighty” long.
Step 2:
To reduce wear on the rails and to also help the bed platform slide when sliding into couch mode, line the top edge with HDPE. Using a table saw, cut the sheets into one ½” wide strips to match the width of the rails.
Install the strips on the top of the rails using countersunk one” screws. The screw heads must be below the surface of the HDPE so that the bed platform can slide without catching.
Phase 2: Installing the Rails
Step 3:
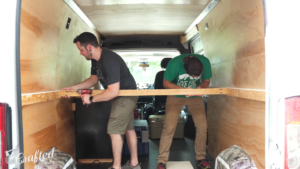
First, measure up from the floor and mark a line. You cannot check for level since the ground is rarely level. Instead, reference other points in the van.
After making the lines, install the rails using 2-¼” structural screws, adding two screws in each furring strip. The final piece to add to the rails is some stops on the front to keep the bed platform from sliding off. The stops prevent the mattress from falling from couch mode to bed mode.
Phase 3: Making the Bed
Step 4:
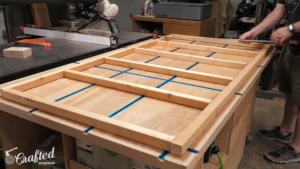
The platform is a simple framework of 2x2s covered in ½” plywood. (Tip from Johnny: 2x4s add a little more rigidity.)
After cutting the 2x2s to size, mark out the spacing of the 2x2s on the longer pieces and then attach them using two” screws through each joint. Since the bed frame is created using two individual frame sections, use a hinge in the middle to keep them connected.
Once done, rip the ½” plywood to width to match the frames at the table saw. (Tip: If you do not have a table saw, you can get your home center to make the cuts.)
With the panels cut to their final size, attach them to the frames using wood glue and one” brad nails using a brad nailer. After the glue dries, break the edges with a sander to make them less sharp, and then move the platforms into your vehicle.
To attach the two-panel, use two thirty” long piano hinges and use one” screws. The system used two pulleys and connected to the furring strips using 1-¼” screws.
Phase 4: Checking Your Work.
Step 5:

After verifying the system works, you need to add some upright supports for the back of the platform when it is in couch mode. Add HDPE strips to help reduce wear when moving.
Phase 5: Safe and Secure
Step 6:
This keeps the platform from moving around when the vehicle moves in either mode or while driving. Add a barrel bolt at each end of the front platform, and drill one set of holes for the barrel bolt in the position where the platform would be in bed mode. Then, drill another set of holes to lock the platform in place when it is in couch mode.
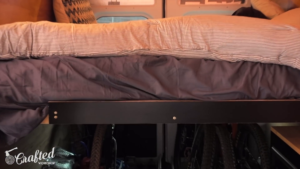
Add a cleat to the front of the rail to prevent your mattress from sliding off.
With that, the bed is done!
*BONUS*
But what do you do with the space underneath the bed? You could leave it empty, but why not use that space for storage? Johnny has also crafted a few steps to make the space under the bed helpful in storing mountain bikes. But if you are not a biker, you can still use these same steps for your hobby item of choice.
What Things Are You Storing?
Step 1:

First, figure out the exact height you must work with under the bed. You can use a rail system for easy access to your stuff. Find the highest point of the item and ensure it clears the underside of the bed.
Step 2:
Cut to your desired sizes, ensuring you have a few inches of clearance between the top of your item and your bed.
Step 3:
Assemble by using screws and waterproof wood glue. Once built, a protective coating will be applied to the tray to prevent unnecessary stains.
Next Step Has a Pre-Requisite That Your Van Has the Floor Installed.
Step 4:
The slide-out rack is attached to the van’s floor; this part of the drawer is a fixed space. Secure them with corner braces every couple of inches to transfer the load from the tray to the van.
Step 5:
Attach the slides to the tray, then place the tray on the floor with a three-eighths” plywood sheet (or piece of wood that is three-eighths”) underneath. By having the wood beneath, you have a gap between the tray and the van’s floor to ensure no rubbing while sliding the rack in and out. Screw in the structure to the slides and then secure it to the floor.
And…DONE!
Did you find this helpful building? Would you want to try something like this in your van one day? Let us know in the comment section below if you have any ideas for your van bed build.
Need the tools from this video? Get them all at AcmeTools.com and follow our Acme Tools Blog for the latest tool news and other fun builds like this.