Steps to Make Modern Barstools
Since moving into my home seven years ago, I have meant to build a set of barstools for my kitchen island. I have waited long enough, so let us make a set! The modern barstools were designed to fit my forty-three” island. So, if you will reference this build for your barstools, size them accordingly.
Step 1: Designing the barstools & breaking down the rough stock
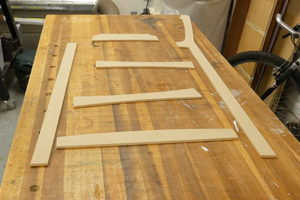
A good portion of this project was completed before I entered the shop. Both legs, the riser block, and the two aprons were designed in SketchUp. Using the templates, I cut them on a CNC machine. With the templates, I could work faster. Having the same precision as my CNC machine while using my router table and a flush trim bit.
Luckily, I could find clear and comprehensive 8/4 cherry stock at my sawmill. That meant I had minimal waste and could get most of the parts from one board. When laying out the legs, I put the templates over straight-grained sections of the board. That way, the grain of the legs does not distract from the more generous figure of the backrest and seat. I also tried to minimize waste when laying out the templates. So that meant trying to fit parts like the riser block behind the rear leg and the aprons next to the front leg. With all the parts laid out on the cherry board, I had to use my jigsaw to break it down. I had to do this because the board was a monster. It was over fifteen inches wide and ten feet long!
Step 2: Milling lumber & flush trim routing
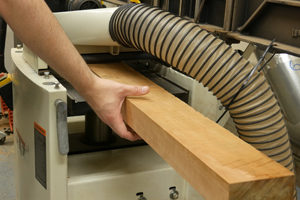
The first items to be milled were the front legs, rear legs, and riser blocks. I headed over to the jointer to join one face and one edge. Then, I ran them through the thicknesser to take them down to their final dimensions of 1-½”. The six aprons were milled up in a separate session since they required a little bit of resawing. I was able to get all twelve aprons (for both barstools) out of six boards since they were only ¾” thick.
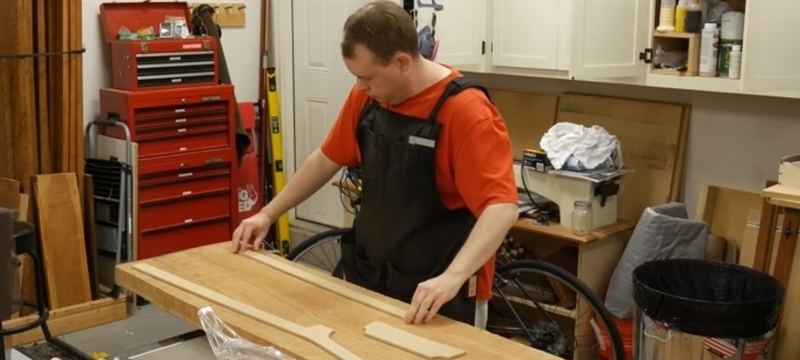
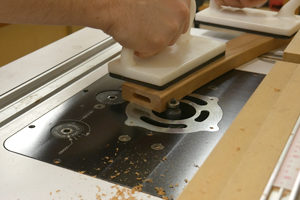
To cut the rear legs into shape, I began by placing the MDF template over the cherry stock and traced the shape of the leg. I headed over to the bandsaw to rough cut the piece to shape, making sure to stay ⅛” away from my line. Next, I taped the template to the cherry stock and headed to the router table to flush-trim the excess material. This left me with an exact copy of the CNC template. I repeated the same steps for the front leg, riser block, and all six aprons.
I used my crosscut sled at the table saw to cut the riser block and aprons to size. Having the CNC templates makes setting the stop block a breeze. I cut the aprons and riser blocks to length before cutting their curves. That meant I could lay the side of the piece up against the fence of my crosscut sled. I did not have to worry about the curve throwing my angel off.
Step 3: Domino joinery
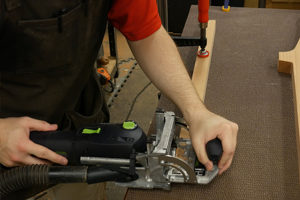
I used the Festool domino to cut the loose tenon joinery for both barstools. First, I joined the riser blocks to the front and rear legs. I placed the pieces into position, securing them with a clamp, and made my reference marks. Next, I lined up the centerline of the domino with my reference marks and made the plunge. I put two dominos on each joint on the riser block and both legs since they were thick enough to support them.
Next, I cut the joinery on the ends of the side aprons. Since they were ¾” thick, I put one domino on each end. With the joinery cut, put the aprons in place and transfer the mark to the legs to then cut the joinery.
Step 4: Bent lamination seat & backrest
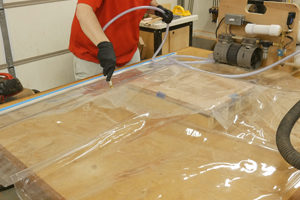
The seat and backrest have a curve in them for added comfort. This is achieved by using bent lamination. I started with the seat by resawing 3/16” thick, twelve” wide boards to edge glue to make up each seat layer. To glue the layers, I mixed up some plastic resin glue. This will help to prevent springback. It dries hard, unlike traditional wood glues, which are flexible. With the glue on the panels, I stuck the seat in my vacuum bag on top of the bending form and turned the vacuum press on. I kept the seat in the bag overnight.
The exact process was used to make the backrest as well. I edge-glued three panels, placed the resin glue on each layer, and stuck it in the vacuum bag in the same bending form. I was leaving it to dry overnight.
Step 5: Edge treatment
Before gluing up, I took this opportunity to round over all the edges with my ⅛” round-over bit at the router table. There were a couple of places that I could not round over. Like the faces where the riser blocks met, the front and rear legs. If this is not clear, check out the video for more information.
I also rounded over the edges of the backrest and the seat.
Step 6: Shaping the riser blocks and rear legs
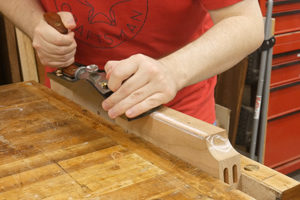
The inside edge of both riser blocks needed to be shaped to sit flat since the seats were curved. Using my low-angle jack plane, I cut a 5-degree angle. This process took some time. It was a lot of removing the waste, evaluating the fit, removing a little more waste, and evaluating the fit. Repeat this until the seats sit flat on the riser blocks.
To attach the seats, I first had to drill two holes in the bottom of each riser block. This allowed me to place a screw in each hole to mark the seat for pre-drilling. Using my ⅛” drill bit, I pre-drilled the four holes and then attached the seat to the riser blocks.
Step 7: Glue up time!
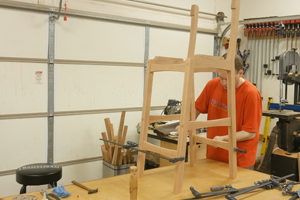
I always like to approach every glue up with a plan, and this project was no exception. I started by gluing up one rear leg, front leg, riser block, and side apron as one frame. This meant the next day, I had two frames to join with the other four aprons. This made the glue up stress-free. I used to hide glue during the glue-up because it lubricated the dominos. At the same time, using traditional wood glue would have caused the dominos to swell. And the fit was already tight.
Step 8: Shaping rear legs
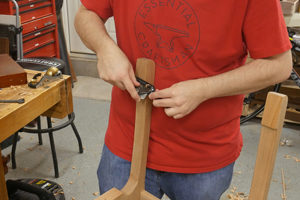
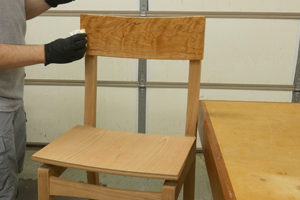
The final piece of the puzzle was to attach the backrests. I started by tracing the backrest curve onto the top of the rear legs, which showed me how much material I needed to remove. I removed the waste using my spokeshave and block plane. Much like the seat, it was a good bit of assessing the fit and removing more waste until the fit was perfect.
To attach the backrest, I first glued it into place since it was a long-grain glue joint. I followed that up by installing four screws, two on each leg. I cut ⅜” plugs using a plug cutter to fill the holes.
Step 9: Applying finish
I wanted a “close to the wood finish for the barstools.” That means nothing thick and nothing too shiny. I wiped on three coats of semi-gloss, wiping varnish and sanding in between coats with 320 grit sandpaper.
Done!
I love the design of the barstools and think they came out great! This was a challenging build but also gratifying. The cherry looks fantastic, and I cannot wait to see how they look in 20 years. I hope you enjoyed the building. Thanks for letting me share it with you.
Thanks so much to SimpleCove for the build. Did you enjoy the building? Want to start building your custom barstools? Then stop at your nearest Acme Tools store or go online and check out all our woodworking tools in stock. We have great daily deals and tools ranging from DIY to the trades.
We have more DIY build on our blog if you are ready for more challenges. Let us know your thoughts on this post in the comment section below. Please tell us what you would want to build if you had your woodworking shop. Remember always to do your best work.