
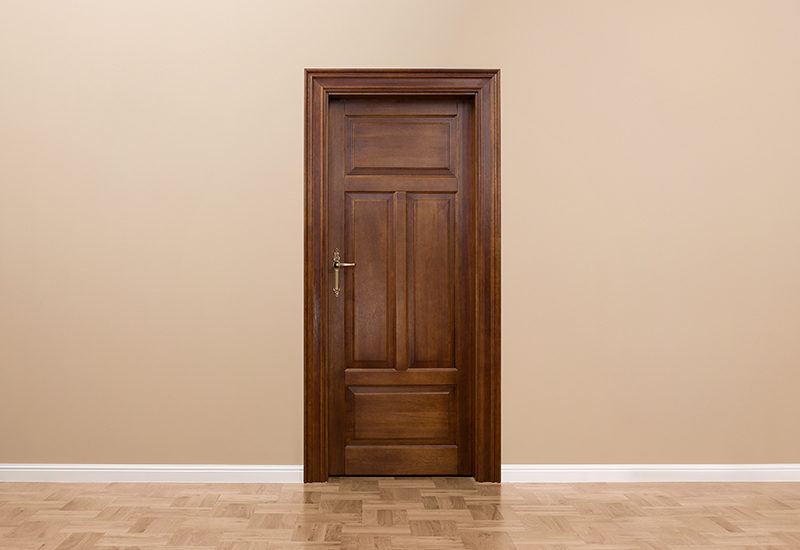
When it comes to the windows and doors of your home, they do more than just provide a gateway to the outside world. They improve the look of your home, provide light and air, and give you plenty of framed views from the inside out.
However, through time and exposure to the elements, it’s not uncommon for the wood and seals around the framing to lose effectiveness. When this happens, it compromises the rest of your home by letting moisture in, which can, in turn, introduce a whole slew of problems, including mold and rotting wood. It also drastically affects your utilities, driving them up as the insulation fails to keep the air contained within your house. The good thing is, with the right tools and a little time, you can learn how to install a window and door in just a few simple steps.
Helpful Hints to Make Installation Easier
Before you dive into these window and door installation instructions, these tips will help you cut down on the time you spend on the project:
- Have the right tools on hand right — determine what you need to have on hand before you begin. What you need depends on the type of installation you’re doing.
- By using self-adhesive weatherstripping, you’ll reduce the amount of time you spend on this project.
- Add a gasket at the bottom of a door or in the foundation of the window to further reduce drafts.
- When priming the space, look for evidence of exposure to the elements or rotting wood. Discolored wood is a sign of rotting, while cracks in the framing are usually evidence of the warping after exposure to high temperatures.
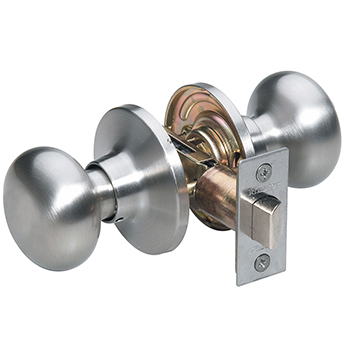
- Hardware products, which include doorknobs and window pulls, are the finishing touches of your installation job and offer a wide degree of personalization. You’ll get the best results when hardware matches, so pick a style that works for you and stick with it for the whole project.
- Just a few minutes of additional preparation can help ensure that the installation process goes off without a hitch.
Priming the Space
Before you can begin installing doors and windows, it’s necessary to prime the space. Sometimes, this is simply removing the old hardware and installing the new, but then, sometimes, you’ll need to gut the entire area and start from scratch.
Priming for Doors
Upgrading your doors is an excellent way to update the look of your house. Whether replacing an interior or exterior door, you’ll first have to remove the hinges and then remove the door from the frame.
In some instances, you’ll find the frame is in excellent condition. If so, all you need to do is hang the new door. Other times, you must rip out the frame entirely and build a new one, which takes more time and effort. Once you have the materials, creating a new frame takes approximately two to three hours with these window and door installation instructions.
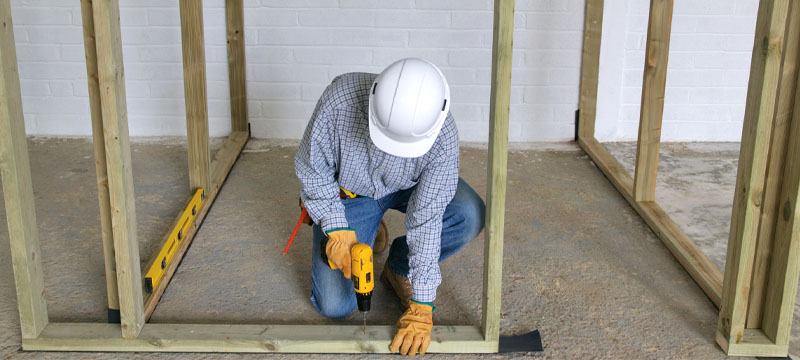
Framing Essentials You’ll Need

If you find that you have to frame a doorway, there are certain essentials that will help you create a sturdy structure on which to rest your door.
- Hammer: a heavy-duty hammer is best
- Saws: a power miter saw and circular saw help make straight, 90-degree cuts
- Stabila Level: to ensure the frame is vertically and horizontally plumb
- Carpenter’s squares: to help square corners and for making cutting lines on wood
- Tape measure: for accurate measuring of wood and doorways
- Nails: for building the framing structure and installing it in the doorway
When you have the old door removed and the frame ready to go, it’s time to begin the installation of your replacement door.
Priming for Windows
There are many reasons to replace a window. Perhaps you have a broken pane and need to replace the entire unit. You may want to update your home’s look or energy efficiency, and adding new windows is the project to do that. Regardless of why you want to replace it, the window installation steps are the same.
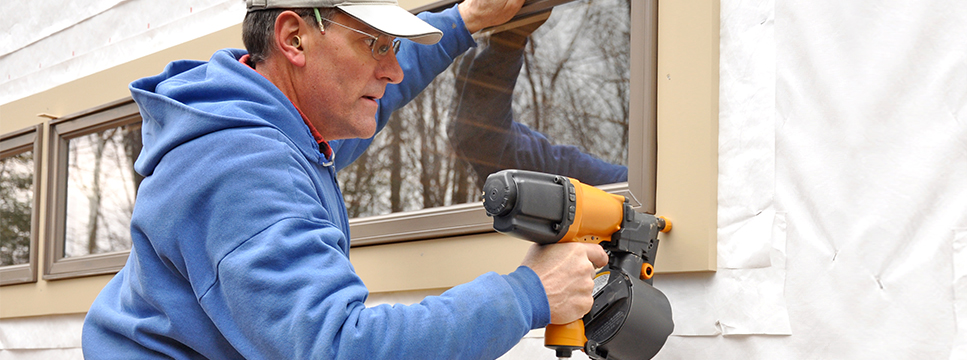
The first step is to remove the siding outside your house, if necessary, to reach the nailing fins. (Nailing fins are the exterior ledges of the window that you secure to the side of your home to keep them in place. Be careful not to damage the siding since you’ll have to book it again once the new window is in place.) Once the nailing fins are exposed, remove the caulking and old nails with a cat’s paw tool, and carefully remove the old unit.
Level and Measure the Area
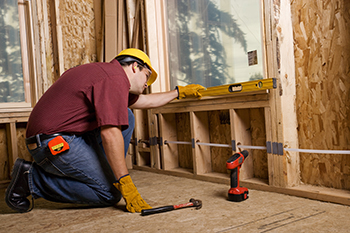
After you remove the unit, whether it’s a door or window, you’ll want to use a level to ensure the area is even — if the level is off, the unit won’t sit right, which can affect its performance. You can quickly remedy an uneven reading by sanding or readjusting the framing until it’s level.
In addition to uneven areas, you may find rot or compromised wood. If so, it’s best to remove the framing and redo it. Otherwise, the rot could spread and potentially damage the structure of your home. If you need to demolish and renovate the frame, you can find any electrical wiring and turn off the power to the area before you start to avoid injury.
Once you’ve determined that the framing is level and in good condition, measure the area where the unit will go. For best results, you can measure more than once to see if you’ve recorded the proper measurements. For windows, it’s essential to measure corner to corner in both directions, in addition to height and width. Bear in mind that it’s often necessary to leave a 3/4-inch gap in the depth and a 1/2-inch shorter in the space to allow the unit to fit.
Hanging Doors
When preparing to hang a door, there are certain factors to consider. First, is your door an exterior or interior unit? There are differences in installing the two, so having the right tools for the job is essential, including hand-cutting tools for framing jobs. Installing interior doors is often simpler than exterior doors, especially where framing is a factor.
Interior vs. Exterior Doors
The main difference between interior and exterior doors is insulation. Exterior doors are heavier, and the framing needs more insulation to keep the elements out of your home. The frames are often more significant to accommodate the heavier weight of the door.
Interior doors are often lighter and require no insulation. Since they are not exposed to the elements, they don’t need to be heavy or backed by several insulation layers and weather-stripping. For this reason alone, they are often easier and quicker to install.
Installing the Door and Hinges
Screw in the hardware or hinges into the frame, and then attach the door to the hinges and hammer the pins in. Open and close the door a few times to ensure it flows smoothly. If it falters, it’s likely due to the hinges being uneven. In this case, simply unscrew the hinges and re-position.
Inserting Windows
You can implement several window design ideas based on your intended purpose. Energy-efficient windows let you put a barrier between you and the elements. In contrast, picture windows stream in more lighting, which is beneficial if you have a large living area or space you want to highlight with natural lighting. You can even add a bay window for an inviting seating area or to enhance the appearance of your home.
When learning how to install a window, it’s essential to prime the area first. Once it’s measured and you have the correct size window, simply insert it into the cutout. Before securing it with the nailing fins, please double-check to ensure it’s level. It’s easier to adjust the mount before booking it than removing and re-posting the window.
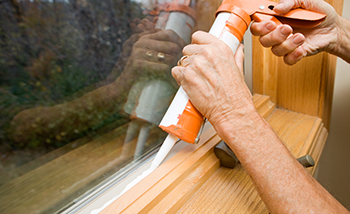
After you secure the window, insulate it correctly with the insulation you choose; caulk and foam are popular because they are easy to spray on after the window is in position. Then, paint or stain any cosmetic framing pieces; if needed, reapply the siding on your home and attach the frame around the window.
Whether you’re looking to improve the curb value of your home or find that you need to replace your unit due to drafts, cracks, or rotting wood, this window and door installation guide can help you prepare for the task at hand. After installing the units, put on the final touches, including your window and door hardware, and sit back to enjoy your handiwork.

2 Comments
Austin Saunders
January 15, 2020 at 11:16 amI like what you said about making sure that you have the right tools when installing doors. My brother has been telling me about how he wants to get some new doors put in soon. I’ll share this information with him so that he can look into his options for professionals who can help him with this.
Tyson Coolidge
January 20, 2020 at 12:14 pmI like what you said about replacing your window if you have a broken pane. My sister has been telling me about how her son threw a baseball through her kitchen window the other day. I’ll share this informant with her so that she can look into her options for getting it replaced.