
Many people view the garage as a space to park their cars and store tools. They don’t view it as an area with so much potential. A garage can be a workspace, somewhere to host guests or a place to just hang out and watch a game. Your garage should feel like an extension of your home. The main reason garages get a bad rap is that they’re often cold. Why would anyone want to spend time in it?
During the winter months, the benefit of a warm, cozy garage is something that can’t be expressed enough. Plus, it’s something that’s hard to explain if you’ve never had a heated garage. Conversely, your garage will turn into an oven during warmer summer months. One of the best ways to keep your garage at the correct temperature is with insulation. This will make it easy to maintain the proper temperature in your space without allowing heat to escape or get in. We’ll walk you through the different types of insulation, how to choose the right kind for your home, and how to install the insulation.
Benefits of Insulating a Garage
Insulating your garage may seem like a large undertaking and a money pit, but the project has many benefits, from general comfort to cost savings.
- Greater energy efficiency, which means lower costs.
- Warmer temperatures make storing power equipment in your garage easier. Which leads to less maintenance.
- Noise reduction in your home and neighborhood.
- Comfort while working or entertaining in the garage.
- Warm vehicle at all times, which lengthens the life of the car’s battery.
Before You Get Started

Before beginning your project, you must decide what insulation you want to install and if you need a heater. The current state of your garage can dictate what type of insulation is chosen. If drywall is already installed, cellulose insulation would be a good choice as it’ll reduce damage to the existing drywall. Insulation is built to prevent heat from escaping but doesn’t produce it. If you don’t already have one, you’ll need to install a heating source to keep the garage toasty.
Types of Garage Insulation
There are several options for garage insulation, each with its own disadvantages and advantages. Things to account for include cost, ease of installation, and R-value.
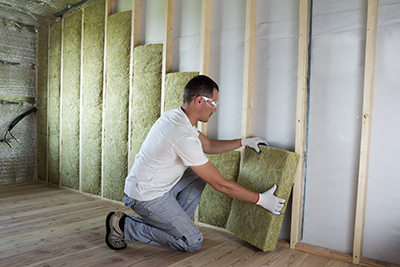
1. Fiberglass Insulation
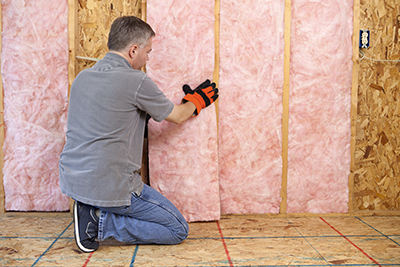
Fiberglass insulation is the most common material used in homes, making it cheap and easy to install. It comes in pre-cut batts and long blanket rolls sized to fit between wall studs. The rolls can be made with or without paper, which can give the final product a more finished look if you don’t plan to install drywall. The paper also helps prevent interior heat from escaping and water passing through the insulation.
Loose-fill fiberglass is another option that is ideal for garage attics. Fiberglass can irritate eyes, skin, and lungs, so be sure to wear the proper protective gear while installing, such as safety glasses, a mask, and gloves.
3. Cellulose Insulation
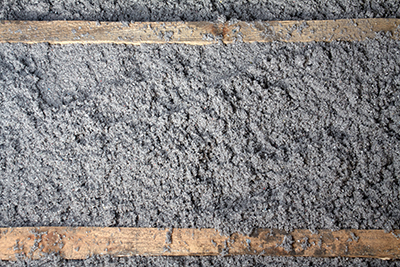
Cellulose insulation is a newer option quickly gaining popularity. Made primarily of recycled newspaper and treated with fire retardant, cellulose is also known as loose-fill or blown-in insulation. A blowing machine is needed to properly install cellulose insulation as it aerates it.
Due to its insulation structure, cellulose can only be used in finished garage walls or attics. However, if drywall is already in place, the cellulose can still be installed by cutting holes between studs and blowing it in. The holes can be patched once finished. Cellulose has one of the lowest R-values because of its loose design.
2. Rigid Foam Insulation
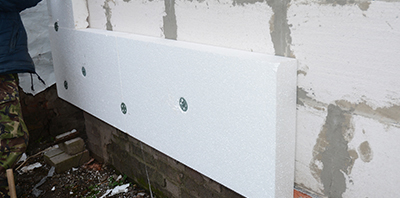
Rigid foam insulation is pretty much how it sounds. It comes in large sheets and anywhere from 1/2-inch to 4-inch thickness. Types of rigid foam include polystyrene, extruded polystyrene, and polyisocyanurate. The density of the foam offers some of the highest R-value of any insulation available. Rigid foam is relatively inexpensive and easy to cut to fit most spaces. Because of its density, it’s a good choice for thin walls as it’ll reduce noise.
4. Spray Foam Insulation

Spray foam is one of the best insulations for R-value. The main reason for such a high R-value is the insulation’s airtight seal. The main drawbacks of spray foam are that it is rather costly and usually has to be installed by a professional. Spray foam expands and hardens and is best used on large insulating jobs. Installing it yourself can lead to spraying too little or too much as it expands, which is why it’s best left to an experienced pro. Depending on the use of your garage, spray foam may be overkill unless it’s being used as a living space.
5. Reflective Insulation
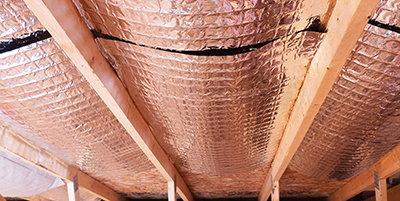
Reflective insulation, or radiant barriers, works slightly differently than usual insulation. Being made of foil-faced kraft paper and other materials, it reflects outside heat away from the garage, so it’s an excellent option for summer months and keeps a comfortable temperature in the space. This concept also works in the winter as the garage’s heat will be reflected back into the space. It’s a great option for garage doors that aren’t insulated and easy to remove if not unneeded.
R-Value: How to Measure Insulation Effectiveness
R-value indicates how effective insulation keeps heat from entering or leaving a space. The value is measured per inch of thickness. R-value can vary based on the type, thickness, and density of the insulation used in the walls. A higher insulation R-value usually means it’s better at controlling the temperature in your space and increasing energy efficiency. With a higher R-value typically comes a higher cost of insulation material.
Depending on the makeup of your home and where the insulation is installed can also determine the R-value needed. Homes built with 2×4 studs usually use R-13 insulation; newer homes with 2×6 studs use R-21 insulation, and R-40 should be used for the ceiling. Generally, colder climates should use higher R-value insulation than warmer ones. In an attic, insulation can be stacked to combine their R-values. For example, fiberglass insulation could be used between studs and cellulose insulation can be laid on top to increase the total R-value.
Tools and Materials Needed
Tools will vary depending on the type of insulation chosen to install, but these are the general ones you will need for fiberglass installation. Other than these, you may need more specialized tools, such as a blowing machine, mask, and safety glasses for cellulose insulation or a sprayer, rubber gloves, overalls, and respirator if installing spray foam.
Tools Needed
- Insulation
- Garage Door Insulation Kit: It’s optional but will help energy efficiency.
- Expanding Foam: For cracks or gaps in the wall.
- Drywall
- Hammer
- Drill
- Drywall Screws
- Ladder
- Gloves and Long Sleeve Shirt: A must for fiberglass installation to prevent skin irritation
- Utility Knife
- Staple Gun and Staples
How to Insulate a Garage Wall
For this step-by-step guide, we’ll focus on installing fiberglass insulation, as it’s the most common material used in homes and the easiest to install.
1. Clear Walls
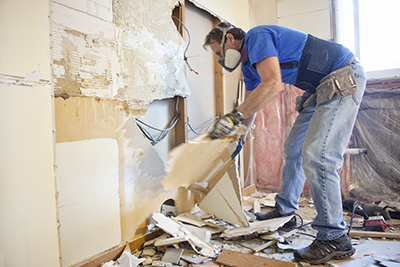
- Remove any existing drywall and dispose of it. Depending on the size of your garage, you may need to rent a residential dumpster.
- Ensure any screws, staples, or any other items are removed from the studs.
- Clear out stud cavities of any dirt and check for mold. If any is found, use bleach to kill the mold and let it dry thoroughly before proceeding.
2. Fill Cracks or Gaps In the Wall
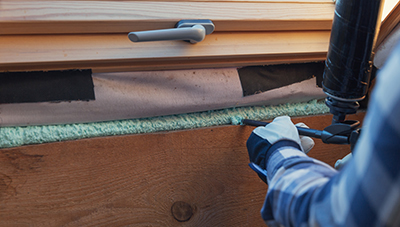
- Use expanding foam to fill any openings.
- Spray while holding the can upside down, filling it only about 50 percent full to allow the foam to expand.
- Let it sit for about 15 minutes until it’s no longer sticky. The spray should be cured in about 8 hours.
3. Install Insulation
- Use a utility knife to cut the insulation to the correct size vertically.
- Once the insulation is in place between the studs, cut off any excess on the sides.
- Use a staple gun to staple the insulation to the side of the stud. (Be sure not to staple on the face of the stud so they don’t interfere with drywall later)
4. Cover With Drywall
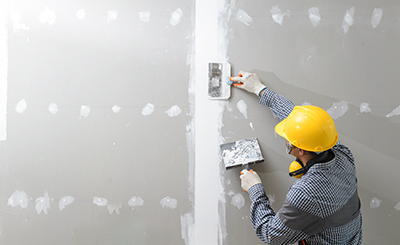
- Attach the drywall to the studs using a screw every 16 inches.
- You can tape and mud the drywall for a more finished look. You’ll need a mud pan, drywall mud, a taping knife, and a sanding block.
- Apply mud at the joint where the drywall meets and place tape along the crease while the mud is still wet. Perform the same process on the inside corners by creasing the tape at a 90-degree angle. Fill any screw holes with mud.
- Once the first coat dries, repeat the entire process in the same order without paper. For butt joints (drywall joints without beveled edges), use a 10-inch taping knife and apply two lines above and below the joint. This builds up the area, so the joint has a smoother look. Don’t go over the original joint.
- After the second coat dries, apply a third thin coat of mud, feathering the edges for a smooth appearance. On butt joints (drywall without beveled edges), be sure to apply mud on both sides and the original joint.
- Finally, do one last thing pass over only the butt joints.
- Lastly, sand the dried mud at the joints and indentations from the screws until the wall is perfectly smooth.
How to Insulate a Garage Ceiling
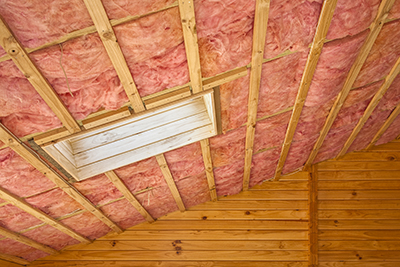
Once you’ve done the walls, you need to do the ceiling, which is more important. Heat naturally rises, and you don’t want that precious commodity leaving through the roof. The process for insulating a garage ceiling is relatively the same as doing the walls. You will need a helper to assist with holding insulation, handing you tools, and supporting the ladder while you work.
That method is more for vaulted ceilings. Some garages have traditional ceilings that run perpendicular to the floor and have a crawl space above them. To make things easier, you’ll need to install drywall before adding insulation. The process would be the same as the walls, but you’ll be working inside the crawl space, and you can add cellulose insulation on top of the fiberglass insulation for added R-value.
How to Insulate a Garage Door
Insulating the garage door can be done in several different ways. You can use reflective insulation and slide it between the slats and frame of each door panel. Another way is to use adhesive retainer pins and push the insulation on the pins. Then, snap-on retainer pin caps are put on top to keep the insulation in place. Garage door insulation kits can also be purchased if you need something all-in-one.
Additional Garage Projects
- Top 6 Garage Improvement Ideas
- Garage Storage Ideas to Maximize Your Space
- How To Install Garage Shelving