At that time of year, we must start packing all our fun summertime toys and preparing for winter. You spent all Spring and summer ensuring your swimming pool was in tip-top shape, so do not ruin all that challenging work by not properly preparing it for winter storage.
Winterizing your pool will prevent damage to its frame and imbalanced water. It is time to think about winterizing your pool when temperatures are consistently lower than 65 degrees. Our guide will make learning how to winterize an above-ground or inground pool easy.
How to Winterize Your Pool
Winterizing an above-ground pool and an inground pool are identical processes. The main difference is an inground pool is usually directly attached to your plumbing system. This requires the plumbing and skimmer lines to be blown out using either a blower or wet/dry vac. Also, the filter valve should be set between any two settings so the ports are partially open to allow for freeze expansion.
Tools and Materials
Tools:
- Skimmer and Brush
- Pool Vacuum
- Blower or Wet/Dry Vac (for inground pools)
- Blowout Extension (for inground pools)
- Leaf Net
- Winter Pool Cover
Materials:
- Pool Schock
- Algaecide
- Winter Plugs
- Skimmer Plug
- Air Pillows
- Test Strips or Test Kit
Test and Balance Water
Before you do anything else, balance the water in your pool. You can use test strips or an at-home pool test kit sold at most large hardware stores. This optimizes the effectiveness of any winterizing chemicals added to the water. Focus on balancing the pool’s alkalinity, pH, and total hardness. Ideal levels are:
- Alkalinity: 80-120 ppm
- pH: 7.2-7.6
- Total Hardness: 180-220 ppm
If the alkalinity or hardness is too low, add increasers to bring them back up. Increasers or reducers can be used to level the pH of the water. Keeping a proper balance of your water helps prevent scaling, which is a calcium buildup that appears on your pool walls.
Clean the Pool
Once you have optimized the chemical balance of your pool water, it is time to clean the pool. This is one of the most pivotal steps as it prevents algae from growing and creates a more considerable headache in the Spring. Algae can also stain the interior of the pool, making it unsightly.
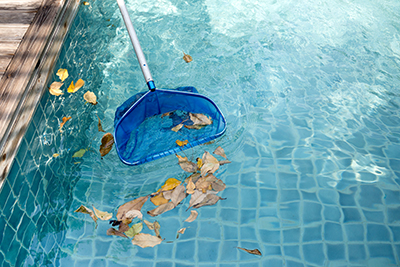
Using a skimmer or leaf net removes debris floating on the water’s surface. If debris is left in the pool, it will counteract any winterizing chemicals you add to the water. Then, use a brush to scrub the sides and bottom of the pool. If you have one, a pool vacuum is an excellent option to clean the bottom of the pool after washing, as it will suck up any debris you just removed from the walls and floor.
Add Winterizing Chemicals
Now that your water is as perfect as you can get it, it is time to add the chemicals to preserve that balance through the winter season and eradicate any last contaminants. You will need pool shock and algaecide for this step. Pool Shock does precisely what the name says. It quickly destroys bacteria, algae, and other waste matter with high chemicals. The algaecide is an additional measure on the top of the shock to prevent further algae from growing.
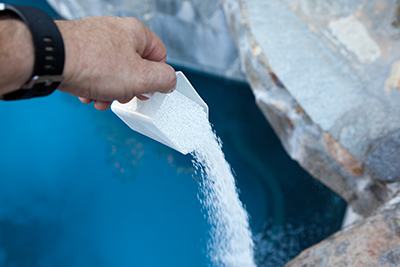
First, add the shock according to the packaging guidelines. This will remove contaminants and increase the chlorine residual, which kills bacteria. Be sure you buy a quality brand of shock so it will not affect the water’s pH level or hardness you have already balanced. Run your pump system for 4-5 hours after administering the shock to help circulate the product throughout the water.
Second, add the algaecide according to the packaging guidelines. Be sure to pick an option that will not cause surface staining within the pool. After application, let the pump system run for another 24 hours to circulate the product throughout the pool. Algae occurs from spores being blown into the pool. The algaecide will prevent colonies from forming.
Remove Accessories and Filters
You are in the home stretch now. It is time to remove any accessories, filters, and skimmers.
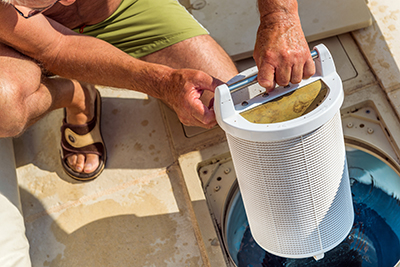
Start by cleaning your pool filter. You can either backwash the sand or DE filter or manually clean it if it is a cartridge filter. If it is a cartridge filter, remove and store the cartridges.
Remove the skimmer basket, return fittings, pool cleaners, and ladders. Remove anything that is not attached to the frame. Next, you can plug the skimmer with a skimmer plug or lower the water level to about three inches below the skimmer.
- NOTE: Do not remove all the water from your pool altogether. That could lead to the pool walls collapsing in on themselves.
Drain Equipment and Pipes
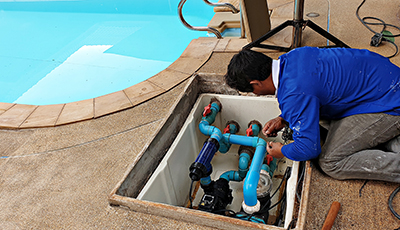
One of the last steps is completely draining any equipment or pipes of water so they do not become damaged or mold inside them. Begin by turning off all power to any pool equipment. Remove the return line and skimmer hose and thoroughly drain them. If you have a PVC pipe, use a blower with an extension or a wet/dry vac to blow the water out of the pipes.
After removing all hoses, you must drain and store all filtering, pumping, heating, and chlorinating equipment. Finally, plug any holes in drains and equipment with winter plugs so water does not get inside them during the winter. Remove the eyeball fitting on your return line and replace it with a winter plug.
Final Steps
The last few steps are the easiest. You will be installing air pillows and the pool cover. Air pillows cause water to expand toward them in the center of the pool when it freezes instead of outward and causes the structure of your pool to become stressed. Inflate the pillows and attach them to a stationary object. You will need 2-3 pillows for an average-sized pool, typically sixteen feet by thirty-two feet.

Lastly, install the pool cover. Most above-ground pool covers include a winch and cable to secure the pool cover. Several accessories are available to help keep the cover secure over the winter, such as wall bags or cover clips. These options are great for areas with high winds. If you are installing a cover on an inground pool, be sure it is appropriately sized and laid over the top of the pool.
Water bags or winter cover blocks can be placed around the edge of the cover to ensure it stays in place. Bags should be placed eighteen inches apart, and in windy areas, they should be placed end-to-end. You can install a leaf net over the top of the cover if you like, but it is not required. A leaf net will make it easier in the Spring when you need to remove any fallen leaves quickly from the top of the cover.
You have finished the steps to winterize your pool. Initially, it seemed daunting, but now you have saved money doing it. Now, curl up in front of the fire as you wait for spring to roll around so you can re-open your pool.