You’re now the owner of one of the most innovative power tools around…the compound miter saw. This amazing tool can easily and accurately cut two angled surfaces at the same time (a compound angle). This means a miter can be cut across the face of the board, and at the same time, a bevel can be cut on the end. At first, it might seem a tad complicated. But, relax! Here are a few pointers to get you off on the right foot.
Set up the saw in an appropriate space
 After pulling the saw out of the box, the first thing you need to decide is where to place the tool in the shop or job site. It’s best to attach it on a workbench or stand against the middle of a long wall. This allows for cutoffs on either side of the blade. If there isn’t a long wall, try to locate the saw near a doorway or other opening that can provide clearance for longer boards.
Take safety precautions
Take a moment and read the instructions and safety information that came with your miter saw. Wear eye and ear protection when using your saw. Don’t wear loose clothing, jewelry, or any dangling objects when operating a miter saw. And remember, always keep your hands clear of the blade by at least six inches.
Practice with straight cross cuts
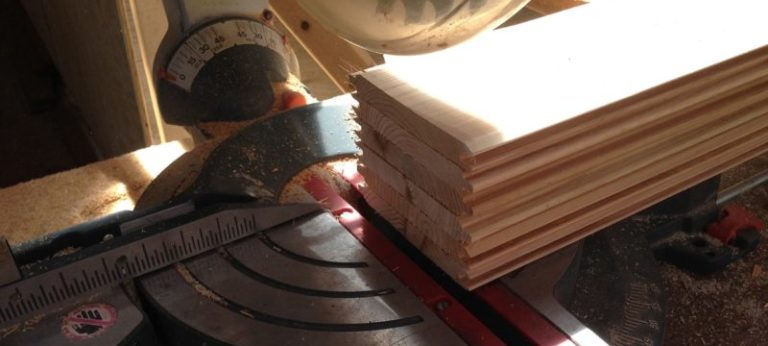
 For a straight cross cut, set both the bevel and miter scales to 0 degrees. Position the workpiece firmly against the fence and clamp it securely in place. Miter saws come with vertical hold-down clamps that apply force to the stock in a downward direction. This keeps the stock from lifting into the blade, causing damage and possible injury. Also, long stock must be supported at the same level as the turntable surface.
When the cut is made, turn the saw on and wait for the blade to get up to speed. Then, move the saw head down in a controlled chopping motion. That’s why it is often called a “chop saw”. When locked into position, the sliding compound miter saw can perform cuts in the same way.
If you are lucky enough to have a sliding compound miter saw, you’ll be able cut wider stock. With the head unlocked, it can slide from its resting position to the front of the machine. When making a cut using the sliding mechanism, the blade is pushed back through the stock. The pushing action is an important safety factor! The force of the cutting action and the spinning saw blade are directed away from you.
As you finish the cut, do not lift the saw with the blade still rotating. Instead, release the power switch and allow the blade to coast to a full stop before lifting the head. Otherwise, the spinning blade can cause tear-out or catch a cut-off piece and launch it into the air.
Try a few miter and bevel cuts
 Miter and bevel settings may be used separately. That is, you can cut either a miter or a bevel using the sliding compound miter saw. More importantly, they can be used in conjunction with each other to cut both at the same time.
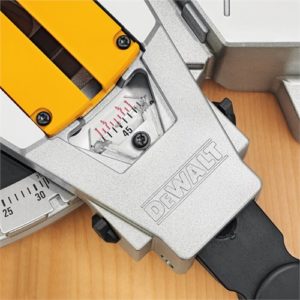
The angle of the miter to be cut is set by positioning the turntable according to the scale. The miter scale is located on the front portion of the base. To set the miter angle, loosen the table lock mechanism and rotate the turntable to the desired angle. Then, release the lock lever and tighten the lock knob to hold the table and saw head in position. You may note that there are several preset positions on the base. These are angles that are commonly used.
The bevel angle can be set at any angle from 0 to 45 degrees. Like the miter setting, a scale, angle indicator, and locking mechanism are provided for this function.
Again, make sure the workpiece is clamped firming in position. When making these cuts, use the same motions that you used when making the straight cross cuts.
Sneak up on cuts
Your cutting accuracy will increase with experience. But, until you are able to make spot-on cuts, sneak up on your cut line. First, make an initial cut about 1⁄16 ” to the waste side of your cut line. Then, cut to the line. This finishing cut will be clean and spot-on.
Useful additions for your saw
Extensions for supporting materials are available for most saws. Roller stands that come in handy for supporting long stock are also available. There are stop block systems that are great for making repetitive cuts. If you are going to be cutting crown molding, you may consider special crown molding stops and holders.
If all you are going to cut is rough lumber, then the blade that came with your saw is fine. However, for better performance when cutting hardwood and plywood, replace the original blade with a blade that has a high tooth count and a negative rake.
Good luck with your new miter saw! Be safe and let the sawdust fly!
If you would like to learn more about using a Miter Saw check out these other Acme Tools Blog posts.
Acme Tools Top 5 Miter Saw Tips
Acme Tools Work Stations for your Miter Saw