Congratulations! You’ve decided on purchasing your first Table Saw and it just arrived at your home. What comes next? You’re probably all geared up to start cutting some wood. But, hold your horses! Here are few quick and simple things you’ll want to address first, that will make life a whole lot easier down the road.
Set up in a suitable location
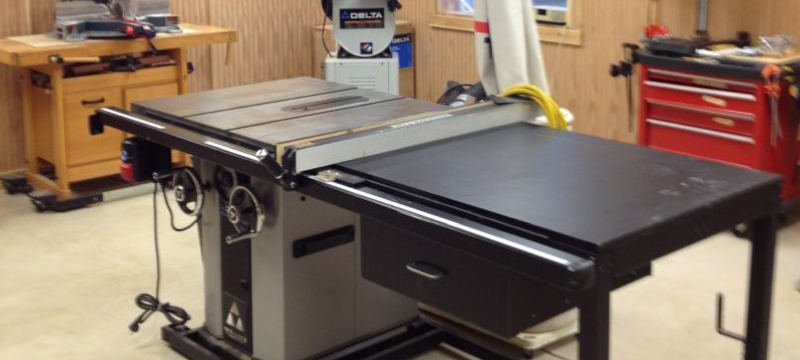
Unless yours is a portable saw that you’ll be toting from site to site, select a location to set up your saw that gives the right amount of clearance for your type of woodworking. Also, consider workflow to avoid a lot of running around the work area. And, if you have a bench-top saw, obviously, you’ll need a bench.
In a shop, tables saws are typically placed in one of these positions:
Center of the shop if this gives enough space for ripping and panel sawing, as well as, crosscutting long boards
With the extension-table end of the saw near a long wall of the shop if your shop is long and narrow.
Diagonally in the shop if you need more room to rip long boards. Have the outfeed side face the door or window to get even more room for cutting the big stock.
Near the door, if your shop is in the garage. This makes it easier to wheel or drag outside when more space is needed.
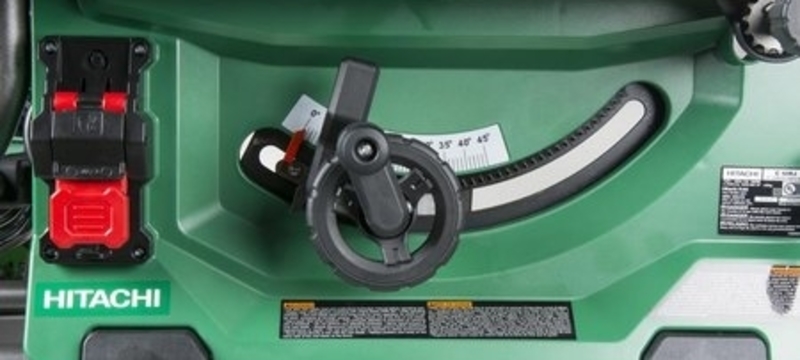
Install the right blade for the type of cutting you plan on doing
Sure, your table saw probably came with a blade. Make sure it’s the right blade for your needs. Remember, it’s the blade – not the saw – that cuts the wood.
There’s a type of blade for each type of cutting. For example, there are specific blades for ripping, crosscutting, and plywood. There’s also a combination blade that you should consider, as it does an excellent job with most wood cutting tasks. And, since the combination blade will likely be the workhorse and do most of the cutting, make sure you get a high-quality one that will last.
Make any needed adjustments
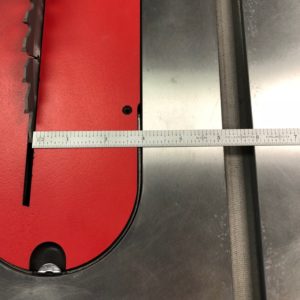
Check to make sure that the saw’s components are still in alignment. The jostling that could have occurred during shipping may have thrown things out of whack. The owner’s manual will provide specific instruction for adjusting for the various parts of your saw. The two most important alignments you should check are:
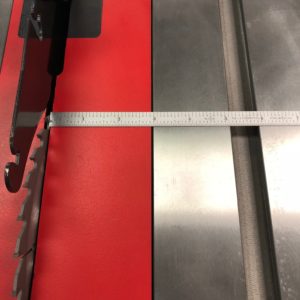
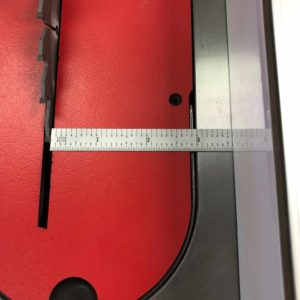
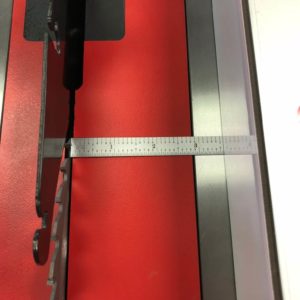
The blade must be parallel to the miter gauge slots. To check this, use a ruler, combination square, or dial indicator to measure the distance between the slot and a blade tooth near the front of the table. Then, measure the distance between the slot and a blade tooth near the back of the table. (For the best accuracy, use the same blade tooth for your measurements. You can mark a tooth, and then rotate the saw blade to make each measurement.) If these measurements are precisely the same, your blade is in line with the miter slot and you’re good to go. If not, make the necessary adjustments according to your owner’s manual.
The rip fence must be parallel to and in line with the blade. Since the blade is parallel to the miter slot, you can use the blade to line up the fence. Slide the fence close to the blade and lock it down. Use your ruler, combination square or dial indicator to measure the distance between the fence and the blade at the font of the fence, and then then at the back of the fence. These measurements should match exactly. If not, make the adjustments outlined in the owner’s manual.
When all the components are aligned correctly, you’ll have better accuracy, smoother cuts, less resistance, and most importantly, you’ll have increased safety by reducing the chance of kickback.
The saw should be unplugged anytime you are making adjustments.
Take safety precautions
You must read and abide by the safety information in your saw’s instruction manual. Here are a few of the most common safety considerations when using a table saw:
Use the safety guards that came with your equipment whenever possible.
Always unplug the saw when changing blades and other accessories.
Do not start a cut until the bade is running at full speed.
Make sure the rip fence is locked into position before cutting.
Use the miter gauge or rip fence – never attempt a free hand cut.
Keep your hands out of the blade’s path.
When cutting, stand to one side of the workpiece to avoid possible kickback.
Use a wood stick, not your fingers, to clear wood scraps from the table.
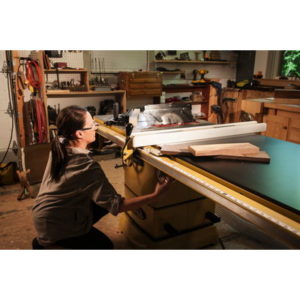
Practice with test cuts
Bingo! Now you get to cut some wood! However, before you set to work on an actual project, it’s a good idea to first make practice cuts with scrap pieces. After all, wood is not cheap, and you don’t want to ruin the good stuff while you’re learning. Read your instruction manual carefully for complete cutting instructions. Following is basic information about the two most common cuts.
Start with a simple rip cut (or cutting along the grain). An example would be cutting a 2×4 in half lengthwise. Set the saw’s rip fence so that the distance between it and the sawblade is the width that you want the finished workpiece. Set the height of the blade so that it is about ¼” higher than the thickness of the wood. Use your left hand to press the wood down on the table and flush with the fence. Use your right had to feed the wood into the blade at a steady rate. Use a push stick in your right hand to push the board past the blade as it gets close.

Now try a crosscut. You can take a piece of the 2×4 you just rip cut and make it shorter by crosscutting it. For this procedure, the miter gauge keeps the workpiece in position as you pass it past the blade. Start by making a mark on the workpiece where you want the cut. Put the workpiece flush on the table and firmly against the miter gauge as you line up the cut line with the blade. When cutting, feed the workpiece into the blade by sliding the miter gauge up its track at a steady rate. Remember to keep your hands free of the blade as you hold the workpiece against the miter gauge.
Popular accessories that help you get the most out of your saw
There is over a dozen great accessories to customize your new saw. What’s best for you? Well, start with safety and look at push sticks and feather boards. This equipment helps control the workpiece while keeping your fingers away from the blade. Then, look at function items based on the type of woodworking you do. Here are a few examples:
If you need precision, consider upgrading your miter gauge to one that has a longer face and a built-in clamp.
For cutting panels, consider adding a sliding table to easily guide hard-to-handle pieces.
If you need to make dado cuts (grooves) or rabbit cuts (notches), a dado blade mounted in your saw will easily do the trick.
If dust collection is an issue, attach a good dust collector to the saw’s port. There are also some great collection systems that attach to a blade guard.
Attaching an outfeed table to your saw will help support long stock.
If your saw is large, consider putting it on a mobile base, making it easier to move around.
Good luck with your new saw! Be safe and let the sawdust fly!