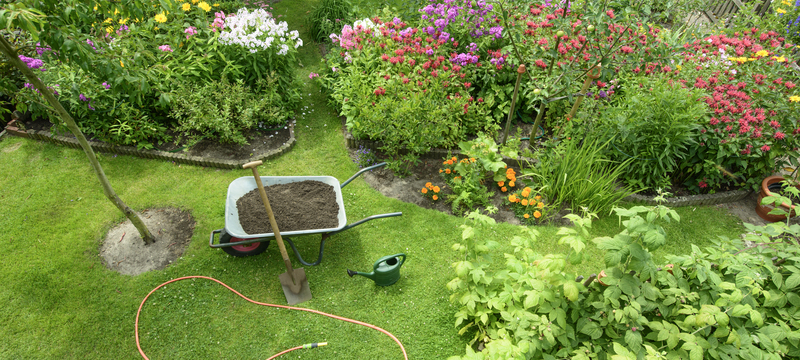
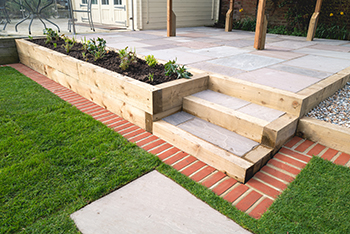
A raised garden bed provides plenty of benefits. They’re perfect for areas with poor soil and allow you to create ideal soil conditions for whatever you’d like to grow. Raised beds are great to keep pets or pests out of your garden, too. Building a DIY raised garden bed can feel like a daunting task, but it doesn’t have to be. We’re here to make that difficult job a lot easier with a step-by-step guide.
Raised Garden Bed Tools and Materials
Materials
Lumber
Soil
Landscape Fabric/ Wide-Mesh Hardware Cloth
Heavy-duty Plastic
Bird Netting (Optional)
Considerations Before Starting
There are a handful of things to take into account before you begin building your garden bed. Some are more important than others, but they all need to be taken into consideration. Planning your project out beforehand will make things much easier as you go.
Choose a Location for Your DIY Garden Bed
Finding a location for your garden bed is the most important part. Things to consider are access to water, overall proximity to your home, lighting and shade levels, and potential animals and insects.
- Find a generally level area with plenty of sun.
- Pick a spot generally close to a water source making it easier to feed your garden.
- Building the garden closer to your home will make you more likely to tend to it each day. Tucking it far away will make it seem like a chore to work on.
- Decide early what you plan to grow in your garden. Some plants have longer root stems and will require a deeper garden bed.
- If animals, such as pets or rabbits, are common around your home consider putting a mesh fence around the top of your raised bed.
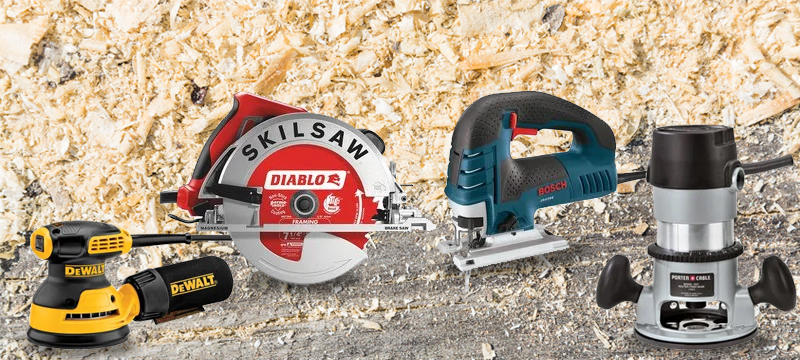
Determine What Type of Material to Use for the Frame
There is a world of materials that can be used to frame your garden bed. Material choice depends on how long you want your frame to last and your budget. Treated woods are the best for withstanding extreme weather conditions and moisture but are also the most costly. These include cedar, oak, redwood, or black walnut.
If you’re looking for something cheaper, untreated pine is a very cost-effective option but only lasts about 5 to 10 years. For longevity, there are pretreated woods, but then you run the risk of the chemicals used to preserve the wood leaching into your garden. Other options include galvanized metal, composite wood, railroad ties, and many more.
Kits are also an option if you are more focused on ease of the build versus flexibility in your materials.
Raised Garden Bed Instructions
1. Prepare Your Garden Area
Before deciding how to build a raised garden bed, you’ll want to prepare the ground it will sit on. Removing any grass or weeds is important to keep them from stealing nutrients from other plants in your garden.
- Pick any large, visible weeds.
- Mark the area where the bed will rest.
- Remove the grass either by renting a sod cutter or with a good old-fashioned shovel.
- Level the ground to ensure you don’t get any water run-off in your garden bed.
2. Measure and Cut Your Boards
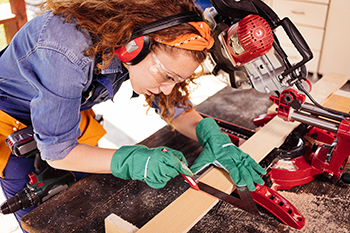
Once you’re ready to build you garden bed begin by deciding how deep you need the bed. If you plan on growing longer root plants or root vegetables, the ideal height is 12 to 18 inches. Beds can be as low as 6 inches if you’re only growing herbs.
Next is deciding the size of your garden. Length is flexible, but your width shouldn’t be any more than 4 feet. You want to be able to reach the center from either side without having to step into the bed.
After you’ve laid out the size of your frame, measure out your cuts on your materials. Be sure to stick to the adage of “measure twice and cut once” to eliminate waste. Use either a circular saw or miter saw to make your cuts. Use sawhorses for support while making cuts. Be sure to cut corner posts to support your walls. They should be cut to the exact height of your frame. Posts can be cut to support along the wall for added strength but aren’t required.
3. Secure Your Boards to Create the Frame of Your Garden Bed
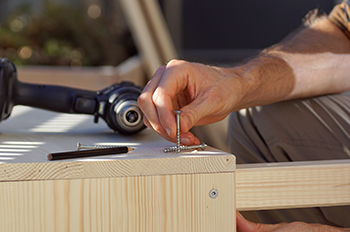
Once you have your frame materials cut, secure the boards of your wall together using the wood clamps. Clamping them together will make the job easier to work on. Lay your wall flat on the ground. Secure a corner post flush on top of the wall boards and flush with the edge of the wall. Drill pilot holes and secure the posts using your screws. Attach the support posts if you decided to cut them.
After you’ve finished the two longer walls secure the shorter side boards using the same method as the corner posts. The posts should be on the inside of the bed once you’re finished.
4. Line the Bottom of the Bed
The next step is important to protect the overall garden bed. If the wood of the frame isn’t rot-resistant, staple heavy-duty plastic along the interior. Next, staple landscape fabric to the bottom of the frame to block weed growth from underneath. Another option is wide-mesh hardware cloth, which keeps weeds out but allows earthworms in to enrich the soil.
5. Add Soil to Your Garden Bed
The benefit of a DIY raised garden bed is the ability to control the soil and any amendments.
- Be sure to tailor your soil choice to what you plan to grow.
- Fill the bed with a good mix of topsoil and compost. Generally, you should have a 2 to 1 ratio of soil to compost.
- Add enough soil to fill the bed as settling will occur. To determine how much soil you will need multiply the length, width, and depth of the garden bed to find out how many cubic feet will fill the bed.
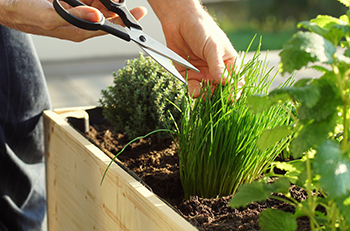
6. Plant Seeds or Plants
There are few rules to follow when planting your seeds or plants.
- Plant them far enough apart to give them enough space to grow. You don’t want your plants competing with each other for nutrients.
- Support taller plants as they grow with plant stakes.
- Be sure to plant veggies so taller ones don’t block sunlight from shorter plants.
- If you have unwanted critters eating your garden, you can install bird netting.
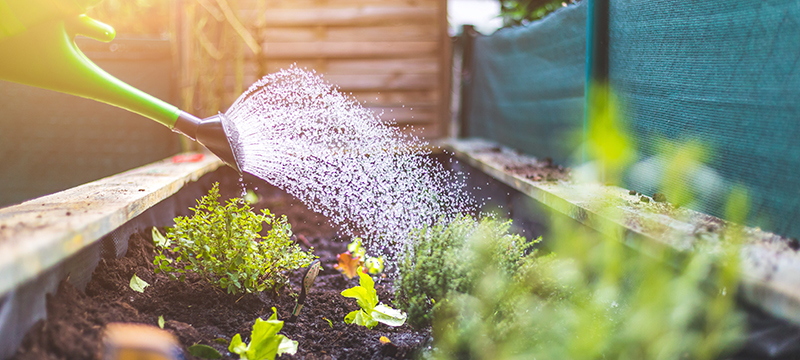
- Be sure to supply about an inch of water a week to your garden, especially if your area doesn’t receive rain often.
Ideas for What to Grow in Your Garden Bed
When choosing what to grow in your finished garden focus on foods you enjoy first. Also, be sure your climate will support the plants you pick. You can even try a theme for your garden. Maybe you like Italian foods and grow ingredients for your favorite dishes, such as tomatoes, onions, or peppers. Herbs, such as oregano, parsley, and basil are perfect for Italian foods, as well. Other ideas for themed beds include Mediterranean cuisine, an herbal tea garden, or a salsa garden.
Maintaining Your Garden Bed
Once your garden bed is ready to go, you’ll need to maintain it each year to ensure the longevity of the hard work you just put in.
- If you stain the wood of the frame, be sure to re-stain it each year to ensure it’s protected from the elements.
- Replace any boards that may have rotted over the past season.
- Between seasons, loosen the soil using a garden fork. These will cut down on compacted soil.
- Cover your garden in a layer of organic mulch at the end of the season. This will protect the soil from harsh winter weather. Another option is an annual cover crop, such as crimson clover or ryegrass. They provide nutrients to the soil and reduce erosion.