A backsplash is one of the easiest home improvements you can do and is relatively affordable. It can completely transform a space that usually looks pretty dull and give it a sophisticated appearance. Almost infinite options are available for backsplash tiles, such as off-the-wall patterns, exciting shapes and colors, or alternative materials. The only limit is your imagination. Once you pick out your dream backsplash, it’s time to install it. The next step can seem daunting, but with our helpful how-to, you’ll sit in a brand-new kitchen in no time.
Tools Needed
- Measuring Tape
- Level
- Tile Spacers
- Tile Cutting Device (Snap Cutter or Wet Saw)
- Notched Trowel
- Grout Float
- Rubber Mallet
- Sponge
- Painters Tape
- Outlet Box Spacer
- Electric Drill
- Stud Finder
- Utility Knife
- Mortar Mixer
- Caulk Gun
- Nippers (optional)
Beginning Stages
Measure areas to fill
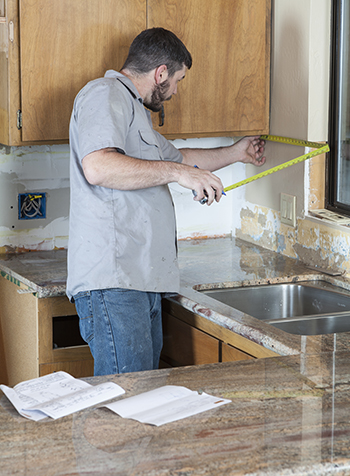
Before shopping for tile, measure the space you will be tiling. Getting exact measurements will keep the total cost within your budget. If only tiling one area, multiply the width and height of the space. For multiple sections, multiply each and add the sums together to find the necessary square footage.
- Be sure to account for outlets and switches when making any calculations.
- Always add 10-20% coverage to compensate for broken tiles or fill small gaps.
- When selecting tile, be sure to consider any unique designs or fixtures that may be inside your backsplash.
- If you are having trouble figuring out the square footage, a tile calculator can be beneficial in finding the exact number of supplies needed for the project.
Prep the walls
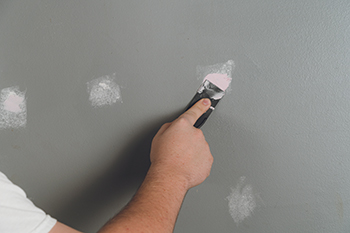
Before beginning your installation, you must prep the walls where the backsplash will be displayed. Prepping the walls is a pivotal step and will ensure the tile adheres to the walls and keeps your project area from becoming damaged. Before beginning any wall prep, you must clear the countertops and move any appliances, such as a stove or refrigerator. This is tedious work, but it’ll save you a headache once the project is complete.
Dry layout tiles to verify fit
Set a center point for the main area to be tiled. Mark a vertical line, as this will be the focal point of the backsplash, and you’ll build outward and up from the center.
Layout the tile along the countertop, with spacers between them, and find their endpoint. If there is too narrow of space on either end, adjust the tile horizontally. Moving them will make it easier to cut pieces for each end.
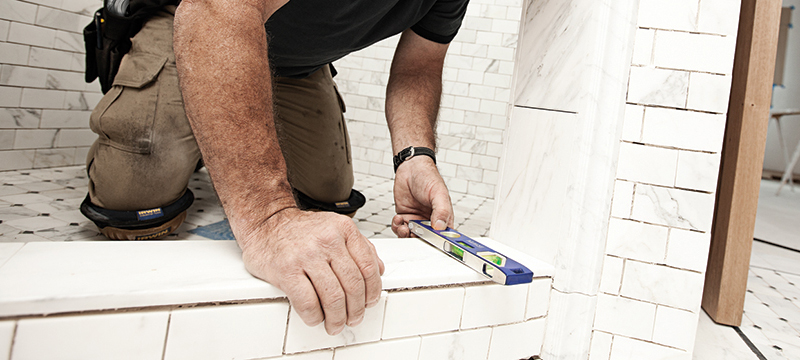
For the vertical layout, use a level to find the lowest point of the countertop and hold a tile in that spot. Remember to account for a 1/8-inch expansion gap between the counter and the tile. Make a mark at the top of the tile and extend the line using a level. This line will act as a reference during the installation.
Tip: If you make any errors, try to make them directly underneath your cabinets. It’ll be easier to hide any mistakes in that area.
Tile the area
Apply Mortar to the wall/surface
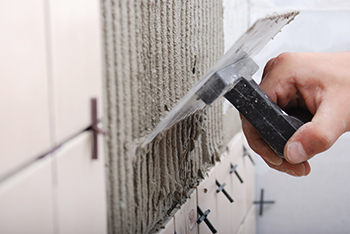
Once you have everything planned, it’s time to start laying tile. You can use either mastic or thin-set mortar for your backsplash. Mastic has a stronger hold but should only be used in areas with little water use. Thin-set isn’t organic, while mastic is, so it’s less susceptible to mold.
Another option is peel-and-stick tile backsplash mats. They bond immediately to the wall when pressed with a grout float. Peel-and-stick cuts down on the time spent waiting for mortar to dry so you can tile and grout on the same day. They aren’t recommended for areas with high moisture, such as shower floors, fireplaces, or steam rooms.
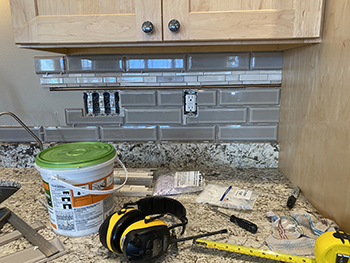
Apply tiles to the wall
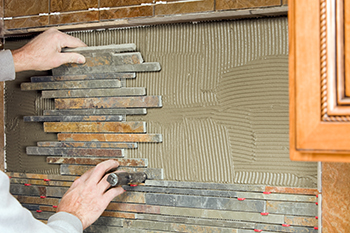
Apply the first tile sheet and slightly twist it back and forth to spread the mortar on the back of it. Be sure to leave that 1/8-inch expansion gap between the counter and tile using either a spacer, depending on size, or shims.
Place a board or buffer on the tile sheet and tape it with a rubber mallet. Another option is to use your grout float to press the sheet into the mortar firmly.
Tip: If the sheet slides around too much and mortar comes through the joint lines, you’re applying it too thick. Remove the sheet, scrape off some of the mortar, re-trowel the wall, and reapply the sheet. Scrape out any mortar between the joints with a utility knife.
Continue installing tile sheets, duplicating the previous process. Install spacers between each sheet to maintain the gap between joints.
Cutting Tile
You may have to cut tile around outlets or curved areas depending on your space’s layout or the tile sheets’ design. Most tile sheets come with a mesh backing that makes cutting out individual pieces or rows easy. You’ll need a snap cutter or a wet saw if you aren’t that lucky.
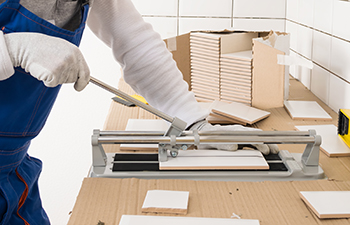
If using ceramic or glass tile, a snap cutter would work best. You’ll score the tile a few times and apply pressure using the handle to snap the tile in half. A wet saw is required for natural stone tile because a snap cutter will cause the stone to crumble. You’ll have to use a nipper for curved areas, which is excellent for minor, narrow cuts.
Once you get just below the cabinets, cut tile pieces to fit the space if it is more than an inch. If you have less than an inch, install a piece of decorative molding or fill the gap with mortar, depending on how large the gap is.
Lastly, please wait for the mortar to dry based on the required time on the product’s packaging; usually, it’s 24 hours.
Finishing touches
We’re reaching the finish line of our project. Grouting and cleaning up our mess is all that’s left to do. If tiling with natural stone, use a pre-sealer to protect the stone from staining. Apply the pre-sealer at least three hours before grouting.
Mix Grout
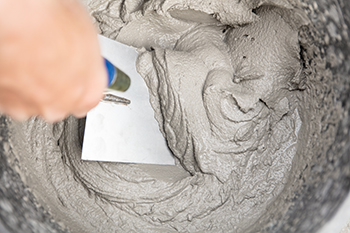
Select a sanded grout for joints larger than 1/8 inch or unsanded grout for anything smaller than 1/8 inch. Mix the grout based on the directions on the package. Once mixed, let the mixture stand for 5 to 10 minutes, then re-mix without adding water. Mix the grout throughout the project to maintain consistency. You’ll have a limited time to use the grout, so ensure you’re not mixing too much at a time.
Grout is also available pre-mixed and can be sealed for later use.
Apply Grout
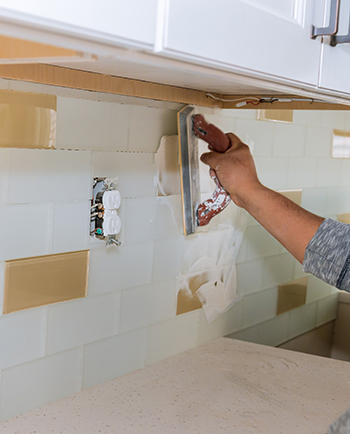
Start by applying the grout with a grout float at a 45-degree angle, working diagonally. Clean up any excess by pulling the float at a 90-degree angle across the tile. Work in sections so an area is completed in 30 minutes and limited grout is wasted.
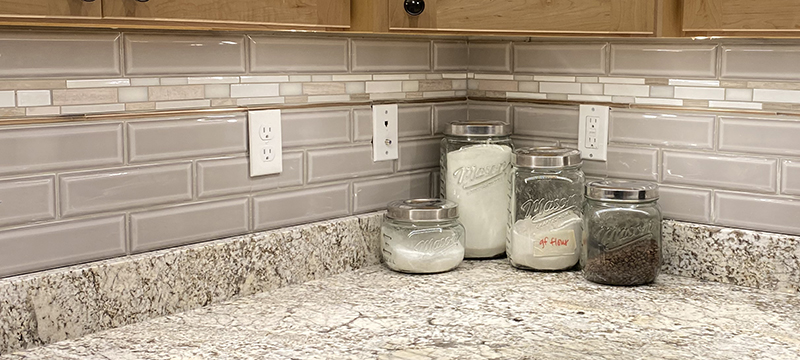
Last steps
You’ve completed your brand new backsplash, and people will be impressed with your home improvement skills.