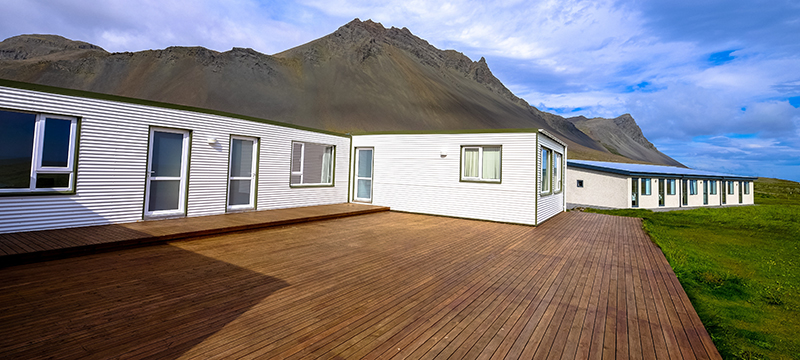
A well-maintained deck boosts your home’s curb appeal and increases your property’s value. However, ensuring your home stays in good shape takes some effort.
Deck restoration projects can rejuvenate and extend the life of the wood. Exposed to the elements and traffic, wood decks need periodic cleaning and maintenance. Deck refinishing involves many steps, including inspection, cleaning, and sealing. By doing the job yourself, most deck rejuvenation projects cost less than replacement.
Read on to learn how to give your old wood deck a facelift.
Steps for Wood Deck Restoration
Although you can restore an old wood deck in two days, it’s best to spread the job across two weekends so that the wood can dry completely before applying a stain.
Inspect the Wood Deck
The first stage in refinishing a wooden deck is conducting a comprehensive inspection to identify any damaged or missing boards or structural issues. Conduct checks for:

- Structural integrity: Look for warping, gaps, or serious cracks in the frame, joists, footers, and the entire structure.
- Wood rot: Prod any spots that look black, white, or splintered using a flathead screwdriver or similar tool. Make sure you inspect the footers since rot can spread from there.
- Pests: Look for borer bee holes, termite damage or termite colonies, and other signs of pest infestation.
- Loose fasteners: Tighten fasteners, such as deck screws. If you need to reapply them, try installing them at a different angle. Reset raised heads using a hammer and remove large splinters with a 5-in-1 tool.
- Excess moisture: Lack of enough drainage is among the top causes of damaged decks. Check for extensive rotting under your deck and cut off rotted portions.
If you need to replace damaged components like deck board, make the appropriate deck repairs before beginning the overall refinishing project. Be sure to tape plastic sheeting over decking and siding up to around waist height to shield surroundings and nearby plants. Also, hide or remove anything beneath the deck before deck cleaning.
Remove Loose Finish and Clean the Deck
Remove any loose paint or finish from previous staining operations with a scraping tool. This provides a clean canvas for cleaning and sanding. Inspect all railings and boards for the flaking finish. Trim any large wood splinters or sand them down with coarse sandpaper. Sanding the deck with a sanding pole is more effortless than sanding on your hands and knees.

Use a leaf blower or broom to clear the deck’s surface of any remaining debris before washing it. You can use a commercial deck cleaner to eliminate dirt, oxidation, and grime caused by prolonged exposure to the elements. To prepare the cleanser, mix it per the package’s instructions. Protect yourself by donning a pair of safety goggles and some rubber gloves.
Scrub the surface in the wood’s direction grain with a stiff fiber bristle brush. Always start with a small area and use clean water to rinse often. Then, wait for it to dry. Most times, this alone may restore the wood’s original color.
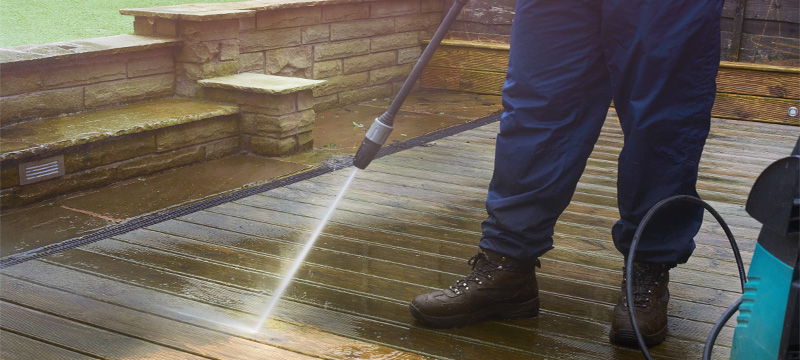
A pressure washer with pressure settings between 600 and 800 psi will help you to thoroughly clean and rinse a big deck quickly. Put on protective eyewear and spray the deck in long, even strokes perpendicular to the wood’s grain, keeping the nozzle a few inches above the surface.
Since the strong spray might damage the fragile wood grain, take extra caution with the nozzle and don’t wash a single spot for too long.
Restore the Wood
Use a commercial deck restoration product to bring back the natural beauty of your deck’s wood. Deck brightener products containing oxalic acid often help eliminate graying surface fibers and the dark tannin stains on cedar and redwood decks.
Consider using an acid-based deck restoration product to rejuvenate the wood deck. Apply restoration formulas to individual boards and scrub with a soft brush while protecting your hands, eyes, and clothing. Wait until it is completely dry, then give it a quick rinse using water.
Do not apply a finish to the deck until after it has dried, but don’t wait too long so it has time to get dirty. Once dry, wear a mask and scuff the deck surface.
Stain and Seal the Deck Surface
Before staining, check for residual sealant by pouring a capful of water on various surfaces. If the surface soaks up the water in less than a minute, apply stain or sealant. Areas where water beads up require more stripping and sanding.
Once you stain the deck, you’ll see all your hard work pay off. When using an oil-based stain, wait at least two days before applying the stain. The saturation of the wood’s pores with water during the cleaning stage will prevent the stain from being absorbed.
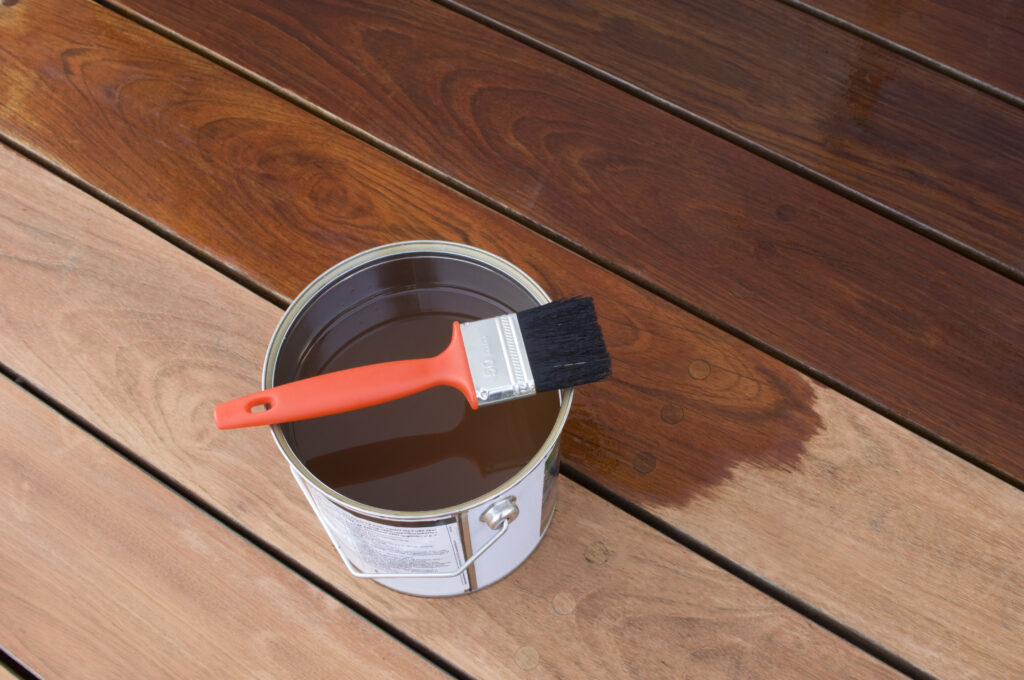
Stain the railings first, then the deck boards. Complete all brushwork before continuing to the decking surfaces and use brushes of varying sizes to stain tight spaces like trim boards, handrails, and balusters.
Consider using a flat paint pad applicator for optimal results when staining the deck boards’ surface. These unique tools facilitate the uniform and rapid coating of extensive areas. Saturate the spot with stain using the applicator, wait the appropriate amount of time as the manufacturer directs, and then remove any excess with a clean cloth. Do not leave pools of stain to dry on the surface.
Choosing an Appropriate Cleaner and Stain
Several deck cleaners are available in the market and each works best on different stain types.
- Sodium hypochlorite: Works well on mildew
- Sodium percarbonate: Good for removing dirt, discoloration, and mildew
- Oxalic acid: Removes iron stains best
- Sodium hydroxide: This is the most popular cleaner ingredient
- DIY cleaners: Usually work on dirt and mildew
For decks to last long, it’s essential to protect the wood with a clear varnish or stain. Choose a wood stain with ultraviolet (UV) ray protection to shield the wood from the sun’s rays. You may also stain your deck with a deeper shade to accentuate the wood’s natural beauty.
Waterproofing a deck requires an oil-based stain that penetrates deeply into the wood and forms a protective barrier. Put some water on your deck to see whether it needs to be resealed. If the water rolls away, the seal works. The deck needs to be sealed again if water soaks in immediately; in that case, schedule a day.
Paintbrushes, rollers, sprayers, or staining pads are some of the gear you can use to complete the task. Consider staining a small test area before committing to the entire deck. This helps you determine the right decking tools for the job.
Embrace Preventive Maintenance
Since your deck is outdoors, it’s subject to the elements, including sunlight. Over time, the deck’s color will gradually shift because of exposure to UV rays. Regularly rearrange your stationary items, such as plant stands and chairs, to reduce the likelihood of uneven staining or splotches.
Maintaining a spotless yard around your deck is one of the best ways to extend its life and keep it looking new. Always keep the trees, shrubs, and bushes around your deck trimmed, so they are at least a foot away from the deck to minimize damage. These plants produce waste that attracts moisture and accumulates in the crevices of wooden decks. Excess water may cause various issues, including rot, mold, or moss that can damage your deck.
Before buying decking tools and supplies, measure your deck to know its exact size. That way, you can avoid dashing to the hardware store in the middle of your renovation because you forgot to pick up enough supplies.